Whenever it comes to publishing a blog post to your WordPress blog or just making a new page, you will always need to add some images to keep peoples attention.
What if the image you want to use is too small for the section you want to use it in?
Obviously, you’ll need to resize it to fit, right? Well, a lot of people run into the problem of losing quality when they increase the size of their images, and it’s because they don’t know the exact steps to take when it comes to resizing your images without losing quality.
Don’t worry, we’re here to help you out along this small journey and you won’t have to worry about pixelated images due to resizing problems anymore.
We’ll be covering how you can resize your images without losing quality with GIMP since it’s a free piece of software that anyone can use. We know that not everyone will be able to afford Photoshop, and that’s the main reason we’ll be going over how to do all of this using GIMP.
If you don’t know what GIMP is, it’s basically a free version of Photoshop without all the bells and whistles. It’s 100% free to use and some people actually prefer it over Photoshop because it’s simple and not as confusing.
Without further ado, let’s get started!
How to resize an image using GIMP
There are a few steps in order to resize your images using GIMP, but once you get used to the process you won’t have to research it over and over again to get it right.
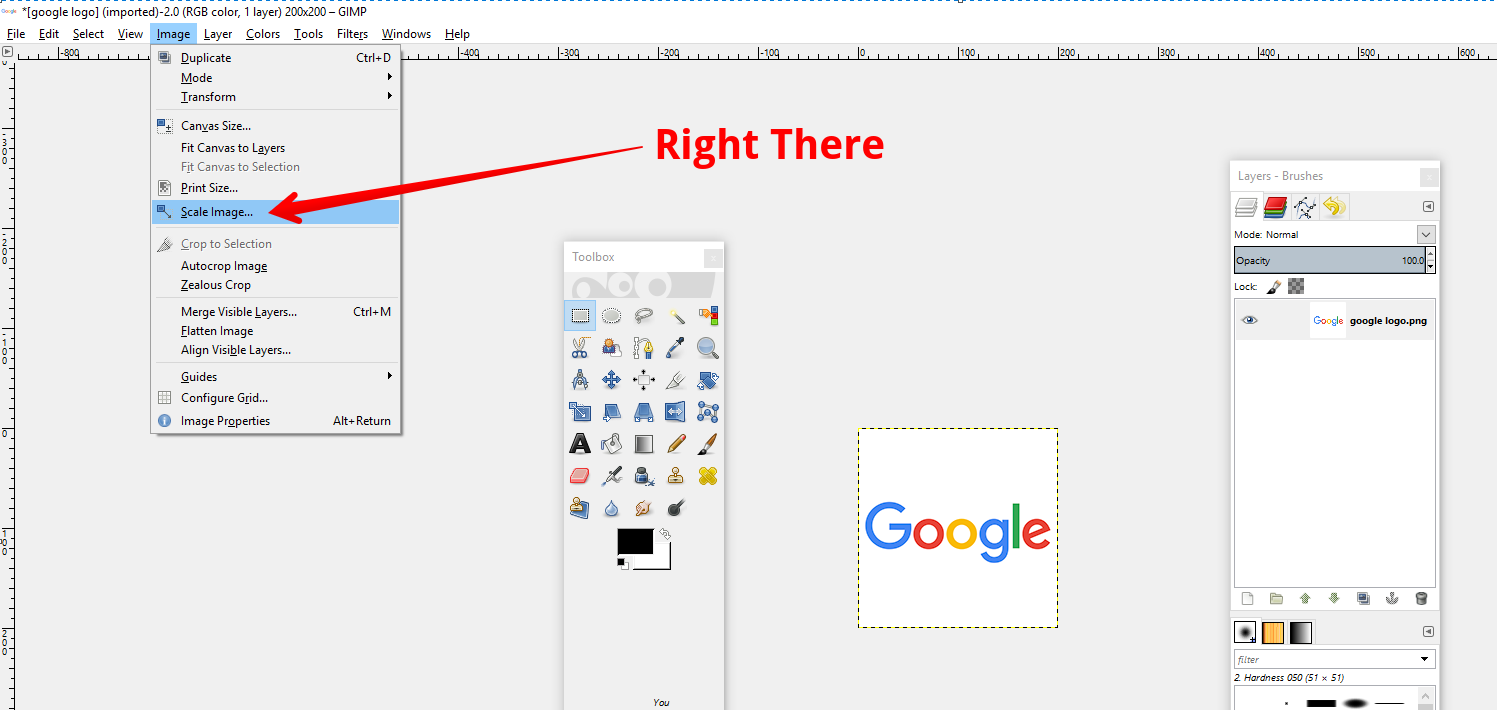
1 Go to “Image” then to “Scale Image”
Image menu is in the top menu bar and once you hover over it there will be a drop-down menu where you can then find “Scale Image”. If you can’t find it, please reference the image below and it should show you how to easily find it.
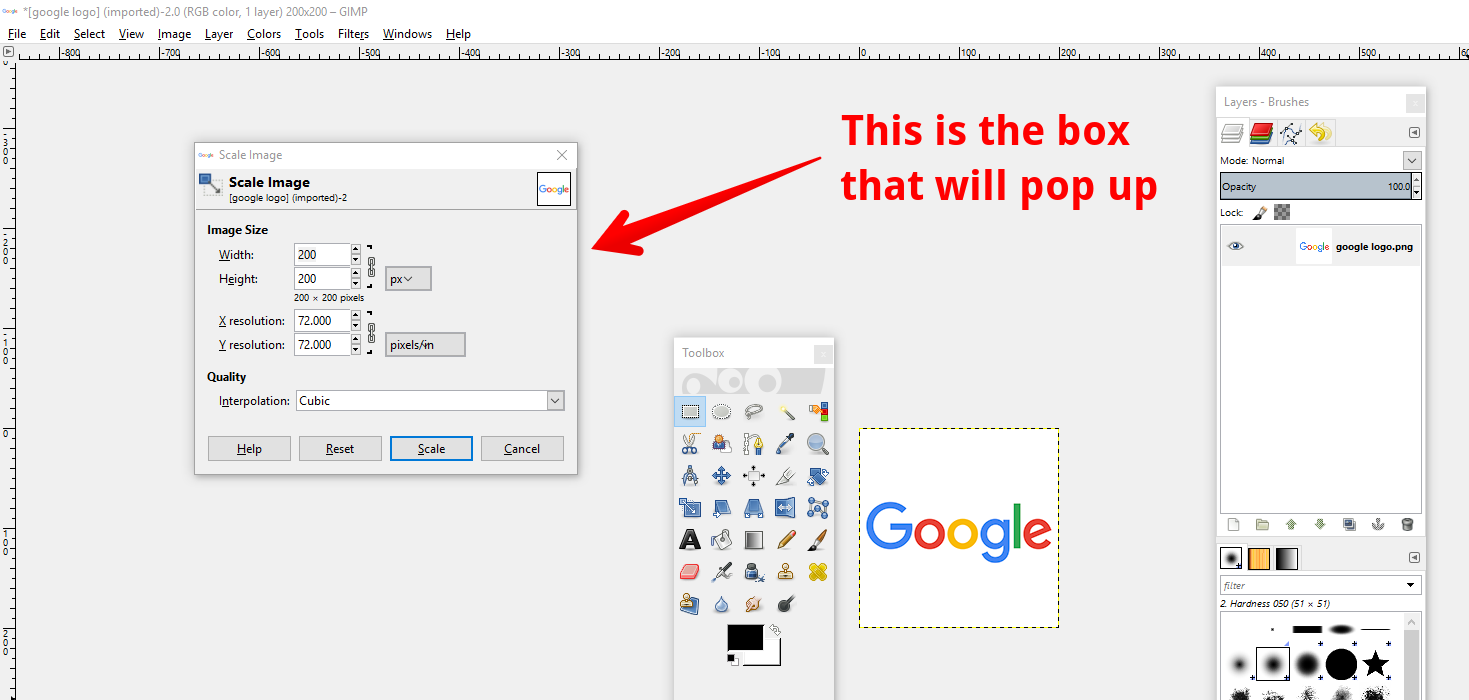
2 Dialog Box popup for changing the image without losing quality
After you click on “Scale Image” a dialog box will pop up. This is where you can input the dimensions of the image you want to increase or decrease in size. For this, we will be increasing the size. The dialog bot will look similar to what is shown below.
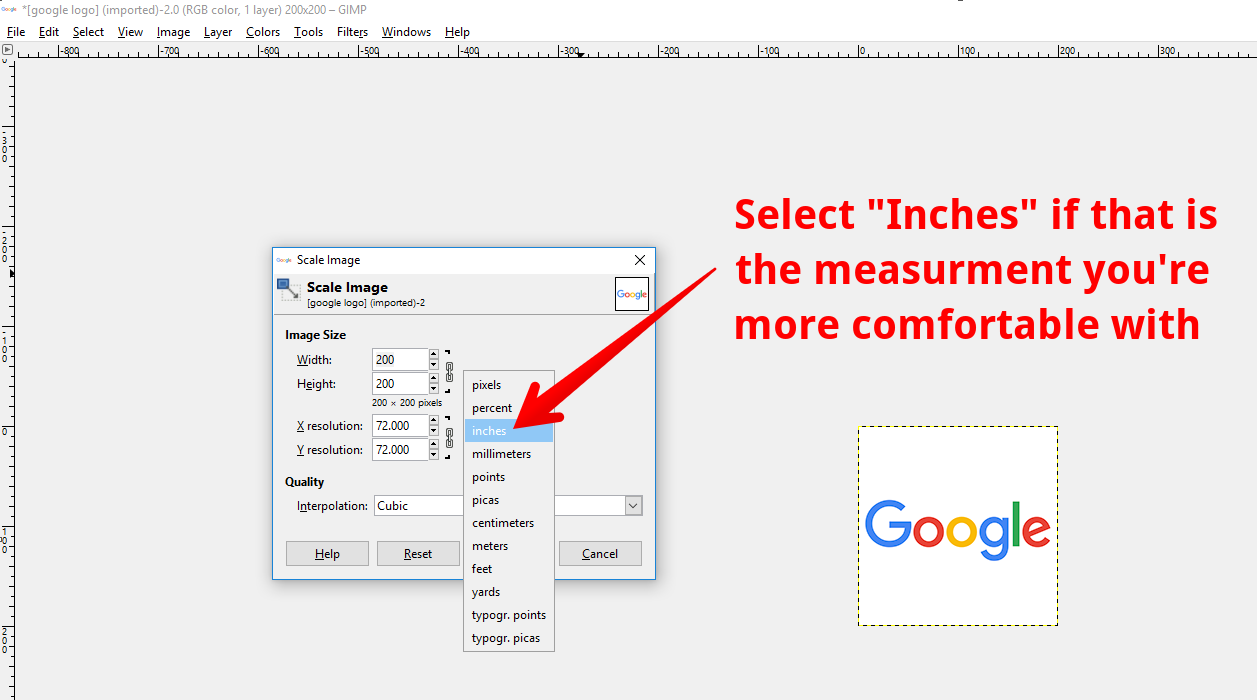
Optional Step: Switching to Inches
If you want to switch your dimensions to inches, because you’re not familiar with pixels, you can simply click on the “px” drop down menu that looks like the image below
3 Input new size and resolution values to change the image size without losing quality
This is where it all starts to come together, you will now be setting how large you want your images to be. You simply enter in the pixels, or inches, you’d like your image to be and you’re well on your way to resizing your image without losing quality.
Originally our image was 200×200 but we want to increase its size, let’s say double it, so that would mean our new values would then be 400×400. If you don’t know what any of that means, you can use the image below as a reference.

4 Edit the quality through interpolation to change the image size without losing quality
So, you don’t know what interpolation means, do you?
Don’t worry, not many people do so you’re in the same boat as the majority of users who are trying to resize their images without losing quality.
Basically, GIMP has to create entirely new pixel information so it can enlarge the image properly. Without this step, you would have a scaled up image that looked slightly pixelated.
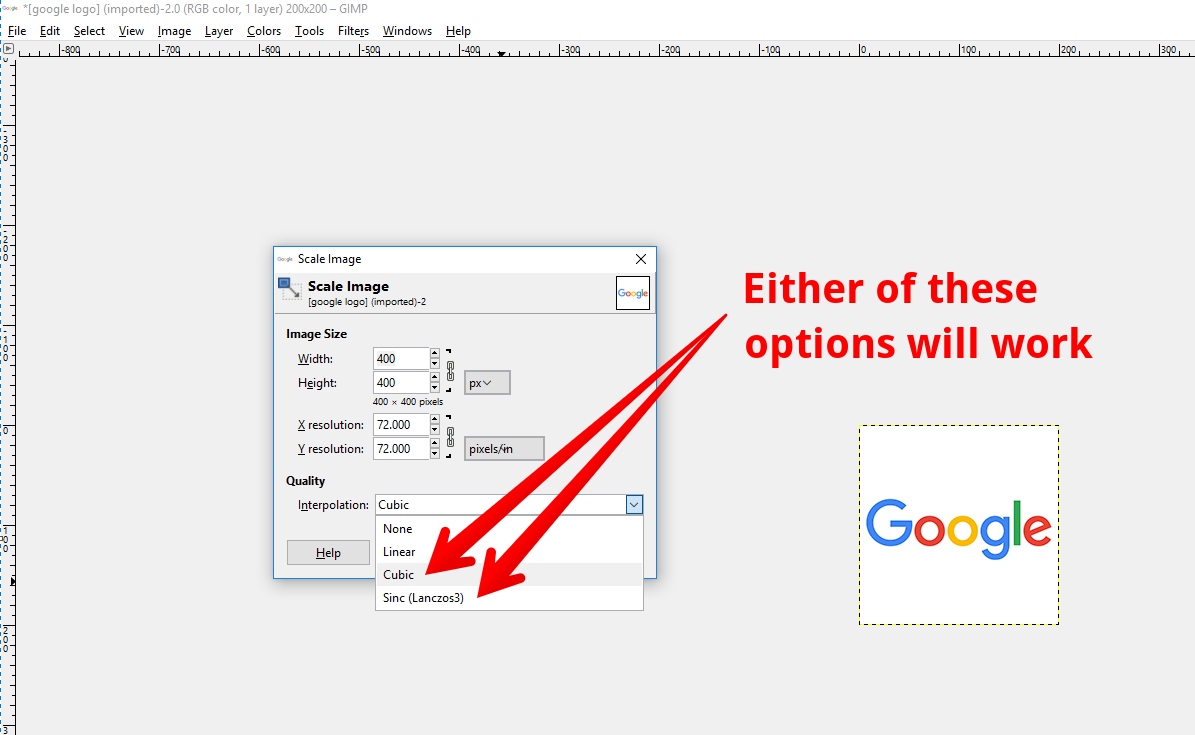
Cubic Option – The color of each pixel is selected based on the eight corresponding pixels around it to make up it’s color. This will usually output the best image you can get, but it’s also a double-edged sword because it takes much more time to produce. This method is also called “Bicubic” at times.
Sinc (lanczos3) option – This interpolation method, Lanczos3, uses a Sinc mathematical function that will go ahead and perform amazing interpolation within the image to give you a resized image without losing quality.
Below is an image that shows you where to find the interpolation drop down and what it will look like. We suggest using either Cubic or Sinc (lanczos3) for changing the image size without losing quality.
5 Click “Scale” to change the image size without losing quality
After you click the scale button, you will be left with your new image that should be larger than what you started with. You can do this for multiple images and add them to your blog posts or even as static images on your homepage if you’d like, the possibilities for your images are limitless.
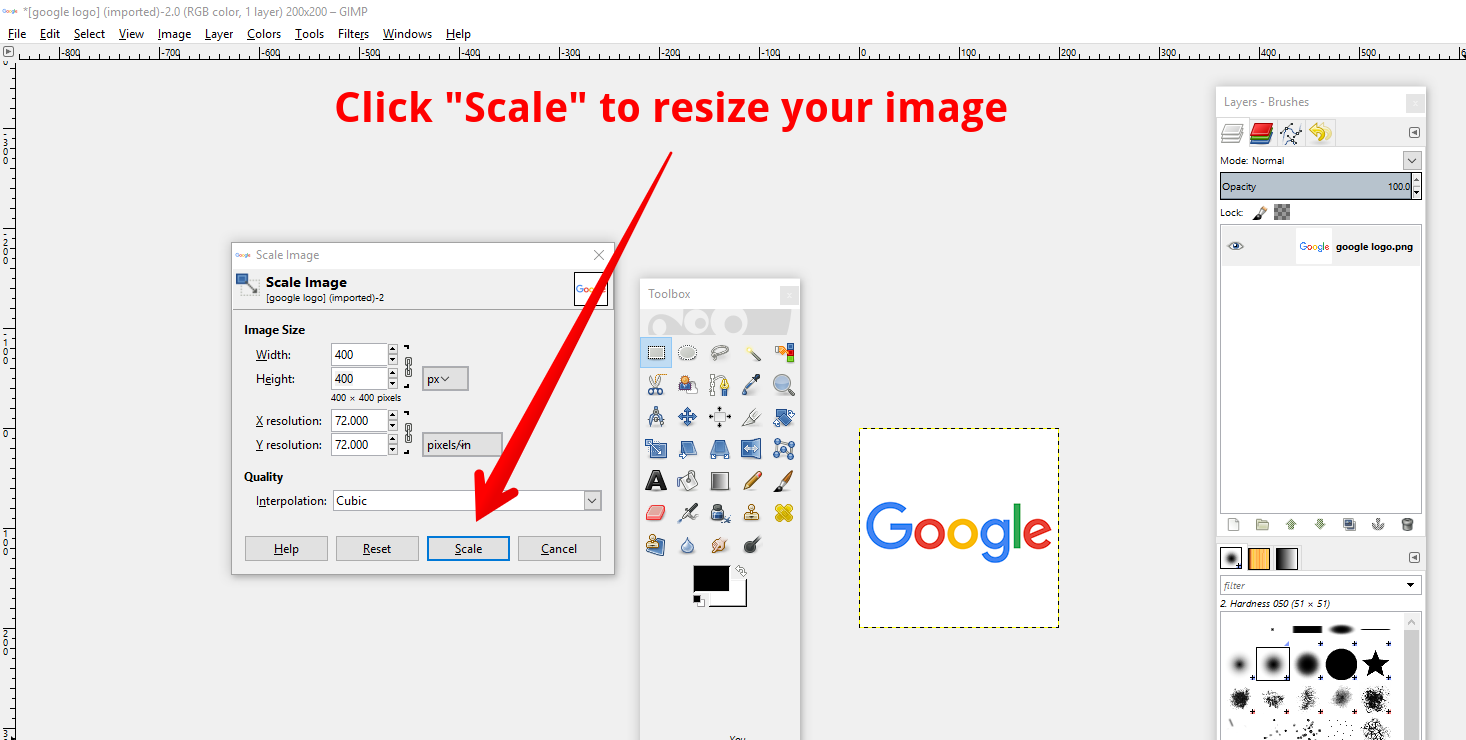
After you click “Scale” you will be left with your larger image!

Many people run into problems when they’re trying to increase or decrease the size of their images for their WordPress websites or blogs, but now you don’t have to worry because you have a detailed guide on how to do it right.
We want you to be successful online, and having high quality images that don’t look pixelated is the first step towards your success other than getting your website live in the first place. Resizing an image without losing quality is a problem a lot of us run into.
We will upload an amazing image that we think is going to be best for a specific section on our website, to only turn out stretched or misplaced due to the size of the image not fitting within the section we chose.
Now, since you know how to resize your images using GIMP, you can save some money as well as headaches because you don’t have to pay for Photoshop in order to get your image to look pristine and have all your visitors love every page they visit while on your website or blog.
Taking your design to the next level is a great thing to do in order to convert more of your visitors into newsletter subscribers or buyers, but if you don’t have high-quality images that fit just right within you pages you will lose more sales than you can actually count. No one wants to buy from the website that didn’t take their time to set up proper images, so you’ll need to sit down and edit some images so you can keep the quality while increasing or decreasing their sizes.
While optimizing images is an essential part of optimizing your WordPress website, we also recommend choosing a theme that was built from the ground up with performance in mind – check out Shoptimizer. Optimizing images is essential for a fast WordPress or WooCommerce site. For a theme built for speed and conversions, check out Shoptimizer!
We hope you learned something new within our post, and we hope you’ll stick around to read a bit more since there’s plenty of quality information to go around.