What is Kinsta?
Kinsta is a premium WordPress hosting company, offering cloud-based hosting. They provide high performance hosting on Google Apps servers – which means your site runs on the same infrastructure as Google.
They host some of the biggest sites on the web, including Ubisoft, GE, Intuit, Mint, ASOS, Ricoh, SparkPost and AdEspresso.
In this review, we’ll cover all the features in-depth. We’ll cover the benefits of cloud hosting, why you need a managed WordPress solution, and show you how Kinsta is different from the competition.
If you’re in a rush and want to sign up right away, we’ve arranged a special discount for our readers. For the first 30 days, you can get 50% off your first month. Simply mention to the Kinsta sales team that you came from MyThemeShop and they will apply the discount to your account.
Table Of Contents
- 1. Pros & Cons
- 2. Is Kinsta Right for You?
- 3. Cloud Hosting
- 4. Why Use Managed WordPress Hosting?
- 5. Security
- 6. Active Monitoring
- 7. Hardware Firewalls
- 8. Containerization
- 9. If Your Site Does Get Hacked
- 10. Performance
- 11. Speed
- 12. Low Latency Database
- 13. SSD Only
- 14. WordPress Configuration
- 15. Premium DNS Service
- 16. Hosting Location
- 17. New Relic
- 18. Easy HTTPS Setup
- 19. Free Migrations
- 20. Rapid Support
- 21. Choice of PHP Runtime
- 22. Staging Area
- 23. Support
- 24. Getting Started (Step-By-Step Instructions)
- 25. Setting up Premium DNS Services
- 26. Adding a Domain to Your Web Server
- 27. Setting Up HTTPS
- 28. Using SSH
- 29. Using Git
- 30. Setting Up Github
- 31. Using WPCLI
- 32. Conclusion
1 Pros & Cons
Pros
- High degree of security, both in terms of the hosting environment and the WordPress setup
- Global data centers to host your site closest to your audience
- Premium cloud-based DNS service at no extra cost
- Guaranteed uptime thanks to a scalable infrastructure
- Simple front end shields you from the complexity of managing cloud computing deployment
- Outstanding fast tech support from real WordPress experts
- Very fast page load speeds
- Free migrations, done by real WordPress experts for Pro Plan and above
- Free SSL and CDN included with every plan
- Free repairs if your site gets hacked
- Daily backups ensures no data is lost if your site is hacked
- Monthly billing cycles – no need to pay for a full year
- Pricing based on the number of visitors to your website keeping it transparent and predictable
- Staging area support included in all plans
- PHP 7 and HHVM support for blazingly fast performance
- Ideal for high traffic websites
Cons
- You can’t register a domain through Kinsta. You’ll have to use a separate registrar, such as NameCheap.
- More expensive than cheap hosting – not ideal for hobby sites
- Limited number of sites per plan – you will have to upgrade to run extra sites
2 Is Kinsta Right for You?
Well, it all depends on how important reliability and speed are to you. If you’re running a hobby blog, then it probably doesn’t matter if it runs slowly at peak traffic times.
On the other hand, if you rely on your site for revenue, it would be a disaster for it to crash during a busy day.
As a premium host, they’re ideal for busy WordPress based sites. For small sites and hobby sites, they may not be the best choice – the stability and speed come at a moderately higher price (the base plan starts at $30 per month).
That said, if you’re experiencing rapid growth, they are a great choice, and migrating your site is very easy.
3 Cloud Hosting
So, what’s so great about hosting your site in the cloud?
“Cloud hosting” is a term that gets thrown around a lot, usually without any real explanation. And it’s often misused to refer to any kind of web-based service.
Cloud computing refers to an internet-based service that allows you to use computing resources and “scale on demand“. This is quite different from renting a web server from a hosting company.
With more traditional hosting, you are assigned a shared or dedicated server that runs on a single physical machine. It can handle a certain number of simultaneous requests before it starts to buckle under the strain. In other words, your server has limited resources.
This is a familiar problem for anyone who has ever experienced a sudden traffic surge (when their content goes viral). Suddenly, their site seems to disappear.
With cloud computing, you can increase the number of servers available as the demand increases. You share the load between multiple servers, and then scale back when the traffic reduces.
There are several companies that provide cloud computing – Amazon, Microsoft, Digital Ocean and Google all offer these services. In fact, Kinsta relies on the services provided by Google, and you could (theoretically) use Google directly.
While these services do provide the ability to scale on-demand, managing them takes deep technical skill and knowledge.
You pay for the number of servers you have running (most companies charge by the hour). It’s easy to accidentally leave too many servers running and get hit by an unexpected bill at the end of the month!
Kinsta takes care of scaling your servers up and back down again and provides you with a simple interface. You don’t have to worry about calculating the price of the service.
The price you pay is completely dependent on the number of visitors. This keeps your costs predictable, and you can also plan future costs looking at your website growth.
From the customer’s point of view, it’s as simple as running a single server.
4 Why Use Managed WordPress Hosting?
So, we’ve examined the benefit of using the cloud to host your site. But Kinsta is much more than a cloud-based web host.e. Most importantly, they’re WordPress specialists.
Now, it’s true that you can host WordPress on virtually any web server – that’s one of its biggest benefits. In fact, most hosts offer one-click installation. So you may wonder if you really need a specialist WordPress host.
While it’s true that it’s very easy to install WordPress, that doesn’t mean it’s easy to keep it running.
You also have to take care of security and performance.
Each web platform comes with its own set of technical challenges, especially in the field of security. WordPress is no exception. Securing a WordPress server is a big challenge. If you lack the in-house IT resources to keep your server secure, it makes sense to invest in specialist hosting.
5 Security
Kinsta employs security experts to ensure the security of every customer’s site. They keep up to date with every new security hole that pops up, and they fix it across all their client’s servers.
Since they host thousands of sites, you benefit from economies of scale – maintaining this level of security on a single server would be very expensive.
While the majority of security threats are based on weaknesses in the server architecture, it’s possible to attack WordPress directly. Security holes are common in plugins and themes, and sometimes even in the WordPress core code.
Kinsta’s team includes WordPress contributors (in other words, these guys regularly write code that becomes a part of WordPress). They work very closely with the WordPress core team, so they are able to roll out security fixes as soon as they are released.
They also monitor the themes and plugins installed on customer sites and will take action to disable any compromised code quickly.
6 Active Monitoring
Kinsta checks your site once per minute, so they can catch it the moment it goes offline.
They use an automated system that monitors the site remotely, using HTTP (just like a real user). This type of software can detect outages and DDoS attacks, but what about other attacks? Uptime monitors cannot detect if your site has been hacked.
If a hacker were to gain access to your site, their first step would be to install backdoors – code that gives them greater access to your server and WordPress installation.
Kinsta deploys scanning software on the server, designed to detect malicious code the instant it’s installed. They install several daemons that can detect changes to the local files, and recognize the unauthorized code.
They’re similar to the anti-virus software running on your PC, except they’re designed to deal with the unique dangers that threaten web servers.
Common backdoors include code fragments that never appear in regular core WordPress files (such as base64 functions). This makes compromised code stand out like a sore thumb.
7 Hardware Firewalls
Firewalls are an essential ingredient in any security plan. They actively block unauthorized network access, preventing hackers from getting a foothold in your server. They also prevent malicious code from turning your server into a “zombie” – which hackers could use to send spam emails, etc.
Software firewalls are a good step, but hardware firewalls are more effective. They’re virtually impossible to circumvent, and they have no performance overhead for your web server.
Kinsta uses hardware firewalls to protect your site.
8 Containerization
“Container” is one of those buzzwords that really took off in the last couple of years, and for a good reason. Containers like Docker have proven to be game-changing technologies for software developers.
Kinsta’s service is built on top of LXD, a container technology from the same company that built Ubuntu.
One of the core benefits of LXD is that each site exists on its own separate virtual server. If a virtual server is hacked or compromised in some way, the damage is limited to that site only.
With shared hosting from some web hosts, if a single customer’s account is hacked, every customer is endangered. A bigger risk is hosting multiple sites on the same server – once one site is compromised, the rest are exposed.
Kinsta’s infrastructure makes this type of cross-contamination impossible. Even if you host 100 sites on your account, each one exists within its own bubble.
LXD Containerization also simplifies the backup process, which is why Kinsta is able to offer painless backups.
9 If Your Site Does Get Hacked
Security is never perfect, and sites do get hacked – even when top security experts are looking after them.
If it happens to your site, Kinsta will detect it rapidly and work to fix it – probably before you become aware of it. Since they make daily backups, they’re able to restore your content quickly and with minimal loss.
Fixing your site may require some manual work, too. Kinsta provides this service for free – hiring a developer to repair your site could easily cost hundreds of dollars, so this is a very significant point.
You can also manually roll back your site to any of the daily backups from the user panel.
10 Performance
Performance is another key area. We’ve already seen how cloud computing brings performance benefits during times of peak traffic. But server availability is not the only area for improvement.
One important choice is which web server you use. Most hosting environments use Apache – it’s a great piece of software with a long history. It’s free to use, and there are many extensions (or modules) that extend its basic performance.
However, Apache was created in a simpler time. Websites were much lighter when it was first created, and each web page typically contained a small number of files.
As the years passed, ISPs gave consumers faster internet connections. This meant web developers could produce more ambitious web pages with more files and heavier ones at that.
As web browsers were enhanced to deal with these ambitious sites, developers could deliver an improved experience. But all these improvements came with a price – they put much more strain on the webserver.
In 2000, a typical web page may have required 50kb of data, spread out over 5 or so files. Today, the average web page contains 1MB or 2MB of data, spread over dozens of files.
Apache originally worked by creating a new process for each HTTP request – this worked fine when each user was only downloading a handful of files for each page request.
Today, that model is outdated. When multiple users hit a web server at the same time, the number of connections can easily overwhelm a standard Apache server.
There are workarounds and Apache modules that can reduce the problem. But there’s a better solution – Nginx.
Nginx is an “event-based” web server that can handle thousands of simultaneous connections without crashing. Getting it to work with WordPress can be tricky, however.
WordPress was originally designed to work with Apache – that’s why it uses .htaccess files. These files are configuration files for the Apache server – Nginx does not know how to process them.
That’s not to say it’s impossible to get Nginx and WordPress to cooperate – it just takes some tinkering and expertise. This is the approach that Kinsta has taken.
They spare you the pain of getting WordPress to run with Nginx by configuring the WordPress code for you.
11 Speed
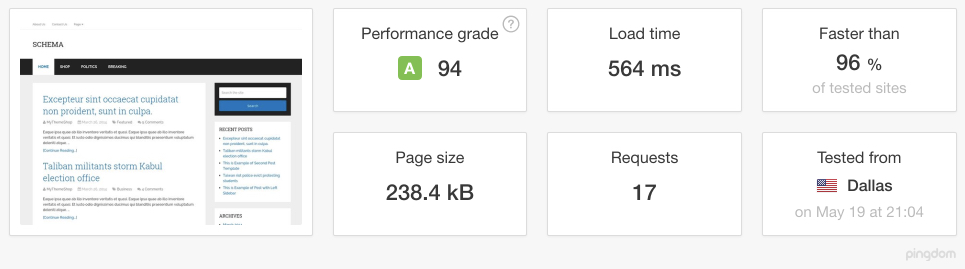
Kinsta runs cloud servers that are robust and capable of accommodating a high amount of traffic without compromising on the speed.
The scalability of the cloud servers is remarkable which makes it easy for you to host a site with a high number of page views on Kinsta without constraining the hosting resources.
No Caching Required
With Kinsta you do not need any caching plugin since they use fast and reliable cloud-based servers with an inbuilt caching feature that is highly optimized for speed.
This is an impressive quality since you don’t have to worry anymore about the loading speed of your site.
12 Low Latency Database
Most hosting companies use a dedicated machine to provide database services to all their customers. This reduces the overhead of running a single database on each virtual server – database servers are resource hungry, consuming disk space and memory.
For customers, this is far from ideal. Sharing a database with multiple customers on a separate machine introduces network latency. And naturally, the database servers slow down during peak traffic times.
Kinsta takes a different approach – each site gets its own database running at localhost in the site container. Instead of piping data slowly across an internal network connection, the data is served from the localhost.
This leads to blazing-fast database performance – as a result, your site runs faster.
13 SSD Only
Storage is normally the performance bottleneck in any computer. The processor and internal memory are capable of shifting data around at lightning fast speeds. By comparison, hard disks are around 100,000 times slower.
Hard disk speed clearly has an impact when your web server is accessing the file system, but it also has a huge impact when it is processing virtual memory.
Many processes require a large amount of memory to perform their job. Modern operating systems rely on “virtual memory” to prevent the process from gobbling up all the RAM.
Part of the process’s memory is stored in RAM, and part is stored on the hard drive. When the process has to access the hard-drive section of its memory, the system slows to a crawl.
Kinsta offers a minimum 5GB SSD with their lowest plan and it goes all the way upto 120GB.
Why are hard drives so slow compared to internal RAM?
It’s because they are made of moving parts. True, those parts move very quickly – but that’s nothing compared to the speed of electrons flowing through a circuit.
SSDs, on the other hand, are solid state devices, similar to RAM. They don’t have any moving parts, so the data can move around much faster.
Many web hosts use physical hard disks to store data. Some provide SSD storage as an add-on.
Kinsta provides SSD only storage, which is orders of magnitude faster than relying on hard disks. As a result, every aspect of your server runs faster, from the file system to the database.
14 WordPress Configuration
Using a high-performance web server is a big step towards improved performance. But you can also optimize WordPress to make it faster.
Although it’s very easy to use, WordPress is quite a complex beast. Out of the box, the performance is OK – but it’s nowhere near as good as it could be.
The main issue is caching. When WordPress receives a request from the web server, it has to assemble the HTML code from a number of sources. Some of the data come from the files that make up your theme. Some of the data come from the database. And some comes from the plugins.
Plugins and themes are very dynamic creatures – they don’t just pipe data from one source to another. They can perform a lot of processing behind the scenes – some even contact external web servers and fetch and process data over the web.
All of this data fetching and processing takes time, and it can make your site run slowly. Without any mechanism to speed this up, each web page will take the same amount of time to assemble whether it is being accessed for the first time or the hundredth.
Caching is one mechanism that speeds up the entire process. It’s a method of storing the processed information so it can be served quickly the next time someone requests the page.
The WordPress framework provides several opportunities for developers to cache their data. Maybe the information is unlikely to change in an hour, or a day. By storing the data in the database, the plugin will run faster until the data gets outdated.
Some developers use these tools to make their themes and plugins run quickly – others don’t.
There are also plugins which cache each complete page of your site.
The problem with caching data is that it can get outdated. For instance, if you publish a new blog post, then yesterday’s cache is no longer valid.
Kinsta provides their own caching mechanism (which you can control through the dashboard). They make a cache of each page on your site once per hour – so if you make frequent changes, the cache will quickly catch them. The cache is stored in memory, so each page is served in milliseconds.
If your site changes often and rapidly, you can increase the caching frequency.
The caching function is controlled by the Kinsta caching plugin, which is automatically installed on every new site.
This allows for the cache to be automatically cleared when you perform an action, such as a published post (or page/custom post) is updated.
If you have the expertise, you can extend the plugin with your own code, although this is really an option for experienced developers.
15 Premium DNS Service
DNS (Domain Name Servers) are one area that is often neglected when we consider performance. Most site owners are happy to let their registrar or regular host deal with the DNS details.
However, DNS servers on busy hosts can experience strain under peak traffic.
Before a visitor can reach your site, their browser has to resolve your domain name into an IP address. If your host’s DNS server is running slow, this can have a noticeable effect on page speed – and can even turn people away.
DNS servers can also crash under a heavy denial of service attack. This happened in 2016 when a massive DNS attack blocked thousands of busy sites all over the world. This included eBay, Twitter, Reddit and even PayPal.
Kinsta provides a cloud-based DNS service (through Amazon’s Route 53). As a cloud-based service, Route 53 can scale to meet demand. And it’s hardened against denial of service attacks.
16 Hosting Location
While the Internet makes it easy to send information to the other side of the world, distance is still a barrier in performance terms.
The data has to hop through multiple networks to reach the user – and the further away they are, the more hops are involved. When your site is hosted in a data center close to your users, there are fewer hops. This means that your pages will load faster.
Kinsta offers 18 data centers across the globe which ensures your users are always served with the server closest to them.
All Kinsta plans offer free CDN which helps offload your static assets to servers around the globe. This makes your website load even faster and adds another layer of protection to your website.
17 New Relic
New Relic is a software analytics suite – you use it to identify which parts of an app are running slow, so you can fix them.
Kinsta has done everything they can to make each WordPress installation run quickly. But WordPress is an open platform, and they know their customers will install custom plugins and themes that they can’t control.
They have provided New Relic analytics so you can debug and optimize your own code, tracking down the cause of any performance degradation.
This is a huge benefit if you’re planning to install custom code, or if you have multiple third-party plugins and you want to find which one is slowing down your site.
18 Easy HTTPS Setup
Using HTTPS and SSL is essential for protecting your customer data and being compliant with SEO best practices.
Kinsta offers free SSL certificates with every plan. That means every website you host with Kinsta will automatically work with HTTPS.
This is a very useful and time-saving feature, as properly installing and configuring SSL certificates is very difficult. Professional help is needed to install it correctly and keep it up to date.
With the free SSL from Kinsta, your website runs with the best security practices while you save time and resources.
19 Free Migrations (Pro Plan and Above)
Migrating your WordPress has never been easier with the Kinsta Migrations. Just fill in a form with a few details and their qualified engineers will take care of the rest.
Of course, there are plenty of tools out there that you can use to migrate your website. But that means understanding the backup and restore process and spending time and energy doing it yourself. Not to mention, the chances of errors are high if you are not experienced.
With Kinsta, there are no worries. Their team of experts can manage and execute the transition with ease. You can even verify the migration before making the final switch of pointing your domain to your Kinsta server.
Please note that this service is only available for free on Pro plans and above. If you are using a Starter plan, you might have to purchase it separately.
20 Rapid Support
Most web companies boast about how quickly they deal with tech support issues. In most cases, they guarantee to answer your question within 24 hours. Of course, it can take several queries to fix a particularly nasty problem.
Kinsta provides very fast support. On average, they resolve queries within 3 minutes. When we tested their support (via live chat) one of their engineers came back with an answer within 1 minute. And he walked me through the solution.
All told, it took 5 minutes to fix the problem (most of the time was spent typing).
This is by far the best tech support we have ever experienced from any tech company!
21 Choice of PHP Runtime
For a long time, PHP developers had little choice over which runtime environment they could use – they were stuck with the Zend engine. For most web apps, this was not a big issue. But for popular sites, it became a serious problem.
Zend engine was extremely slow compared to native code. True, it was much better than the original PHP interpreter.
Zend engine used a bytecode VM model similar to the Java runtime. Unlike Java, Zend would compile the source code each time the PHP script was executed.
This is very inefficient when you consider that each page request requires the script to recompile and execute again.
Over time, a number of alternatives appeared, such as IonCube. IonCube pre-compiles the code into a bytecode file and runs as a PHP extension.
This led to improvements in execution speed and code protection – developers could distribute their compiled files without fears of competitors reverse engineering the code.
HHVM was the next big step towards faster PHP performance. It was released by FaceBook in 2011.
Facebook was originally coded in PHP – large parts of it still are. As the site grew in popularity, the weaknesses of the Zend engine soon became apparent. FaceBook’s engineers developed their own solution.
HHVM features just-in-time compilation (JIT), an optimization that reduces compilation time while providing better execution than a simple translator.
HHVM shows significant performance improvements over the Zend engine and proprietary solutions such as IonCube. What’s more, it’s an open source project.
In response to HHVM, the PHP Development Team released a new runtime engine for PHP 7.
This engine implements many of the features of JVVM. It also has the advantage of being developed by the same team who creates the PHP specification.
While HHVM covers most of the specification, the PHP 7 runtime covers all of it. And it provides complete support for every PHP module.
Before the release of PHP 7, HHVM was the best choice for WordPress. True, it took a little tweaking to get the code to work – but it was worth it for the performance increase.
Today, PHP 7 performs slightly better for standard WordPress installations. For other CMSes, HHVM is still the leader.
So, what does that mean for you, the website owner?
Well, for most of us, PHP 7 is the best choice of runtime – that’s why Kinsta enables PHP 7 by default.
However, if your site includes a considerable amount of custom code, HHVM may be a better choice.
Kinsta makes it easy to switch between PHP 7 and HHVM through the control panel.
22 Staging Area
Kinsta also allows you to clone your site into a “staging area”, where you can try out different tweaks and options without affecting the main site.
This gives you the opportunity to test the different runtime environments and see which one provides the best performance.
It’s also a good practice to use the staging area to try out new plugins or themes, to ensure they work smoothly. When you are satisfied with the performance, you can push the changes to your main site.
23 Support
Kinsta offers a great customer support to their customers. They have rave positive reviews for their excellent technical support.
Instant Replies to Questions
The support is awesome since they offer almost instant replies to the queries put by the customers. The 24/7 technical support comprises of a polite and highly knowledgeable team that offers quick and practical solutions to all problems.
Creating a support ticket from the dashboard is easy, and you can also choose to chat directly with the technical support from any page on your dashboard.
Knowledgeable Technical Team
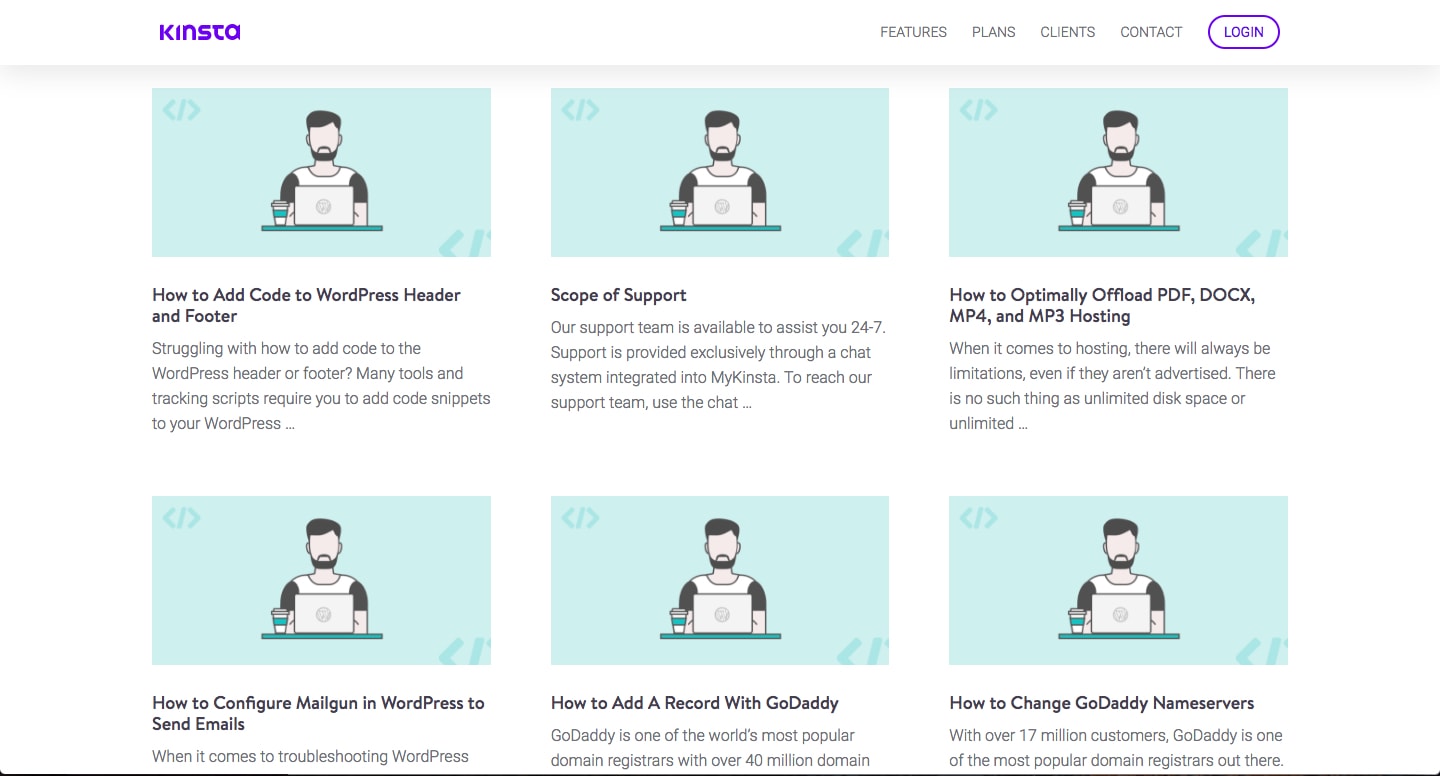
Kinsta also offers the most extensive knowledge base that has tons of useful answers to the frequently asked questions.
The technical support team also offers free site migration and helpful technical guidance for the stability of your site in the new hosting environment.
Helpful WordPress Support
Finally, Kinsta technical support team comprises of WordPress experts with years of experience; you can be assured you will get the best solutions for all your technical problems. They are also keen to help answer all your queries.
24 Getting Started (Step-By-Step Instructions)
OK, so I’ve covered all the features that make Kinsta unique, and I’ve told you how easy it is to use. Let’s take that one step further and show you.
Signing up is extremely easy, as you would expect.
Once you have signed up for an account, you need to register for a paid plan – without a plan, all you can do is look at the dashboard!
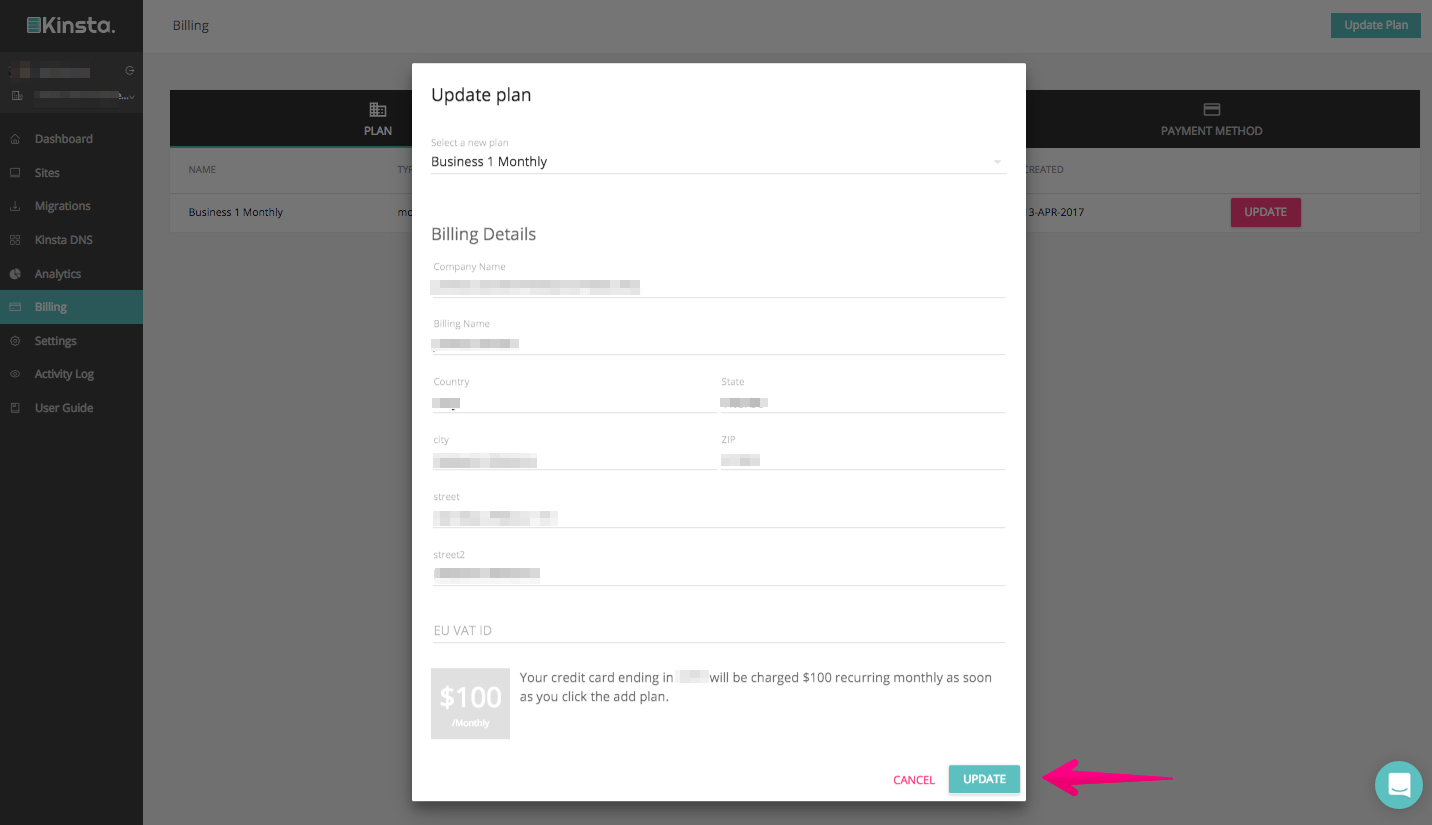
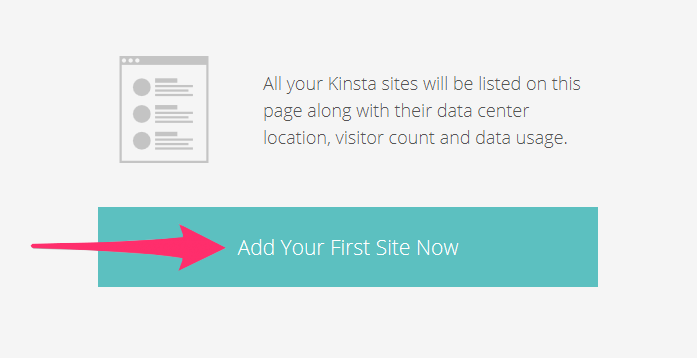
After filling in your payment details, you’ll be presented with the blank dashboard:
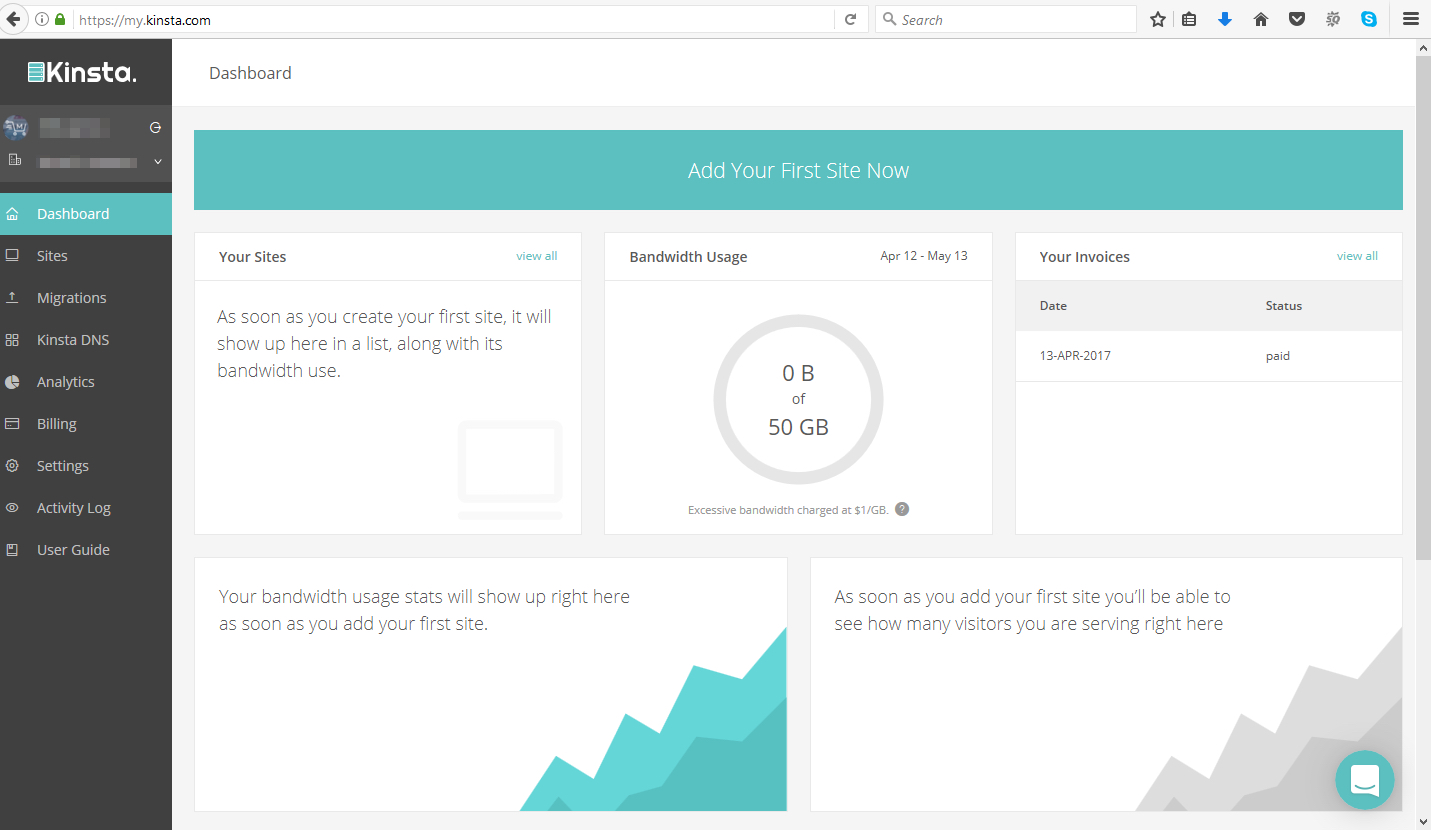
So far, we haven’t created any sites. We can remedy that by clicking on the “Add your first site now” button.
This opens a small dialog box where you can fill in the required settings – including the data center location, site name, admin username and password, and whether you will be using multisite and WooCommerce.
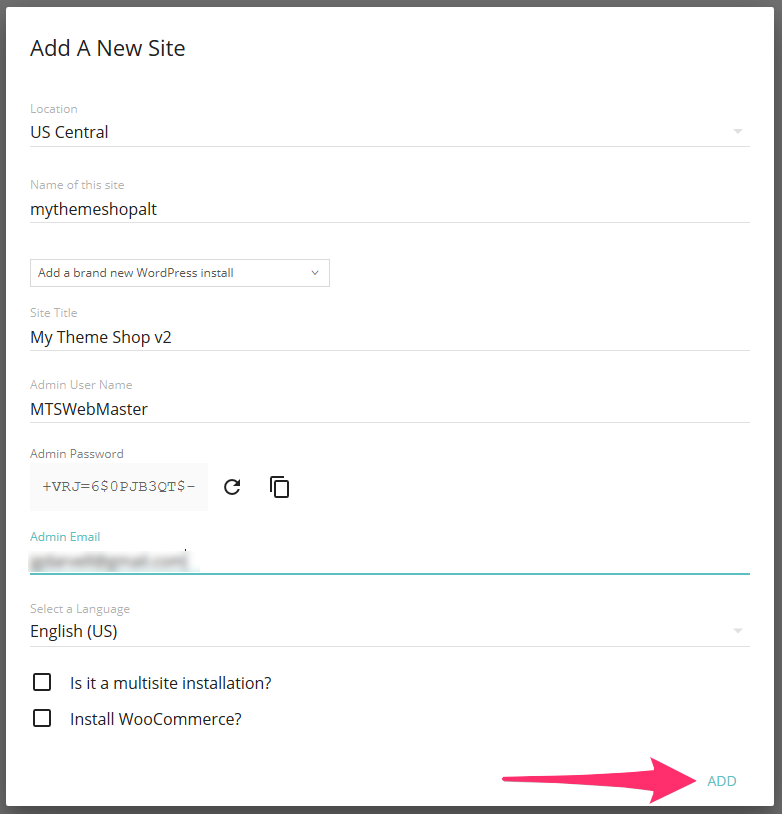
If you click on the location field, a drop down box appears giving you a choice of 3 locations:

After a few moments, Kinsta will create your site and it will appear in your control panel.

You can access this list at any time by clicking on the “sites” option in the menu on the left:

24.1 Site Info
Click on the “manage” link next to your site’s name, and the info panel will open.

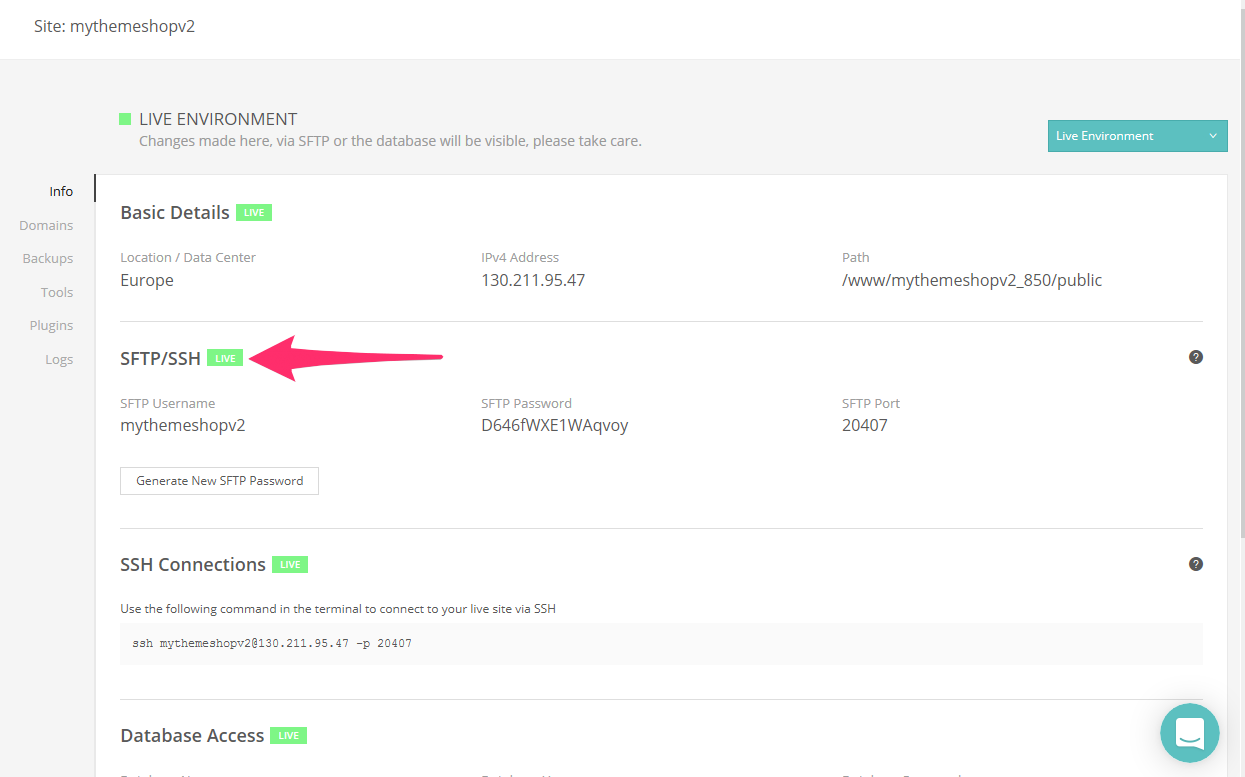
From the “info” tab, you can access the most important information concerning your server (such as the SSH credentials.)
Each site has two “environments” – a live one, and the staging area. You can toggle between them by clicking on the “Change environment button.”
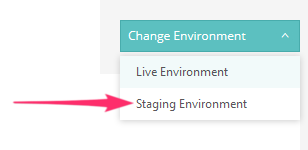
The first time you click on the staging environment, Kinsta will explain what a staging environment is, and ask you if you want to set one up.
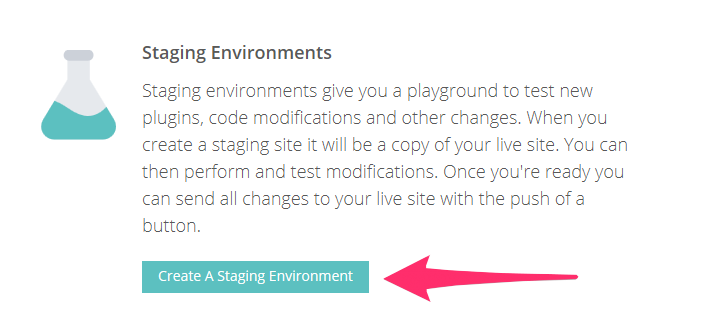
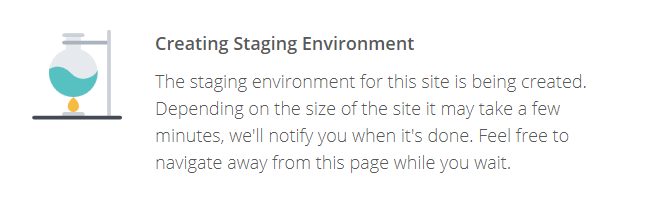
Click on the button, and Kinsta will go to work. It takes a few minutes to clone your site and set up the environment (it’s actually a second web server).
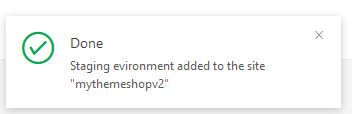
As soon as the environment is ready, you’ll see an alert in your dashboard.
24.2 Tools
Kinsta provides a number of tools for each of your sites. You can access them by clicking on the link below “info”.
This brings up the following options:

Clear Site Cache
Clearing the site cache will remove the cached copies of each page from memory. This is useful when you make changes to your site, and you want to ensure your readers will see the latest version.
You don’t have to click this button every time you make a change because Kinsta will automatically cache the new version within an hour.
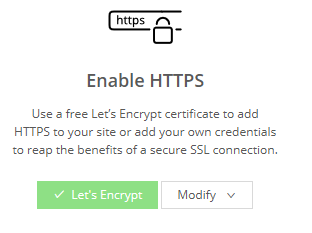
Enable HTTPS
Setting up SSL encryption can be a painful task. Kinsta makes it extremely simple – you can do it with a couple of clicks with the “Enable HTTPS”.
Before you can set up HTTPS, you have to add the domain name to your server and set up the Kinsta DNS service – we’ll show you how to do that shortly.
Selecting PHP Engine
The PHP engine tool allows you to select the ideal PHP runtime for your web server. In most cases, you can leave the default selection (PHP 7.0). But you can select HHVM instead.
Restart PHP
Sometimes, the only way to clear a bug is to restart your PHP engine. You can do this using SSH and the command line, but it’s simpler to use this tool.
New Relic Monitoring
New Relic is a great tool for debugging custom code and tracking down performance bottlenecks. Enabling it will slow your performance, as it logs every PHP action. So we recommend you use this option in the staging area.
25 Setting up Premium DNS Services
Using a premium DNS service can make your site faster and more stable – and it’s a good defense against a DNS based DDOS attack. Kinsta makes it extremely simple to set up.
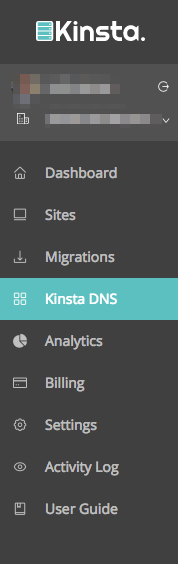
First click on the “Kinsta DNS” option in the left-hand menu:
Kinsta will show you a brief description of their service:

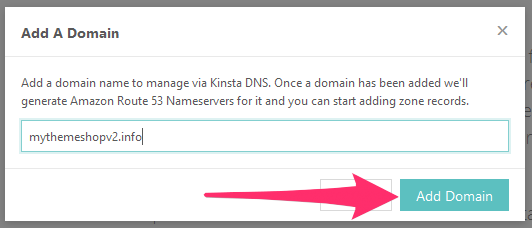
The next step is to add a domain. Note that adding a domain here does not automatically transfer the domain to Kinsta – you will have to edit the DNS records through your registrar’s control panel after setting things up on Kinsta.
After you add the domain, Kinsta will give you a list of Nameservers.
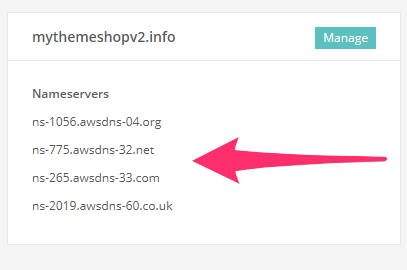
Copy this list into a plain text document, and head over to your registrar. Each registrar handles things differently, but there will be a form where you can change the Nameservers for your domain. Add each of the nameservers from Kinsta’s list.
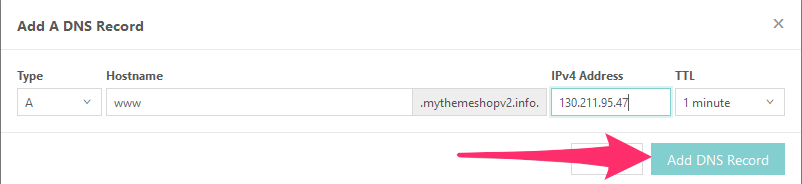
After setting up Kinsta DNS, you need to add records to direct the domain to your site.
You should set up 2 records – an “A” record, and a “CNAME” record.
The “A” record stands for “Alias”, and it links the hostname to your server’s IP address. You can find the IP address on the “info” page.
The “CNAME” record stands for “Canonical Name” – it’s used to direct the non-www version of your site to the www version. In other words, when a browser does a DNS lookup for yoursite.com, the DNS server will tell it to use www.yoursite.com instead.
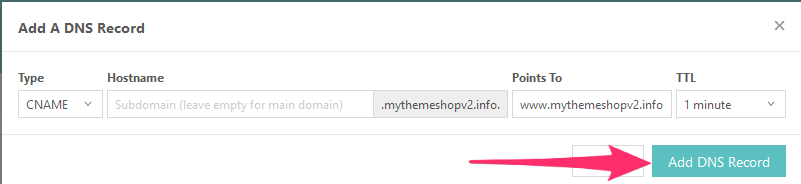
This record helps to prevent “duplicate content” penalties from Google.
26 Adding a Domain to Your Web Server
Adding a domain to the DNS does not automatically link it to your site. At this point, a visitor would see an error message if they navigated to your site’s address.
The error message would come from your server (in other words, the address leads to the right machine). But your server doesn’t know it’s supposed to serve requests for this domain yet.
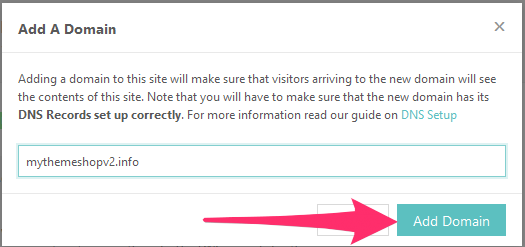
You can add a domain to your site by clicking on the “manage” link next to the site’s name and navigating to the “domains” panel.
Here you will see an option to add a new domain:
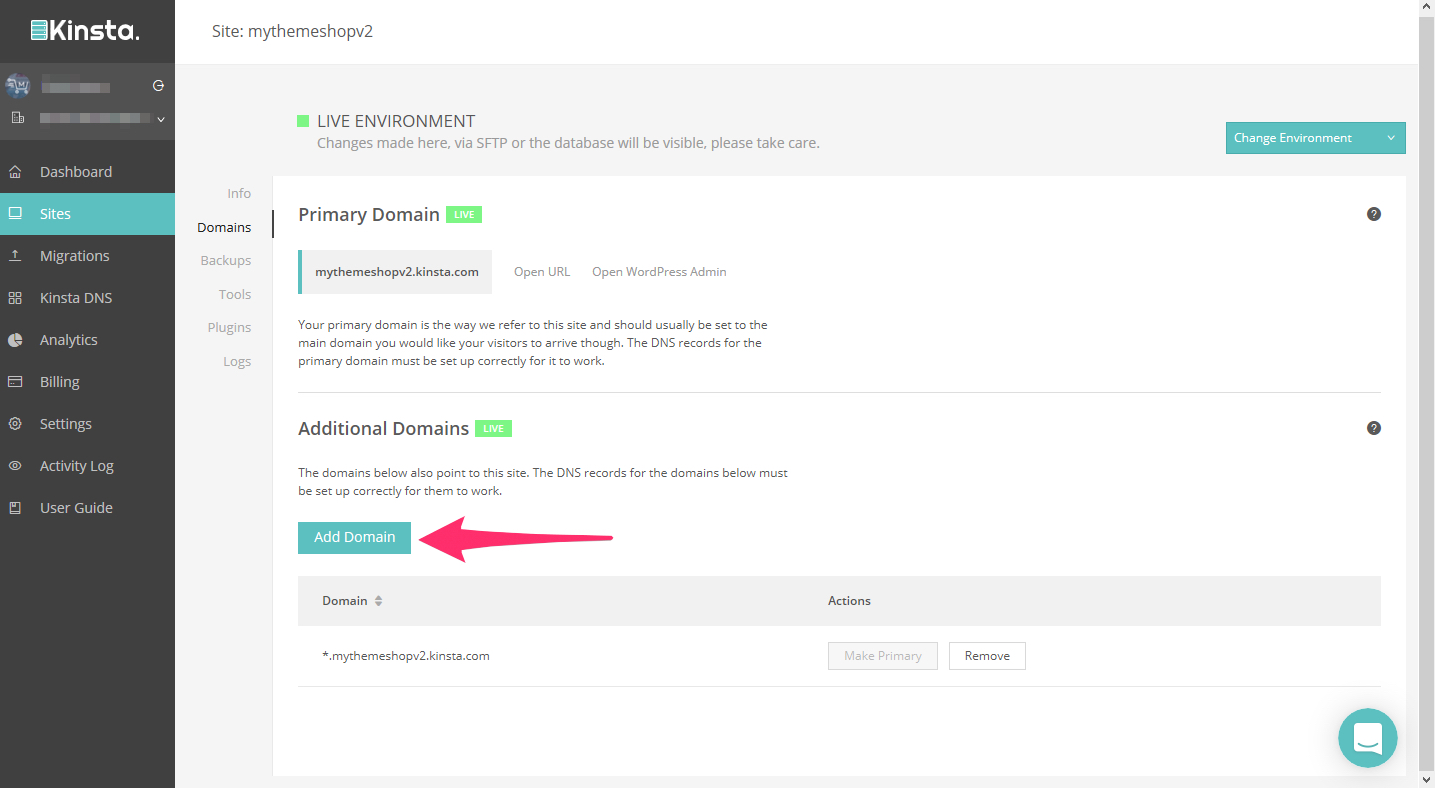
Adding the domain is easy – just type it into the box.
Once you have added a domain, you should make it the “primary domain” – just click on the option.
Kinsta will update the page to show you the domain is now primary.

At this point, your site should be live with your domain name. If you click on the “open URL” link, it will appear in your browser.

However, if you have just registered a new domain name, it can take up to 48 hours for it to “percolate” into the worldwide DNS system.
27 Setting Up HTTPS
HTTPS is vital if you are collecting sensitive customer details or using your site for e-commerce. It’s also a ranking factor in Google’s algorithm. Finally, it helps to secure your admin area, so hackers cannot intercept your credentials when you log in from an insecure location.
Kinsta makes it easy to setup HTTPS.
Just go to the “tools” panel and click on “Enable HTTPS“.
A small drop-down menu will appear.

You can use an existing custom SSL certificate if you have one, but the simplest option is to generate a free certificate. When you choose this option, Kinsta will connect to Let’s Encrypt and generate a certificate for you.
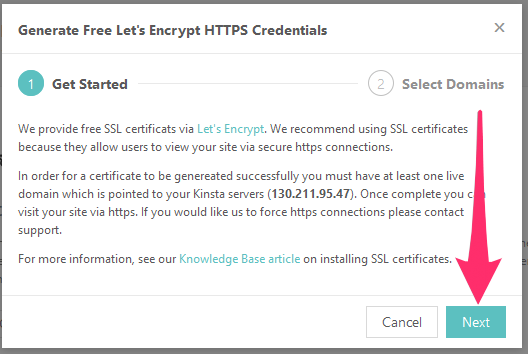
Just select the domain you want to encrypt:
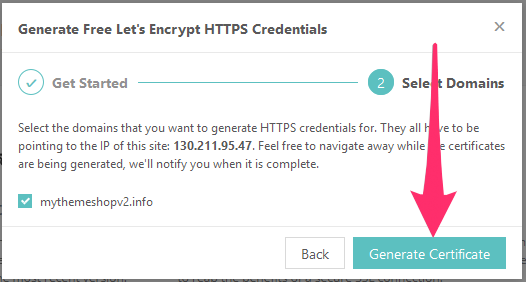
Click on “Generate Certificate“, and you’re done. Kinsta will also setup your server to use the new SSL certificate.
It takes a few moments to set all this up. A message will appear at the top of the page to tell you the process is running:

The user panel will update to show that encryption has been enabled:
Now you can navigate to your site using the https:// version of the URL.
28 Using SSH
SSH is a secure way to remotely access the Linux command line. Kinsta’s graphical interface is very user-friendly, but the command line gives you absolute control over the server.
While command line interfaces can be a little intimidating at first, it doesn’t take long to learn how to use them. In return for a little time invested in learning the BASH system, you’ll gain a powerful tool to boost your productivity and speed up complex tasks.
Kinsta also installs a number of very powerful command line tools on your web server, including Git and WP-CLI.
Git is a “distributed versioning tool” – it’s best to think of it as an “undo button” for your file system. Actually, it’s much more powerful than that, but we’re not here today to tell you about all the benefits of Git!
WP-CLI is a very useful tool. It allows you to manage your site without having to log on to the admin area.
You can install plugins and themes, activate or deactivate them, and so much more besides. Tasks that would take several minutes can be done in seconds, and you can even automate them with shell scripts.
Before you can do any of this, you have to log on to your server using your SSH credentials. You can find them on your site’s info panel:

Here you can see the username, password, port number, and a helpful ssh command (under SSH connections). You can copy-paste this command into your SSH tool to access your server.
There are lots of SSH tools you can use. Putty is a popular choice. One choice is Cloud 9 (c9.io), which is a free cloud-based web developer tool.
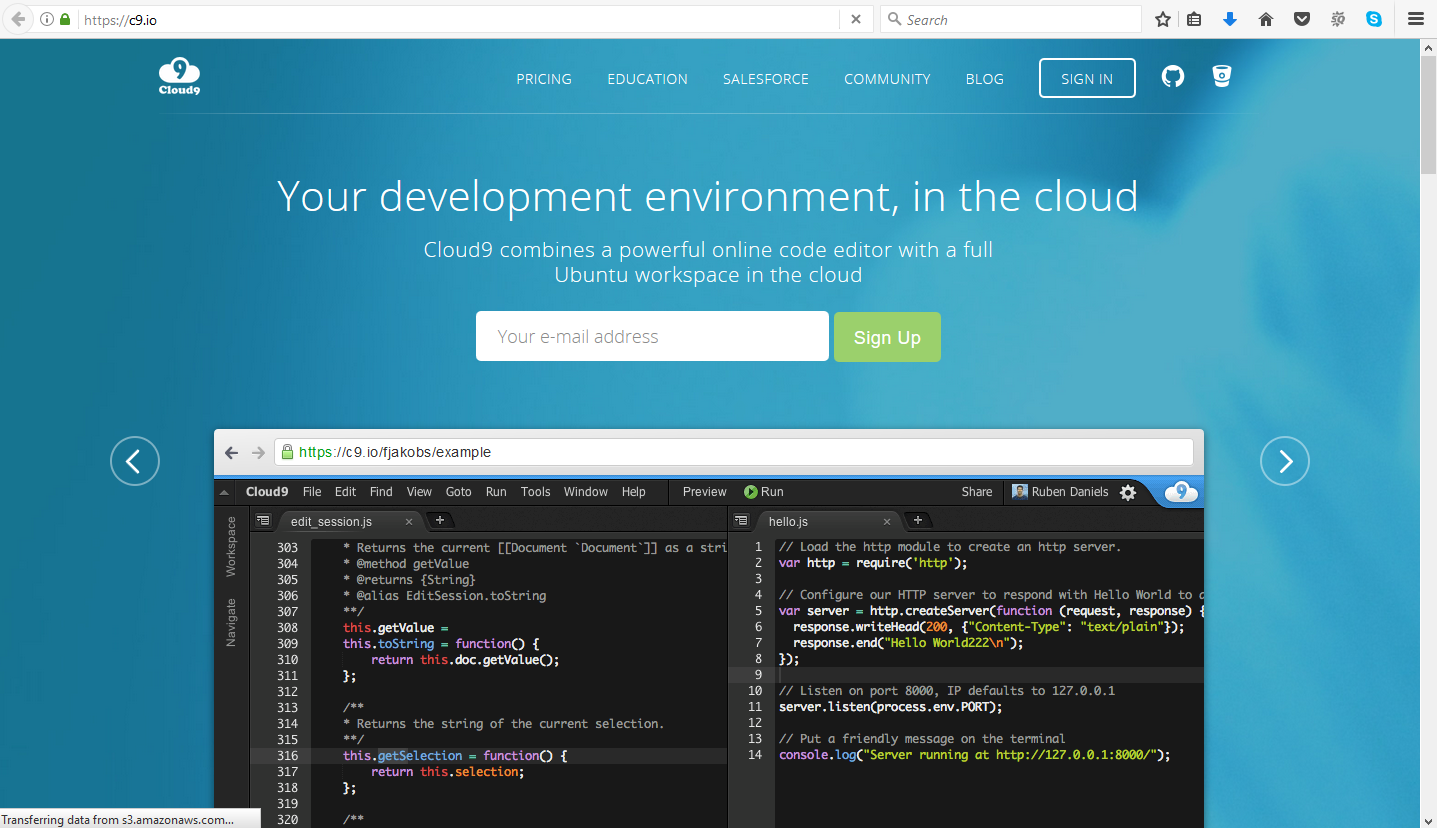
Cloud 9 provides a complete Linux box on the web for free. It’s a mini web server with a built-in code editor, and it’s a great tool for web development. It includes a Linux shell. Although you can connect to SSH through PUTTY, there are benefits to connecting from a Linux environment – it makes tasks such as file transfer much simpler.
Using a cloud-based development tool means you can access the server from a different machine and location, and your command history is preserved. Of course, this is overkill for most users who only want to run simple commands on their server.
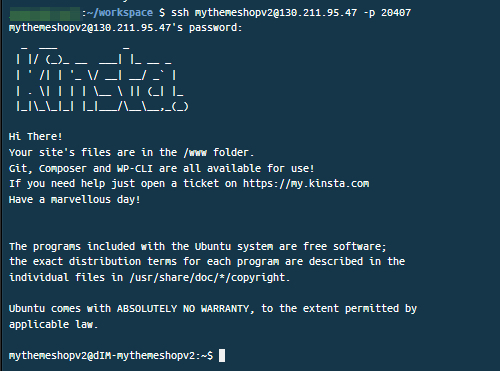
Whichever tool you use, the first step is to cut and paste the SSH command into the terminal.
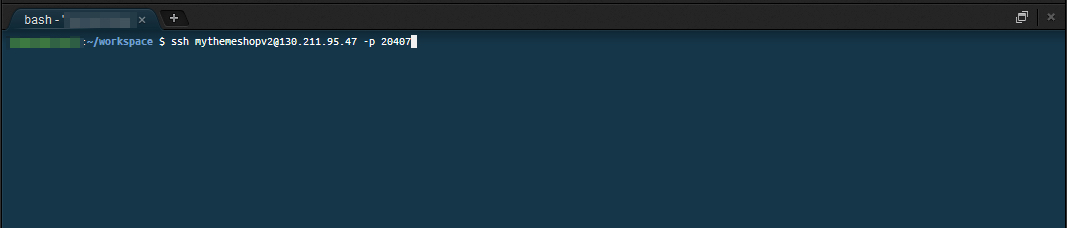
You will have to enter your password – you can copy this from the SSH details on the info panel.

When you log in, you’ll see a useful message from Kinsta. It tells you where your site is installed and lists some of the tools that are available.
29 Using Git
Git is very easy to use, but to get the most from it, you will have to read the (very well written) manual.
Here’s a quick guide to get you started. We’ll show you how to make a repository, add all of the files from your site, and upload them to Github.
The first step is to navigate to your site’s folder. You can see where you are by typing”
ls” – this command lists the contents of the current directory.
We can see there are 5 subdirectories:
1. logs
2. mysqleditor
3. private
4. public
5. ssl_certificates
Our site is installed in the “public folder“, so we navigate there by typing “cd public”
When we type “ls“, we see a list of the contents of this directory.
Next we setup a git repository by typing “git init“.

Right now, the repository is empty. If you type “git status“, you will see a list of the files that are present in your project but have not been committed yet.
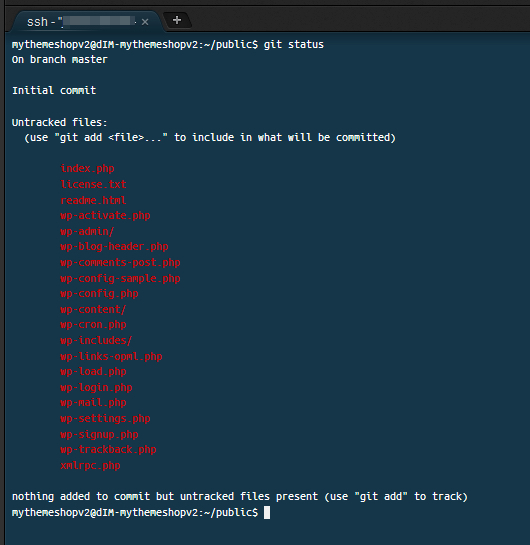
The files are listed in red type to show they are “untracked“.
Before we start adding files to our repository, there are some files we don’t want to track. WordPress creates a bunch of files that are not essential for our purposes – log files, temporary files, cache files, and so on. Over time, you may end up with hundreds of these files.
We can tell git to ignore these files, so they don’t clutter up the repo. We do this by creating a “.gitignore” file.
Just type “nano .gitignore” to open a simple text editor. Here is the gitignore file we usually use for WordPress:

You can find a slightly more detailed version here.
After saving the .gitignore file, you can see it’s listed along with the other untracked files.

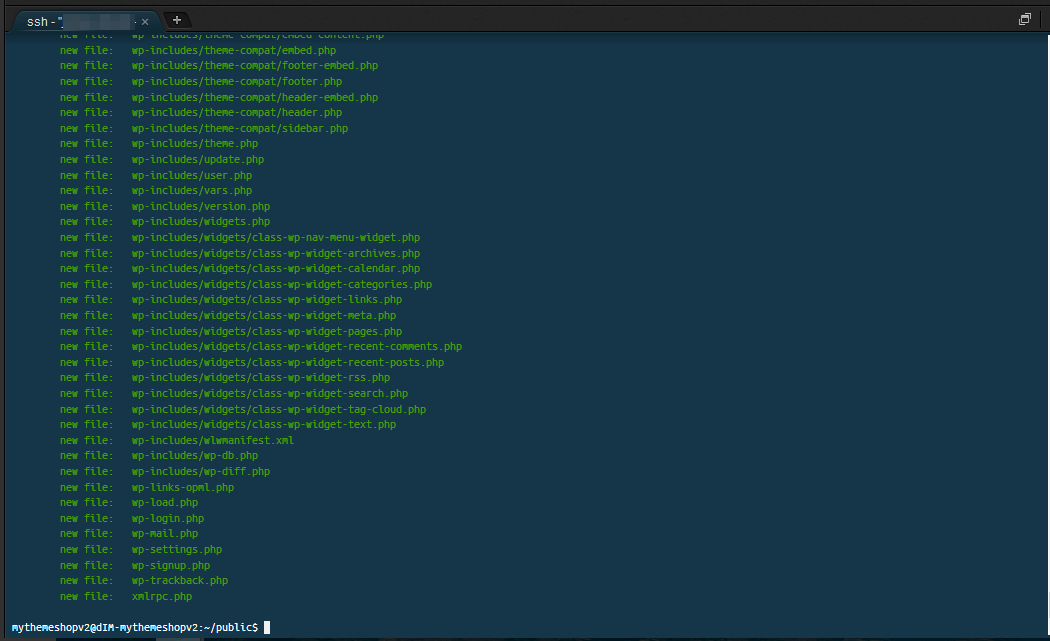
Now let’s start tracking these files! All you have to do is type “git add .” (include the period). This command tells git to add all these files to the list of tracked files.
Git runs through all the files in the current directory and all sub-directories, adding them to its list of files to track.
At this point, we haven’t stored these files in the repo yet. To do that, we have to run the “git commit” command. You should add a message with the -m option, like this:

These messages can be very useful in the future, when you review the changes you made and why you made them. Ideally, the message should describe your change or the state of the project at the moment you made the commit.
You can review your history of commits by typing “git log“. This shows you each commit, together with the date and the identity of the person who made the commit. This is very useful when you’re working with a team.
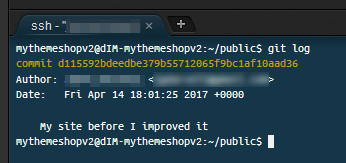
Right now, there’s only one entry, because this is the first commit.
30 Setting Up Github
Github is another cloud-based service. It provides a central location to store your git repositories.
There are plenty of benefits to using a Github repository. The main one is that it makes it easier for teams to work together.
If you hire a freelance developer, you can give them access to your Github repository (instead of handing over your server credentials). They can copy your blog files onto their PC to work, and submit their code via “pull requests” on the Github system. You can manually check them, and then include them into your main repository.
Installing them onto your server is extremely easy – you can do it with a single command: “git pull origin“.
Setting up a new repository on Github is very simple. Just create an account, and click on the “add repo” button. Then fill in the form:

After you have created the empty repo, Github will show you the commands to push your files from your server.

Just copy these commands and paste them into the SSH command line. You will have to type your Github username and password:
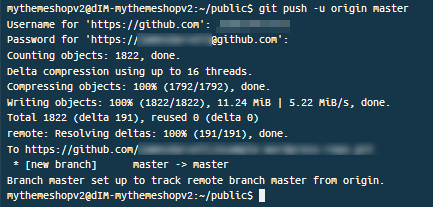
Git will upload your files automatically. Reload the Github repo page, and you will see the files.

To protect your repo, you should invest in a paid Github account (which is very cheap).
Using Github to manage your code provides more control and reduces the security risk when you collaborate with people outside your company.
31 Using WPCLI
Kinsta also provides WPCLI as standard on all web servers. This useful little tool takes a lot of the grunt work out of managing your WordPress site. For instance, you can install a new public theme by typing “wp theme install [theme name]“.
In this case, we installed Shapely:
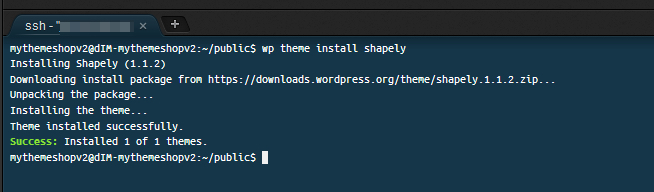
It took about 3 seconds to install.
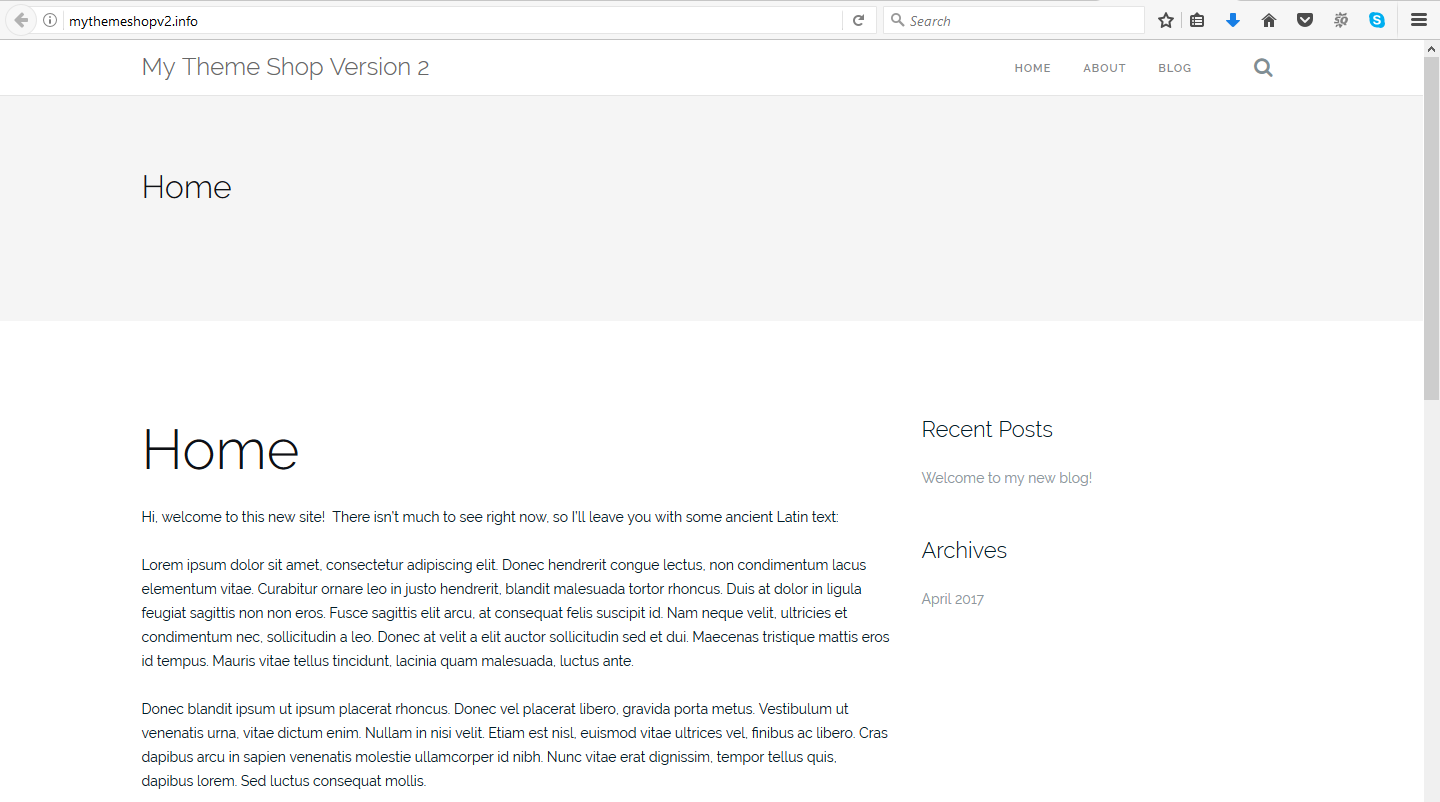
Next, you can activate the theme by typing “wp theme activate [theme name]“:

The theme is instantly activated – you can confirm it by visiting your site:
WPCLI is packed with commands to automate many mundane tasks. You can manage plugins just as easily.
There are also commands to rapidly generate scaffold code for new themes or templates.
Conclusion
When it comes to premium WordPress hosting, Kinsta is really in a league of its own. While the price is high compared to bargain-basement web hosting, no other WordPress host offers so many features and tools.
Combined with their outstanding service and deep WordPress knowledge, these differences make Kinsta the top choice for ultra-stable high-performance WordPress hosting.
We’d love to get your feedback on Kinsta and answer any other questions you may have. Have you used them before, or are you currently hosting any of your sites there? Leave a comment to let us know!
- Speed
- Features
- Architecture
- Customer Support
- Price