WP Review Pro has an innovative Notification Bar feature which can be used in many creative ways. Here we will explain what the Notification Bar is, how to use it, and how to customize it for the best results.
Before going into more details, let us show you the Notification Bar in action. Check out the screenshot below to get an idea of what Notification Bar is.

The notification bar is a dedicated bar that you can display on the top of your website’s pages. You can use the bar to promote your posts, affiliate offers, or anything else.
The strength of the Notification Bar lies in its versatility. Let us take you into the details on how you can configure the Notification Bar to achieve the best results.
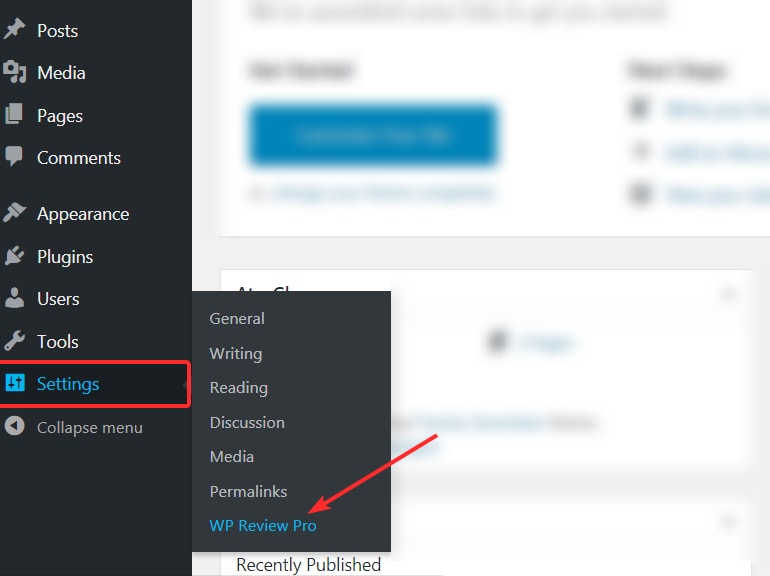
Log into your WordPress website’s backend and head to Settings -> WP Review Pro.
On the next page, select the Notification Bar to enter its settings.
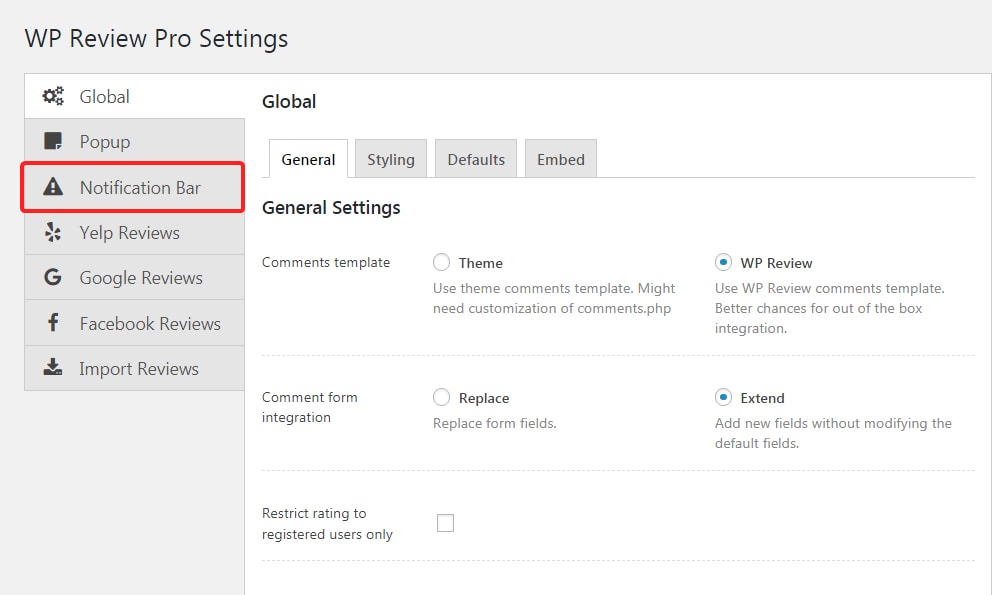
You’ll see that the Notification Bar has its settings divided into 2 tabs.
-
Content
-
Styling
The content tab is used to configure what is shown in the Notification Bar.
The styling tab is used to configure how it looks.
If you are familiar with HTML, you can think of the content tab as the HTML and the styling tab as the CSS.
Let’s analyze the content tab first.
The content tab has a few settings, most of which are self-explanatory. Refer to the screenshot to see all the settings.
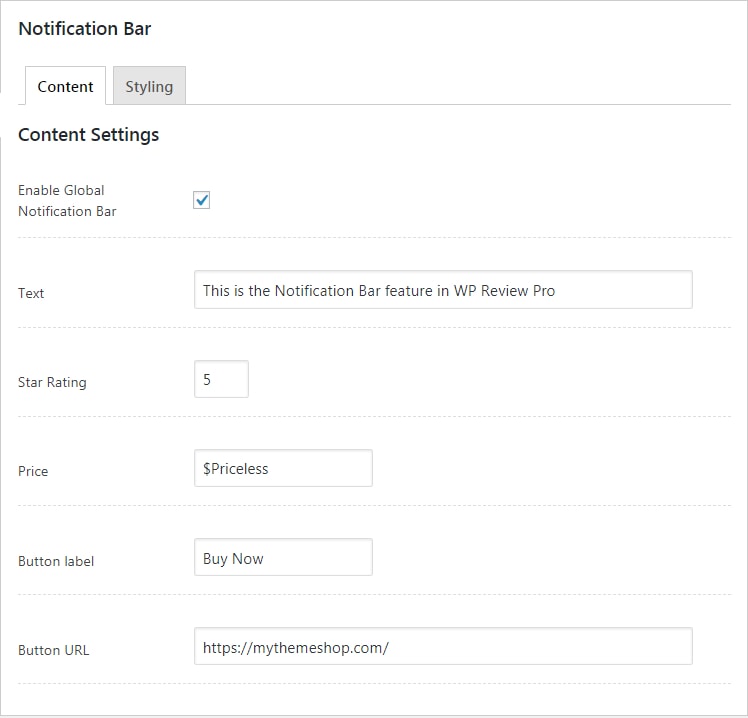
Instead of boring you with a ton of text, we think it’s better if we explain it an image.

If you prefer text, here is what each of the settings accomplishes.
-
Text – The text that appears on the notification bar
-
Price – Enter the price to be shown on the notification bar
-
Star Rating – The number of stars that show up on the rating. This icon can be customized in settings.
-
Button Label – You can customize what the button says here
-
Button URL – Enter the URL to which the button points to
As you can see, customizing these settings in pretty straightforward. Enter the text you like in the respective field, and the text is updated on the notification bar.
Now let’s check out the styling tab.
As mentioned, the styling tab deals with how the Notification Bar looks. That means it can be used to change the colors and the other design elements. Here is how the styling tab looks in detail.
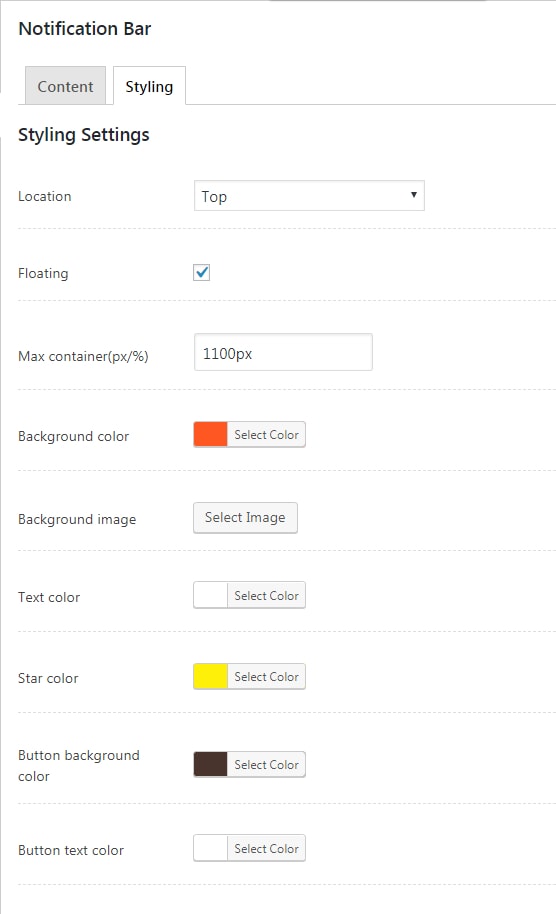
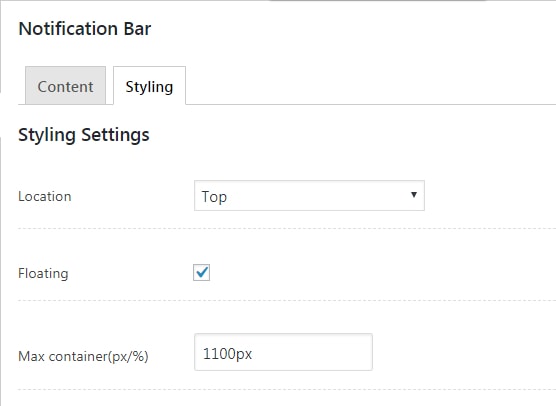
Some of the settings define the various colors, while the others define the position of the notification bar. The following settings define the location and dimensions.
-
Location – You can select the notification bar to appear on the top or the bottom
-
Floating – You can make the notification bar sticky. This option is available only when the notification bar is set on top
-
Max container (px/%) – You can make the width of the notification bar a % of the page, or fixed dimensions.
The following settings define the various colors of the notification bar.
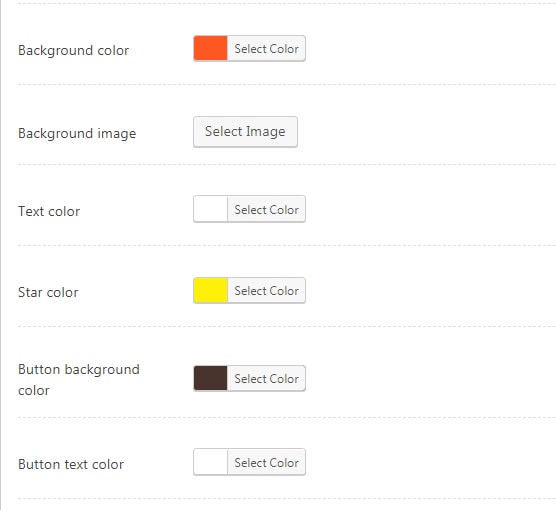
To understand how each color setting affects the notification bar, see the image below.
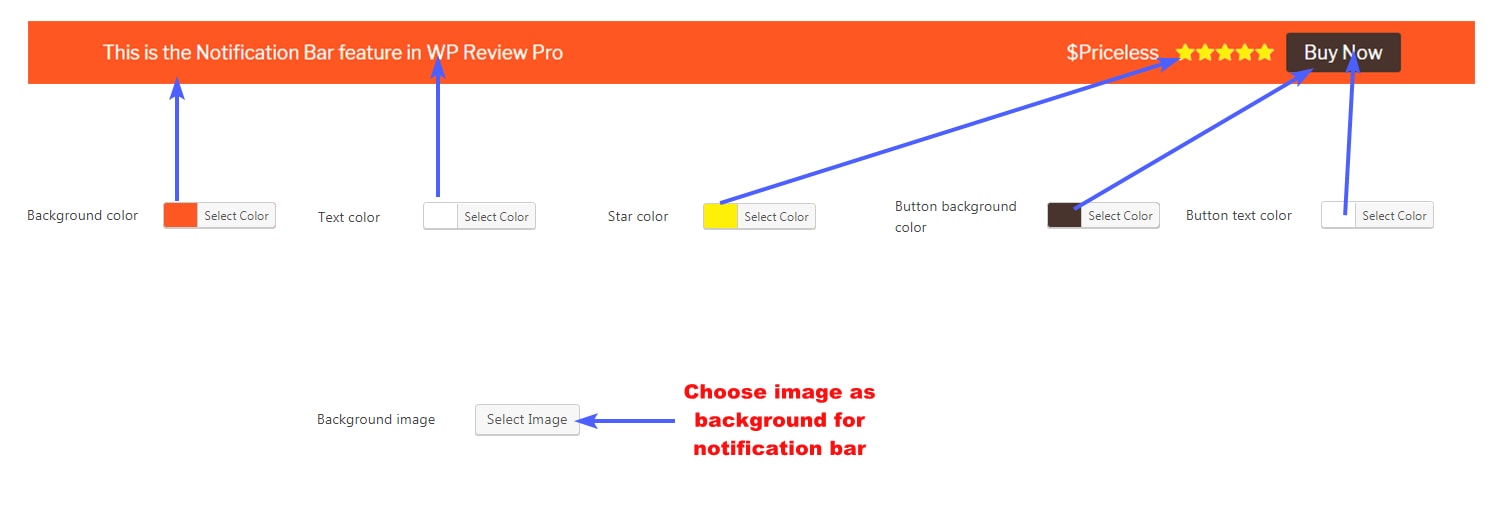
For text lovers, here is what each of the settings achieves:
-
Background Color – You can change Notification Bar’s background color
-
Background Image – Instead of a color, you can style your Notification Bar with a custom image. Useful for gradients or textures.
-
Text Color – You can customize the color of the text on the Notification Bar
-
Star Color – You can customize the color of the star (or other rating icons) with this setting
-
Button Background Color – You can choose the CTA’s background color here
-
Button Text Color – You can choose the color of the CTA’s text here
Once you have modified every setting to your liking, don’t forget to save your settings.
Congratulations, you have successfully configured the Notification Bar in WP Review Pro.
But what if you wanted to have a custom Notification Bar on a specific page or post?
WP Review Pro has you covered. The settings configured above were the global settings. That means that once you set them up, every page on your website will show the same notification bar.
But you can override these settings and create a variation of the Notification Bar for every single page or post on your website.
Let us show you how.
When you install WP Review Pro, all the settings on the post level are available below the text area. Here is how it looks.
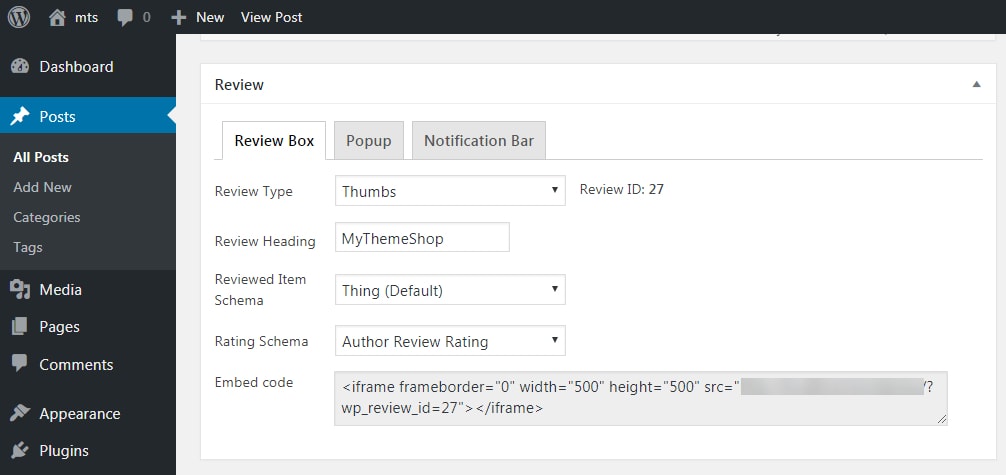
In the “Review Header”, you will also see the “Notification Bar”. Once you click it, you will be presented with the following.

If you click the drop-down menu, you will see the following options.

Here is what the 3 settings accomplish.
-
Use Global Options – If you enable this option, then the Notification Bar for this post/page will use the global options that you set
-
Use Custom Options – This is the holy grail right here. Once you select this option, an entirely new section of settings will pop up which you can use to customize the Notification Bar for this particular post/page.
- None – This will disable the Notification Bar on this post/page. The rest of the pages will still display the Notification Bar using the global settings.
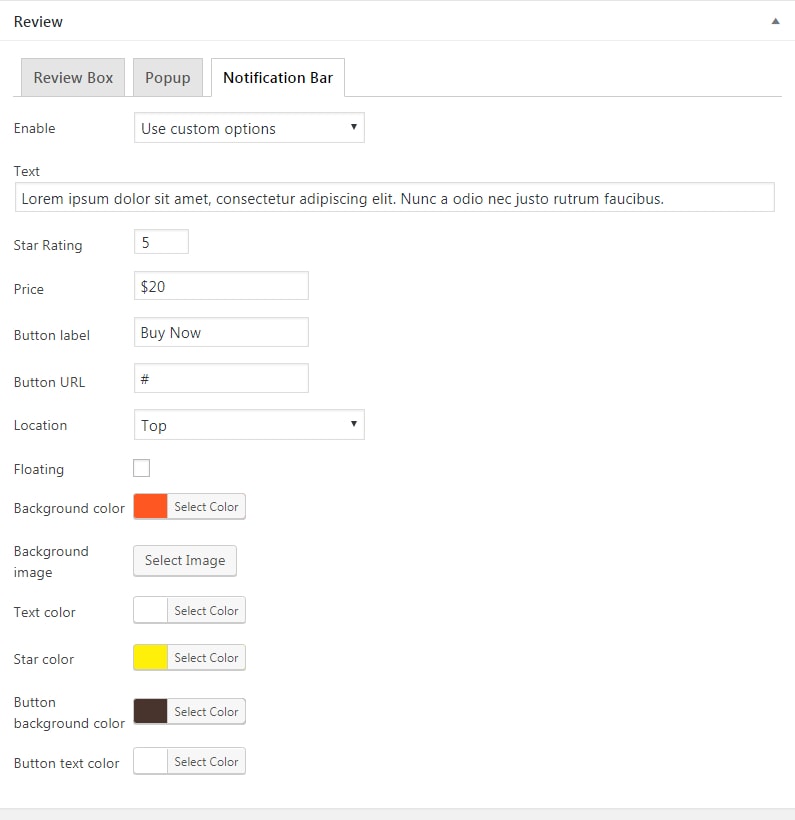
By using the “Custom Options” setting in the drop-down, you can create a custom Notification Bar for any page or post on your website. This opens up the possibility of creating unlimited variations of the Notification Bars of an infinite number of uses.
That concludes this article on how to customize and use the Notification Bar in WP Review Pro.
