Hello, and welcome to this knowledge base tutorial. In this article, we are going to cover how to create a comparison table in WP Review Pro.
For those who are not familiar with the feature, let us explain. Apart from stunning reviews, WP Review Pro can also create comparison tables between multiple products, and we are going to show you how.
A comparison table can be created for 2 or more products, so you need at least 2 reviews on your website before creating a comparison table.
If you don’t know how to create a review, we recommend going through our articles on how to configure WP Review Pro, and also on how to create a review with WP Review Pro before proceeding.
Another important thing to remember is that WP Review Pro does not make decisions about what products you are comparing. You could potentially compare two unrelated products, and WP Review Pro will still create the comparison table for them. However, comparing apples and oranges is not useful, neither does it please an audience.
We assume that your goal is to create comparisons that are helpful to your audience, so we would recommend that you compare closely related products only.
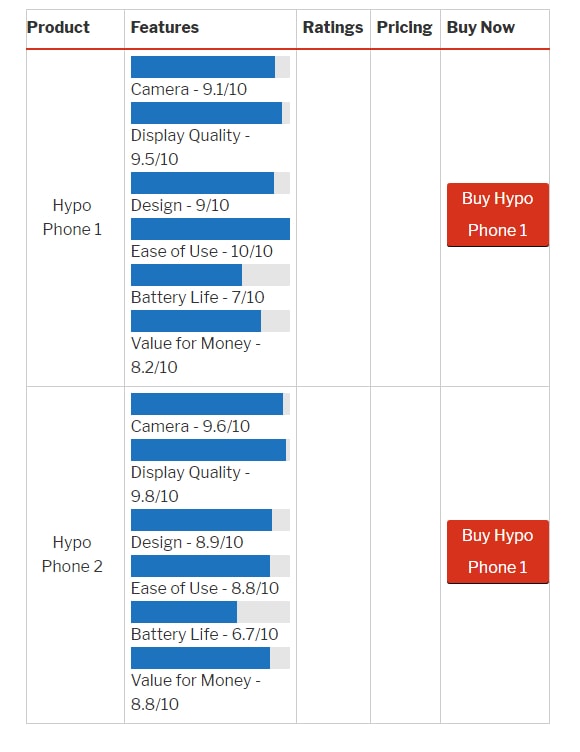
For this example, we will compare 2 hypothetical mobile phones. We will first create reviews for them, and then create a comparison table comparing both the devices.
We will case these devices Hypo Phone 1 and Hypo Phone 2. After creating the reviews, we need to extract their review IDs.
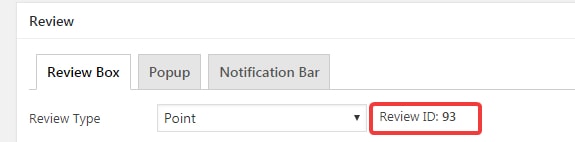
The review ID is visible in the ‘Review’ Section of WP Review Pro, which is visible directly below the text area on your post. Here is the review ID of our Hypo Phone 1 and Hypo Phone 2.

Now we will create a new post for the comparison table.
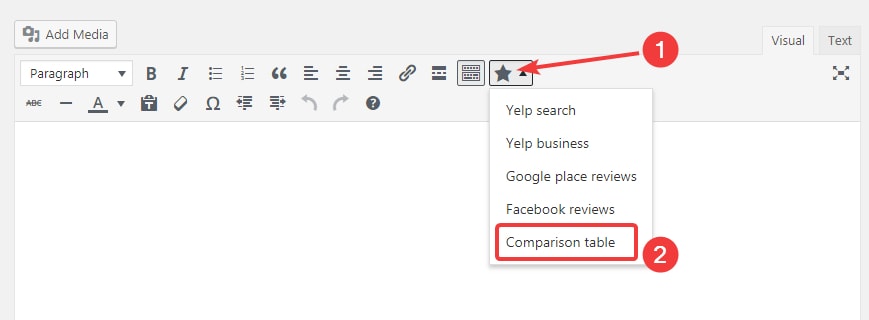
To insert the comparison table in the post, we will use the shortcode inserter that WP Review Pro creates for you on your text toolbar. It is a star-shaped icon with a drop-down arrow.
We’ll click on the icon and select ‘Comparision Table’.
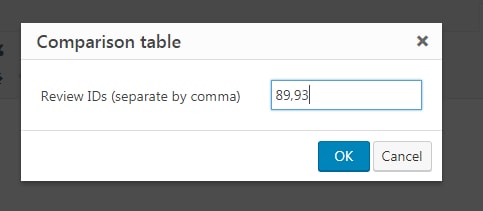
In the next popup, we will enter the review IDs of the hypothetical phones, and press OK.
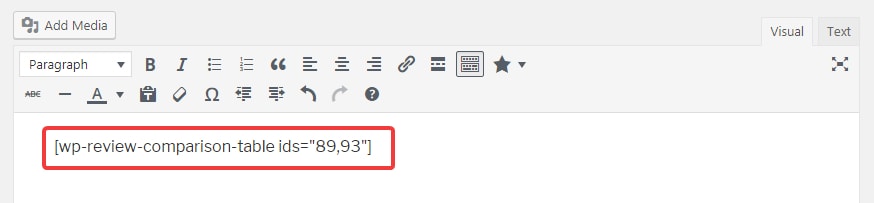
WP will automatically create and insert the shortcode for the comparison table in the text area. If you prefer, you can use this shortcode directly as well.
Then we save the post and open its URL, where we will find the comparison table created.
That’s it. Those are the simple steps that you need to follow to create a comparison table on your website with WP Review Pro. We hope you enjoyed this tutorial and it answered all the questions about this feature that you had. If you have some more, please share them with us so we can help you out further.
