In this tutorial, we are going to show you how to create a Flip Quiz with WP Quiz Pro.
A Flip Quiz is a simple but versatile type of quiz which can be used in many scenarios. You present the user with an image or text, asking them to think about something. When they click the question, it flips to reveal the answer to them; hence the name Flip Quiz.
The simplicity of the Flip Quiz is useful in many ways. You can use it ask questions, share interesting facts, share before and after pictures, and more. Your creativity is the only limiting factor when creating a Flip Quiz. Let us get started.
Creating the Quiz
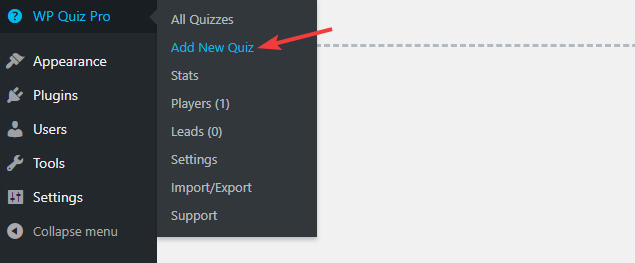
Start by navigating to WP Quiz Pro > Add New Quiz.
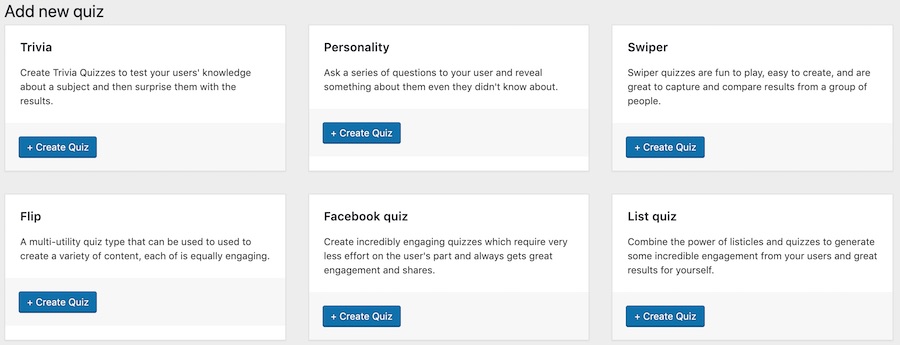
The list of all the quizzes supported by WP Quiz Pro will appear. Click the + Add New button next to the Flip Quiz to create a Flip Quiz.
You’ll reach the blank quiz creation page, which looks something like this.
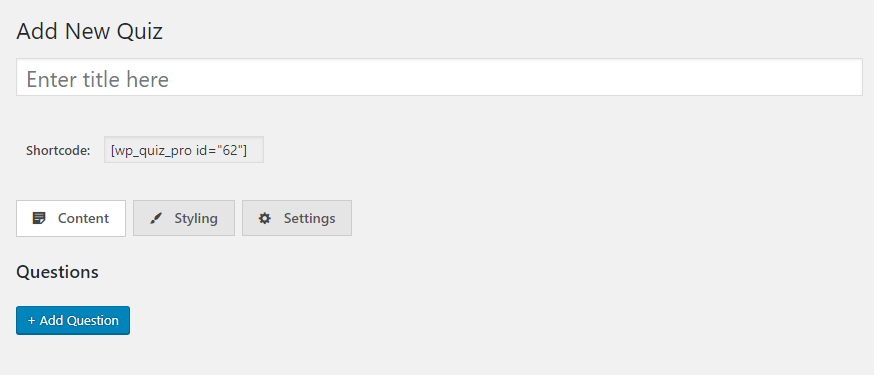
There are a few things to note here.
First, the title. Each quiz has a title which is used for identifying the quiz. It’s not shown to the user nor does it appear elsewhere on the website where the user might not notice it.
Second, the shortcode. This is the shortcode which we will use to embed the quiz in a post. We will cover that in a later section.

The 3 tabs. The Flip Quiz has 3 tabs, the Content Tab, the Styling Tab, and the Settings Tab. Each of the tabs contains some settings that affect the quiz in some way, and we will discuss each of the tabs separately.

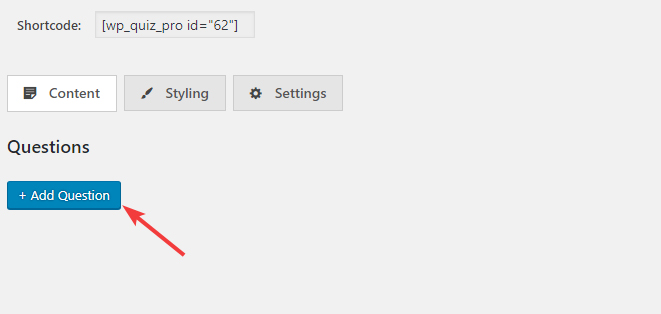
Let us begin creating the quiz.
Click the + Add Question button to add a question to the quiz.
A blank question will be created for you, which would look something like this.
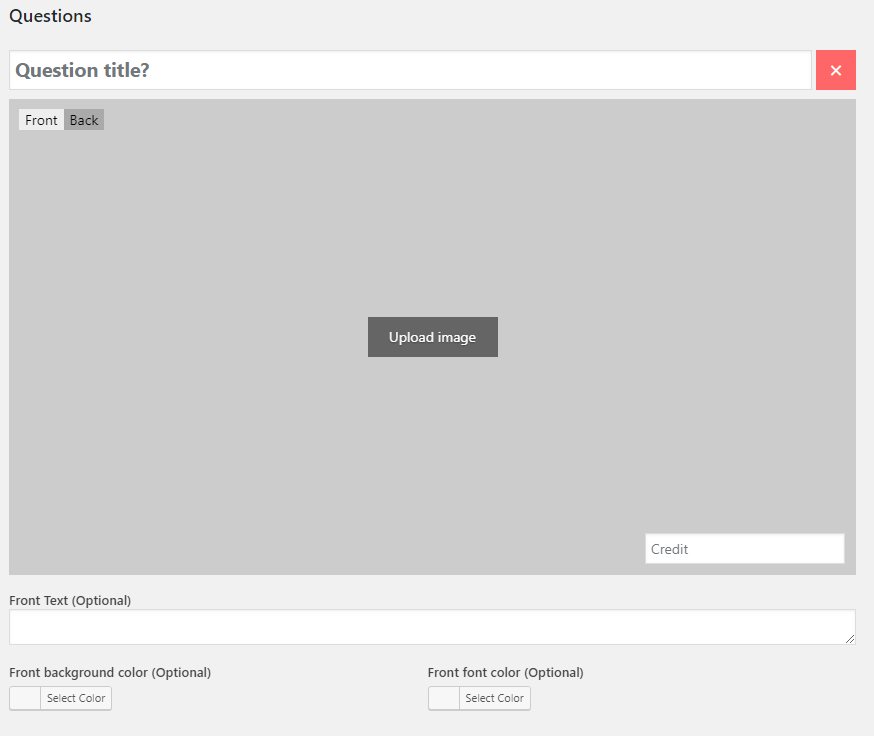
There are many options present when creating a question, and understanding them is critical to use the Flip Quiz effectively.
Question Title

The question title contains the actual question that you’re going to ask the user. Depending on the type of quiz, this may be a question, a statement, or a phrase.
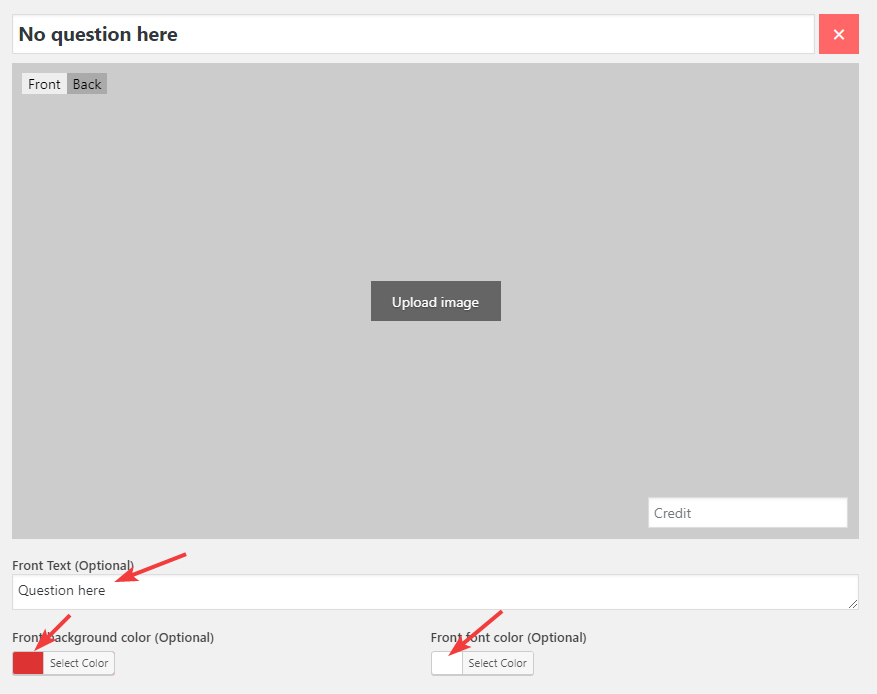
Front Image and Back Image
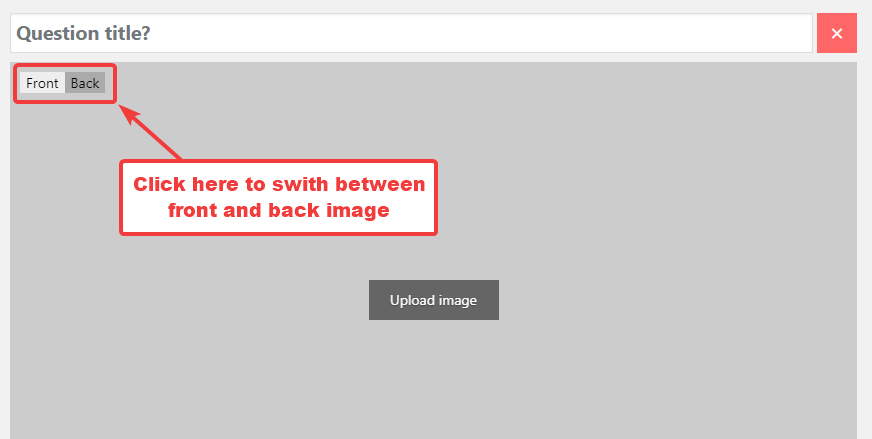
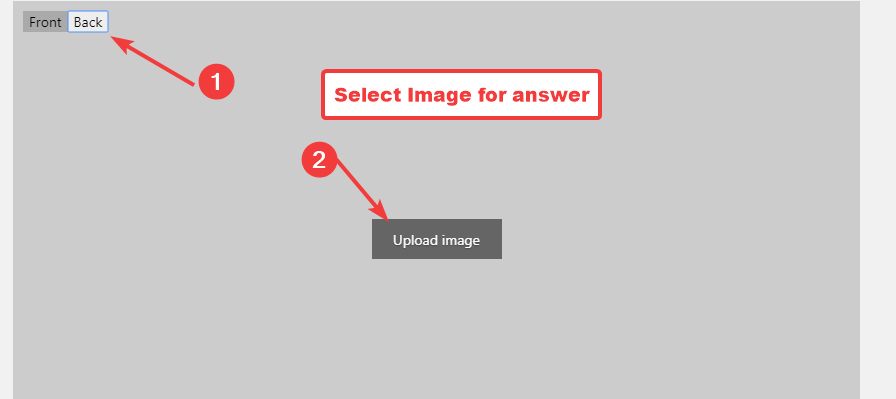
Because the question and the answer in a flip quiz are both in images form, you need 2 images per quiz question. The image for the Question is called Front, and the image for the answer is called Back. You can toggle between the Front and the Back Image by using the toggle box on the top-left of the image.
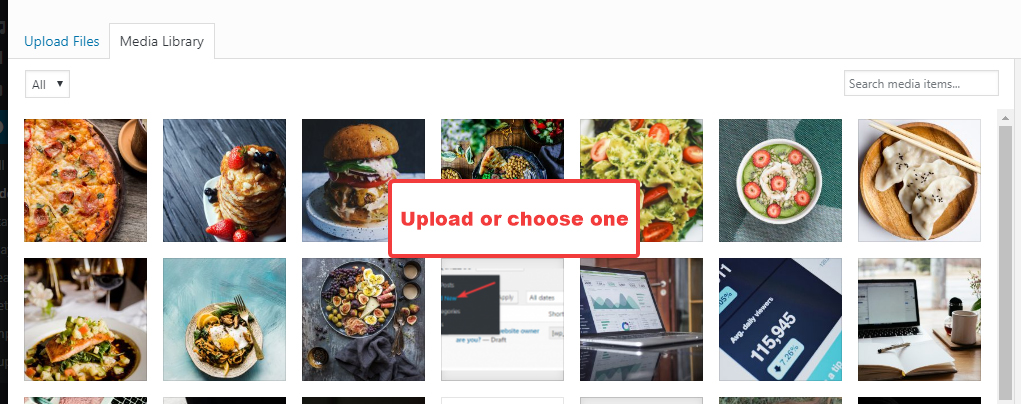
To add an image, click the Upload Image button in the middle of the question.
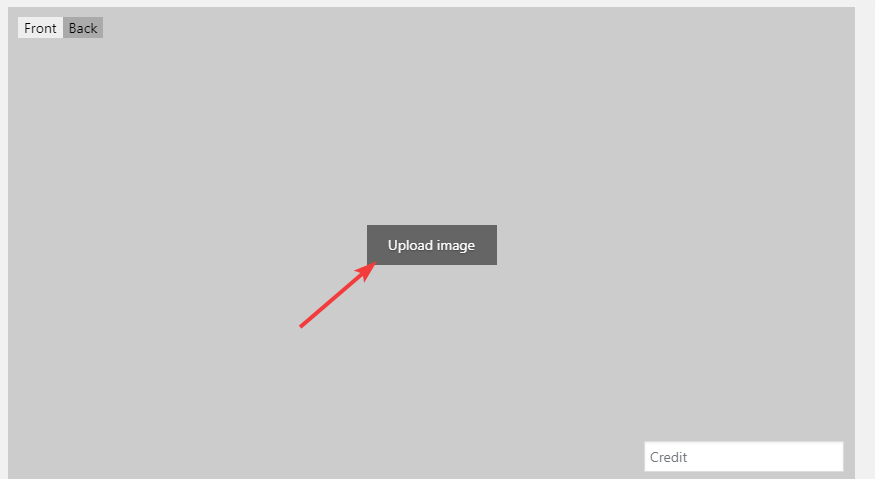
The WordPress media gallery will open up. Upload an image or pick one of the existing ones for the quiz.
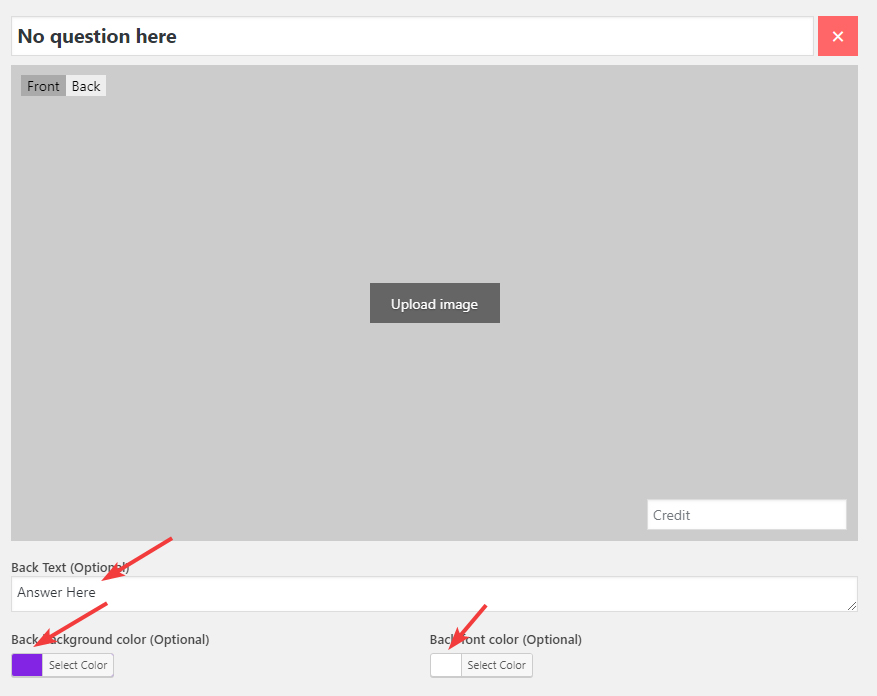
Once you’re done, select the Back option and repeat the process to select an image for the answer.
If you’d like to credit the source of the image, use the Credit field that’s included with both the Front and the Back image. Note that credit is included is included as text over the image and not as a hyperlink.
It’s not mandatory to have an image as the question; you can use text instead. WP Quiz Pro automatically formats the text into a visual form so that your visitors will still remain engaged.
To use text, use the text field that’s located just below the image area.

You can use text for both front and back images, just flip the image to back to see the back text option. If you’ve already uploaded an image when you add the text, the text will be overlaid on the image. It can look good or bad depending on the image, so make sure to see how it looks before making it final.
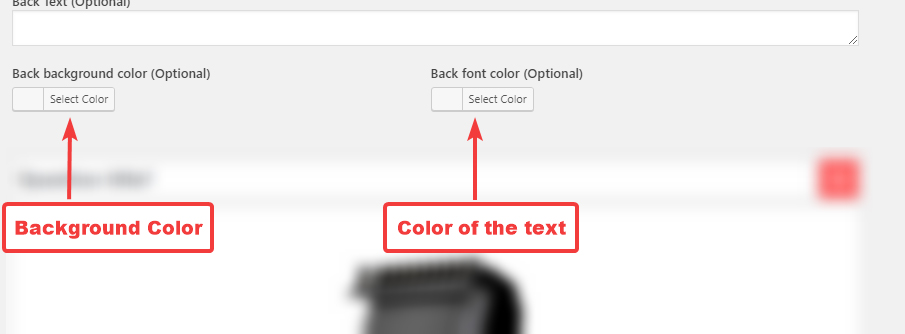
If you don’t want to use an image as a background for text, but don’t want plain boring text, you can style the text using the color options. You can choose a background color as well as the color of the font the text is displayed in.
Editing and Removing Images
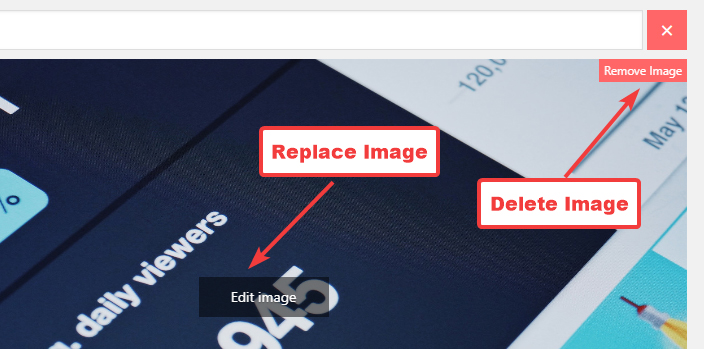
If you’ve added an image you’re not happy with, you can remove it, or replace it altogether. To replace an image, click the Edit Image button that appears on the image. It will open up the Media Gallery once again, and you can choose a replacement.
To delete an image, hover your mouse over it to see the Remove Image option on the top right of the image and click it.
Deleting Questions
You can also delete questions that you don’t like by clicking the giant red cross on the top right of the question.

Creating the Actual Quiz
Now that you’ve understood all the options, it is time to create an actual quiz.
First, you’ll have to think of the questions and the answers. In this case, the front and back images (or text) for each question. To give you a demo, we’re going to create a simple visual quiz with the title, “Can you guess how these popular photographs were taken”. For each question, we are going to use an image of a popular photograph for the front image and a behind-the-scenes image for the back image. Here are the results.
Question 1 – Only Images
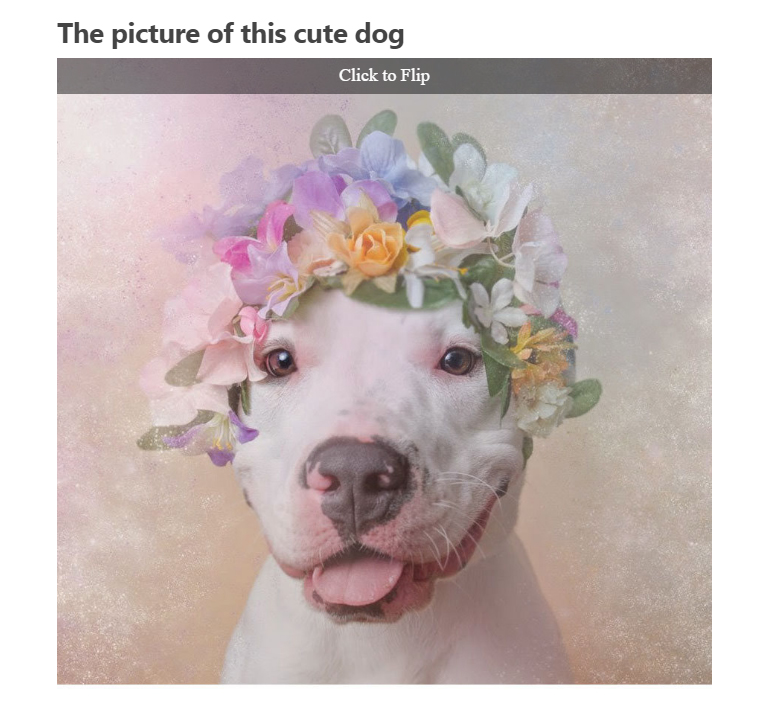
For the first question, we used only images both for the front and back images. Here is how the question looked in the quiz window.
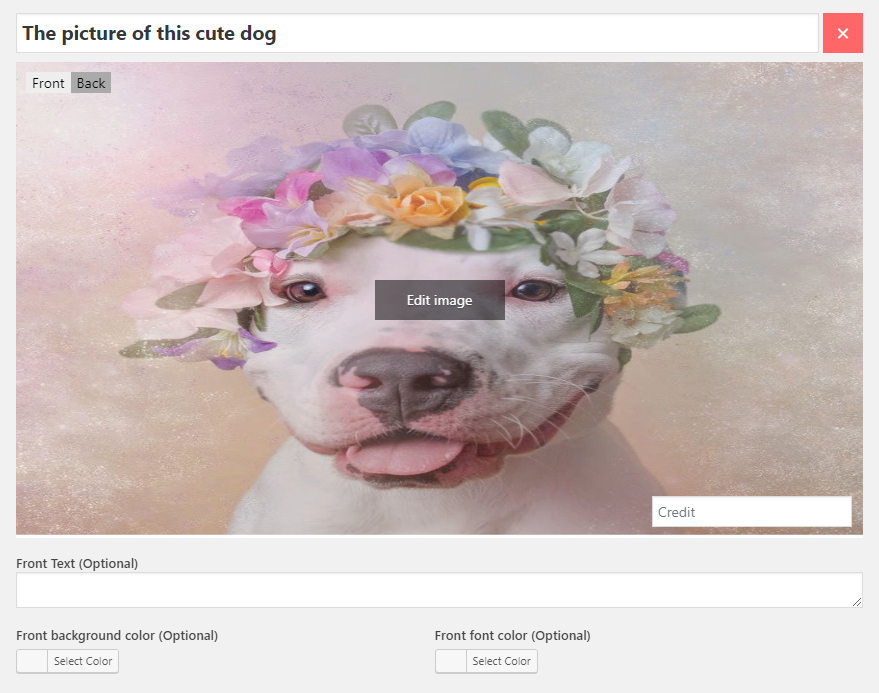
And here is how it looked when we previewed it.
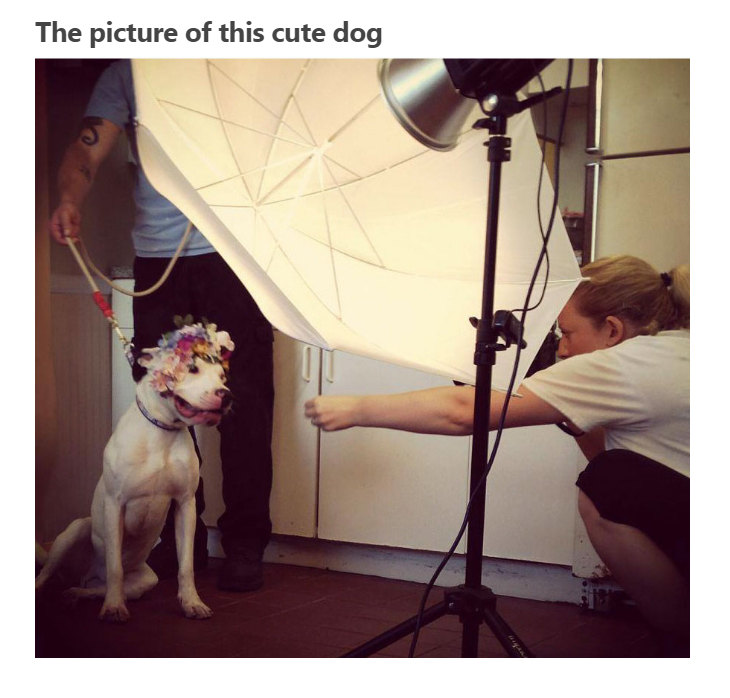
When we clicked the image, it flipped to reveal this.
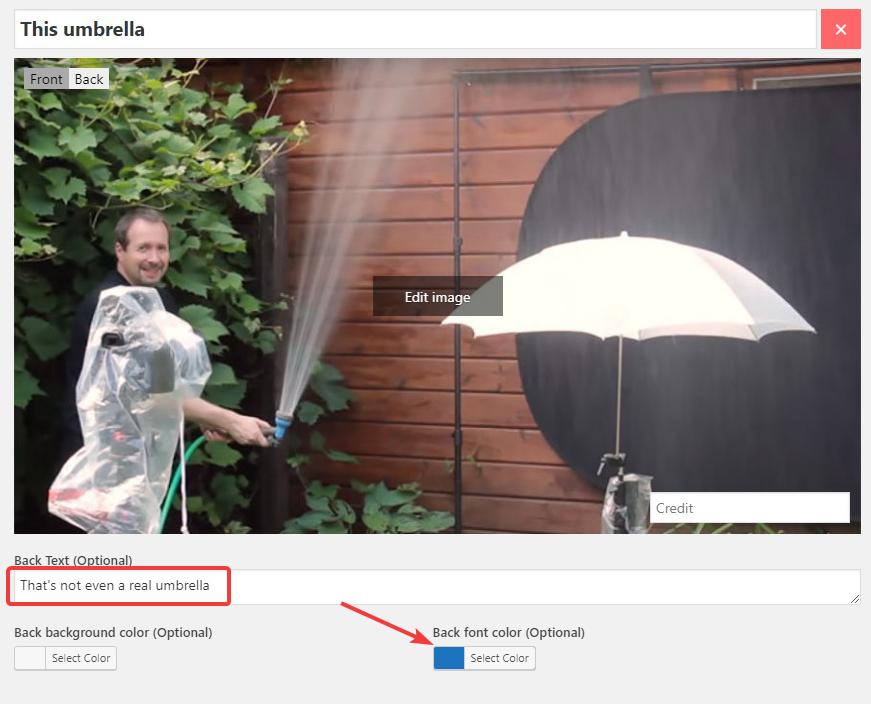
Question 2 – Image and Text
For the second question, we used just an image for the front and an image plus text for the back. Here is a picture of the front image settings.
And these were the back settings. Notice the text we’ve added to the Back Text field.
On the frontend, here is how the front image appeared.
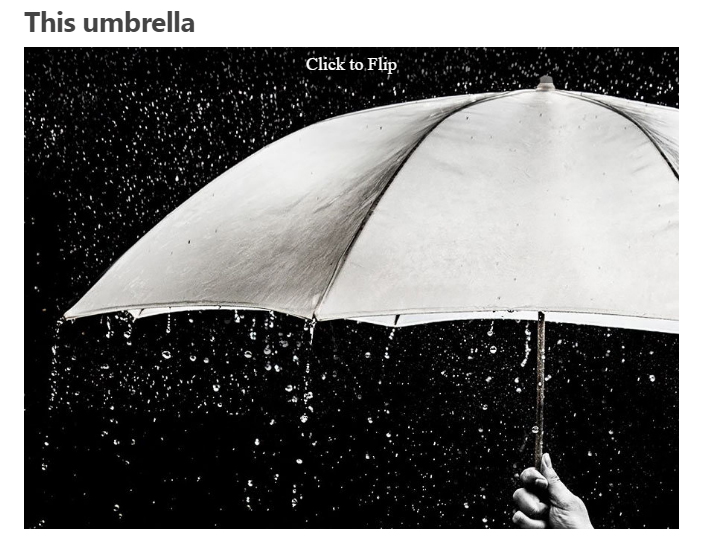
When clicked, the image flipped to reveal this.

Question 3 – Text Only
For the third question, we only used text for the back and the front options. Here is an image of the front option.
And the back option.
On the frontend, here is how the question appeared.

On clicking, this was revealed.

Styling Tab
The styling tab contains the settings which control how the quiz looks. For the Flip Quiz, there are only 3 settings available.
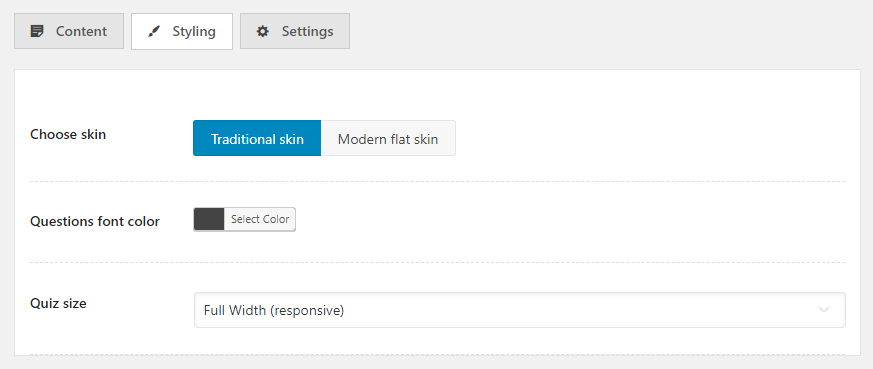
Choose Skin
The Flip Quiz supports 2 types of themes, a traditional skin, and a modern skin. Here you can select which one you want to enable.
Questions Font Color
If you noticed in the images above, the quiz question uses the default black color. With this option, you can choose any color for the question.
Quiz Size
By default, the Flip Quiz uses the full-width option. As the quiz is responsive, this option works well for all device sizes. However, if you want to change that, you can use this option. Click the dropdown to see all the options. Currently, there are only 2.

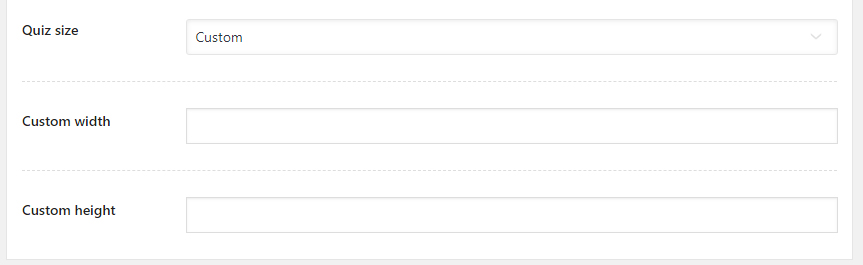
If you select the Custom option, 2 more fields will appear on the screen. You can enter your custom height and custom width for the quiz there.
Settings Tab
Inside the Settings tab, you’ll find the following settings.
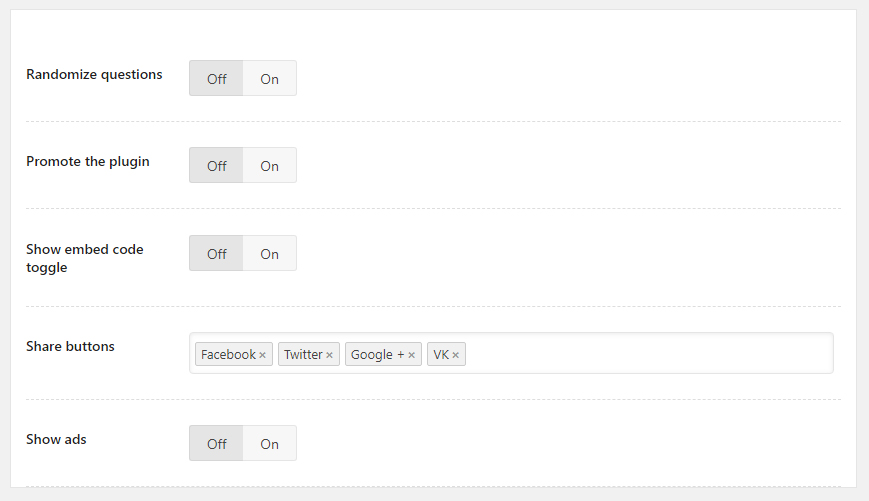
Let us explain each of the settings.
Randomize Question
When this option is enabled, the order of the questions is randomized.
Promote the Plugin
When enabled, this option will place a small link alongside the quiz which will say “Powered by WP Quiz Pro”. If you configure your MyThemeShop account inside WP Quiz Pro’s settings, you can make money from every user who clicks the link and purchases WP Quiz Pro.
Show Embed Code Toggle
If you’d like your quiz to be embeddable on other websites, enable this option. When enabled, this will place a link alongside the quiz which will say “Toggle Embed Code”. When the link is clicked, a chunk of code will be revealed which users can copy and paste on their website to embed the quiz on their website.
Share Buttons
When enabled, this will users the option to share their results on social media. Many social networks are supported, and you can enable or disable them as per your needs.
Show Ads
You can also show ads in between the quiz questions to generate revenue by enabling this option. When you enable it, additional options will be revealed.
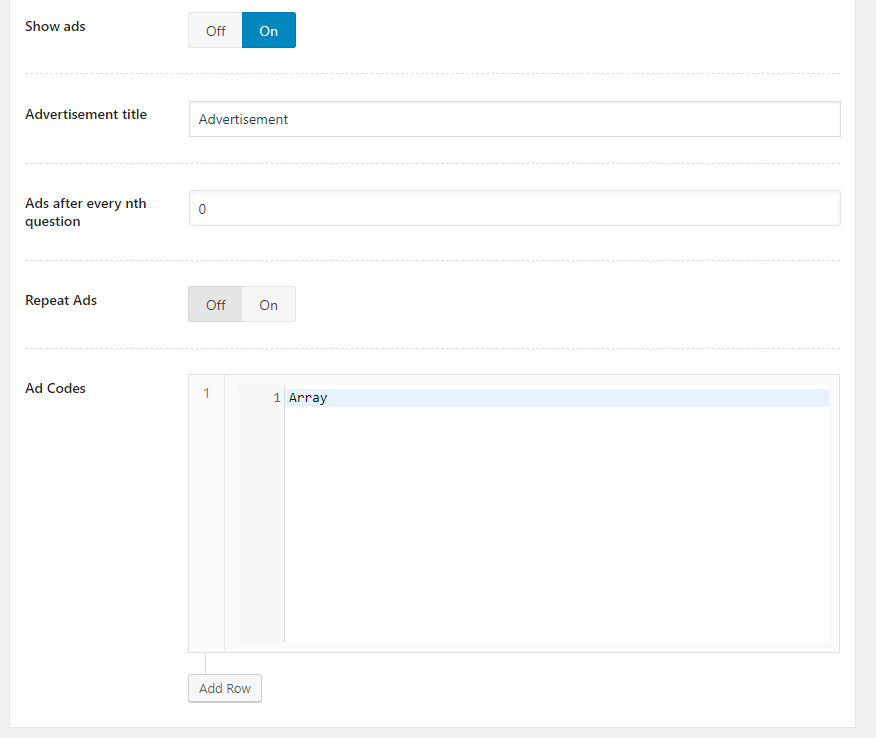
The options are pretty self-explanatory.
Understanding the Settings in Detail
Above, we just gave a brief explanation of what the settings can do. That is because we’ve already covered these settings (and others for other quizzes) in detail in our WP Quiz Pro Setup Guide. We’ve also shared many examples and images that can make the settings easy to understand. Check the guide out if you want to learn more about the settings.
Using the Quiz in a Post or a Page
Now that you’ve understood all the options in a Flip Quiz and hopefully created your own quiz, its time to use the quiz in a post. Yes, quizzes have to be embedded inside posts to make them work. It’s a 3 step process, let us show you each of the steps.
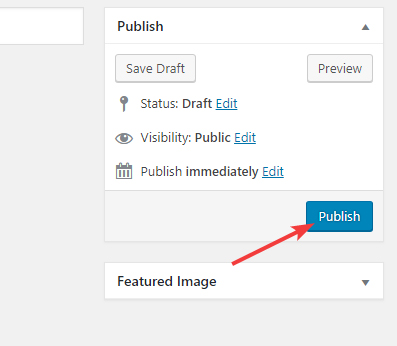
Publish Your Quiz
If you haven’t already, Publish your quiz. Use the Publish button on the right of the screen to do so. Publishing a quiz is not the same as publishing a page, and it won’t appear on your website unless you explicitly set it to do so.
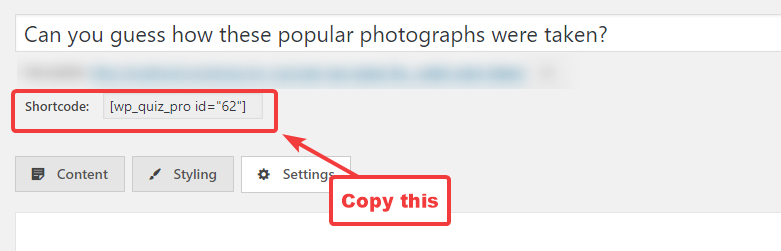
Copy the Quiz Shortcode
Each quiz created with WP Quiz Pro has a unique shortcode which can be found on the quiz creation page and the all quizzes page. Copy the shortcode to your clipboard from any of the locations.
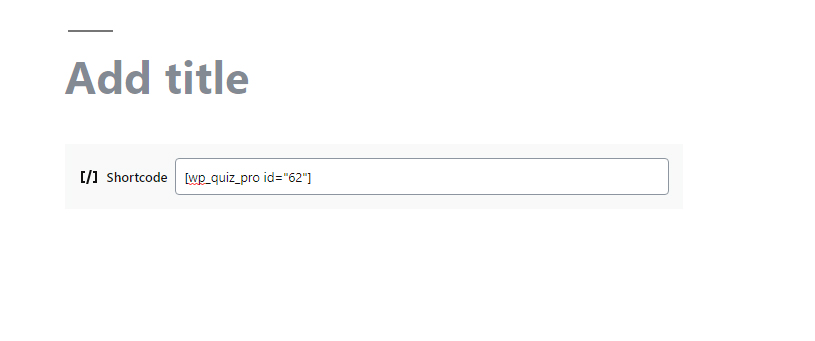
Paste the Shortcode in the Post
The next step is to paste the copied shortcode in the post or page of your choice. For demonstration, we will do that on a new post. We’ll use the Gutenberg Editor, but the classic editor works fine too.
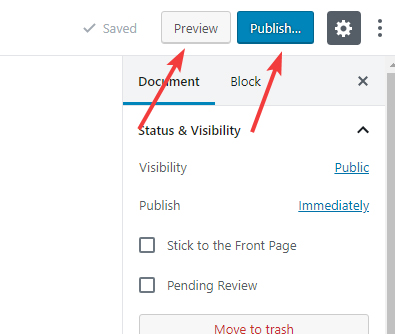
Once that’s done, you can preview your post and publish it you’re happy with it.
Conclusion
We hope that you understand how to create and customize Flip Quizzes with WP Quiz Pro. The options are easy to understand, and we’ve tried our best to explain everything in detail. If you still have questions or have issues with WP Quiz Pro, feel free to contact support. They are available 24×7 and will be happy to help you out with any questions that you might have.
