In this tutorial, we are going to show you how you can configure WP Quiz Pro on your website. If you haven’t installed WP Quiz Pro, we would recommend that you go through our tutorial on installing WP Quiz Pro on your website first.
WP Quiz Pro offers plenty of customization options, and understanding them is the first in realizing the potential of this powerful plugin. Once you understand all the options, you can then think of creative ways to use the options to bring in more traffic and users on your website.
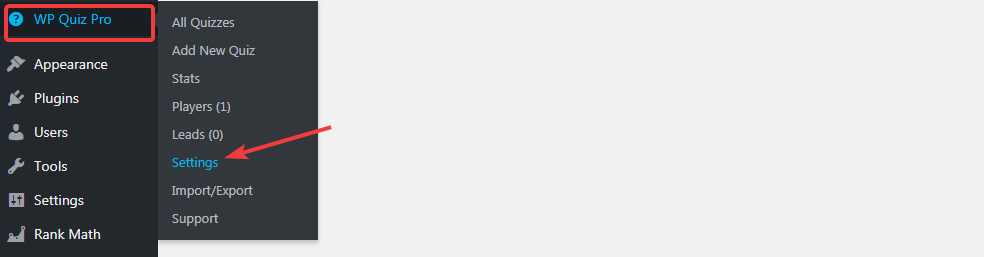
To see all the settings, go to WP Quiz Pro > Settings from the WordPress menu.
You’ll reach WP Quiz Pro’s settings page. Here is how it would look.
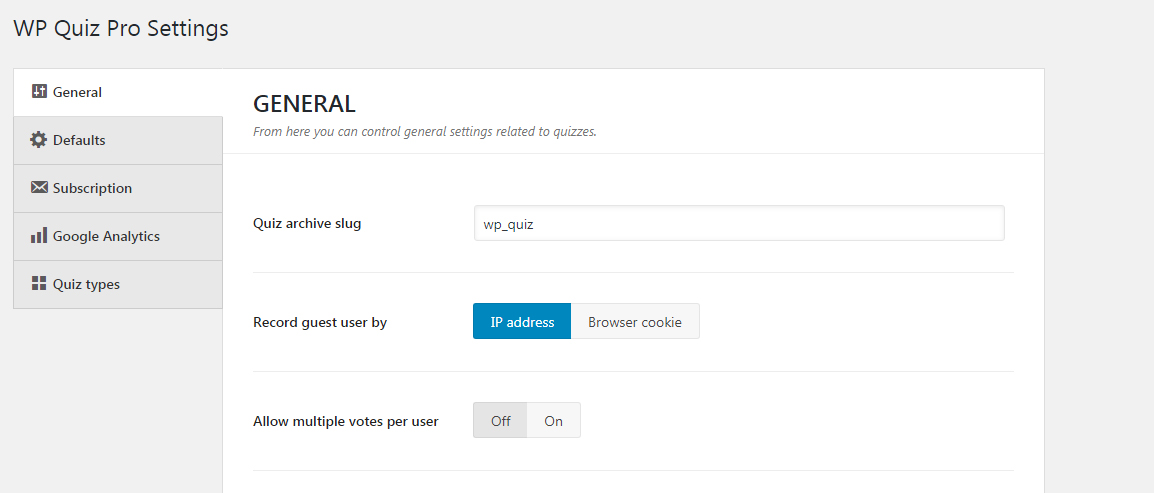
The important thing to note is that there are 5 different types of settings available.
- General
- Defaults
- Subscriptions
- Google Analytics
- Quiz Types
We will cover each of the settings in the 5 categories in detail.
General Settings
The General Settings in WP Quiz Pro configures global settings that affect how the plugin works and behaves. However, WP Quiz Pro has another batch of settings, called Default Settings, which are used to configure default settings for quizzes.
Here is a complete list of all the General Settings.
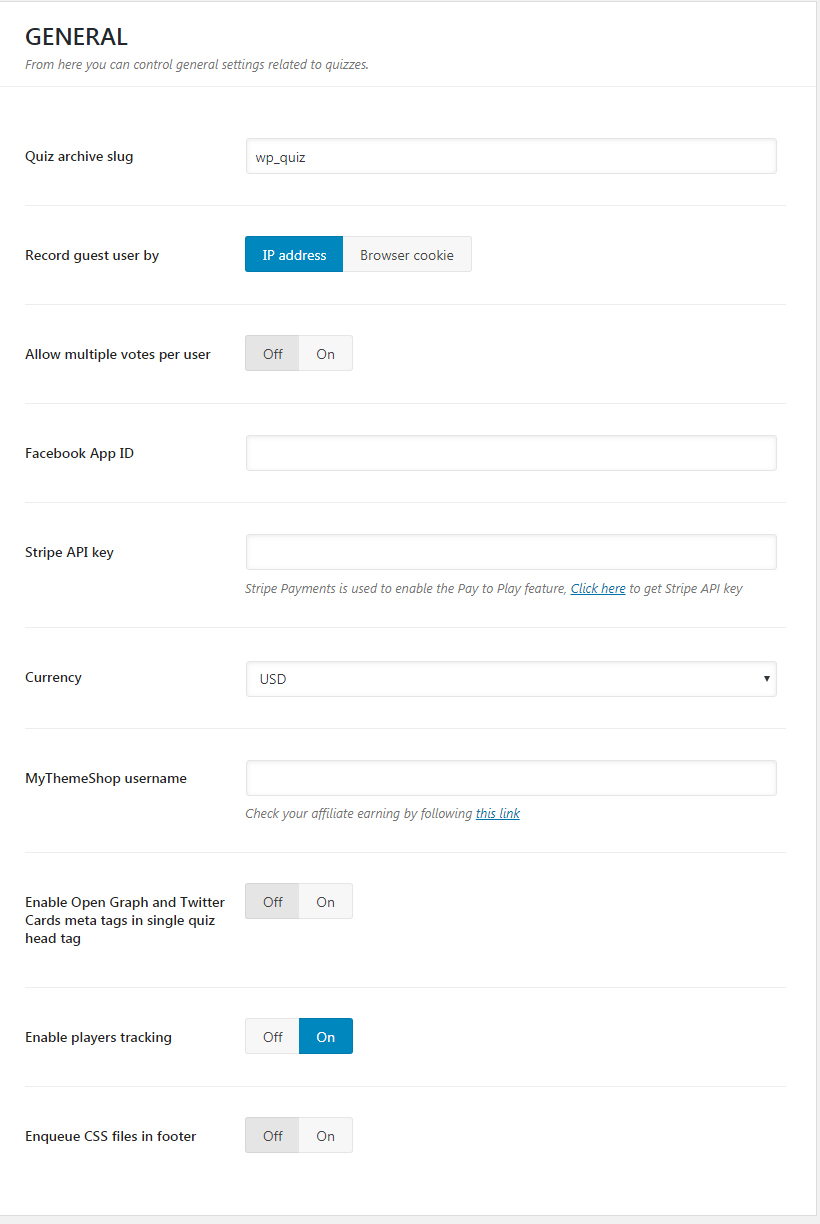
As you can see, there are plenty of settings, and we will explain how each parameter affects the created quizzes, in detail.
Quiz Archive Slug
While quizzes can be embedded in posts or pages, they can also be accessed by their very own URL and also from their archives.
This setting sets slug for quiz archives. The slug is another name that WordPress uses for a URL (or part of a URL). On every WordPress website, you have Author Archives, Date Archives, Category Archives, Tag Archives, and more. When you add WP Quiz Pro to your website, a Quiz Archive is created as well. The Quiz Archive Slug sets the slug for the Quiz Archive.
The slug is only a cosmetic change and won’t affect your quizzes at all. It is just a way for WordPress to organize the quizzes in an accessible manner. The default slug is set to “wp_quiz” and you can change it to anything you prefer. However, we recommend that you set a slug before you start creating any quizzes and keep the same slug. If you change the slug after you’ve created a few quizzes, then you will encounter 404 errors on your website and will have to fix them.
Record Guest User By
All websites on the web use some basic tracking mechanisms to track users. That is how your shopping cart is retained, your email address is remembered, and you don’t have to log into Facebook everytime. WP Quiz Pro uses the same technology to track users activities on quizzes. This way, WP Quiz Pro can retain information about what quizzes have users played, and what did they score on the quiz.
There are 2 methods that WP Quiz Pro uses to track users actions. IP Address and cookie. Both methods aren’t perfect, but one can be better than the other in certain scenarios. In this setting, you can select which of the tracking methods should WP Quiz Pro use to track users. The default setting is IP Address, and you change it if you prefer to use the cookie method.
Allow Multiple Votes Per User
Some quiz types (slider for example) let users vote on things instead of asking them questions. Sometimes you’d want a user to vote only once, but sometimes not. This setting controls precisely that. Here you can set if a user can vote multiple times on a particular quiz or not.
Facebook App ID
You might be wondering what a Facebook App is and why do you need it to use WP Quiz Pro. Let us explain what a Facebook app is real quick.
Facebook is a platform, and it allows developers to create apps that users can interact with. But, unlike mobile and desktop apps, these apps do not get stored on your phone or computer, or even run on your phone or your computer, but run on Facebook itself.
Since WP Quiz Pro has a Facebook Type Quiz where users need to log in using their Facebook Account, it’s mandatory to have a Facebook app that has the necessary permissions to access the required user data.
Now that you’ve understood the basics, here is how to create a Facebook app.
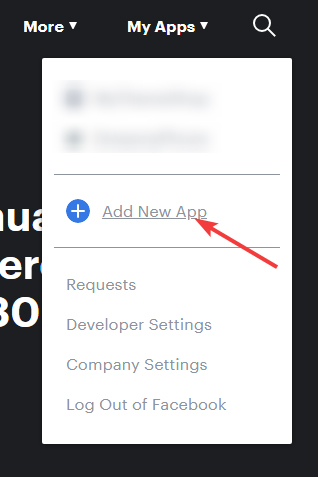
Start by heading over to Facebook Developers website.

From the My Apps section, select the “Add New App” option.
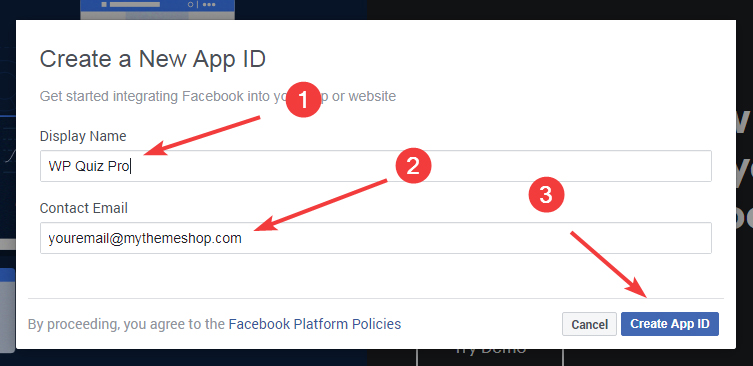
On the dialog box that appears, enter a name for the app you want to create and your email address. Then, click the Create App ID button.
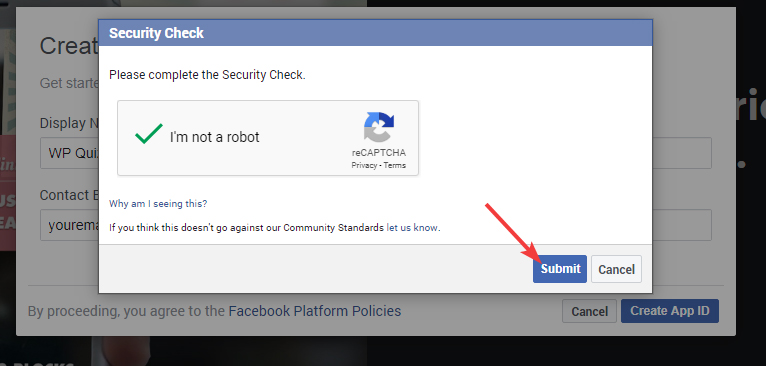
If you get a security check option, just do what you do to get past it.
You’ll reach the developer console, and your Facebook App ID will be displayed as well. But, before you start using it, you have to set up your app.
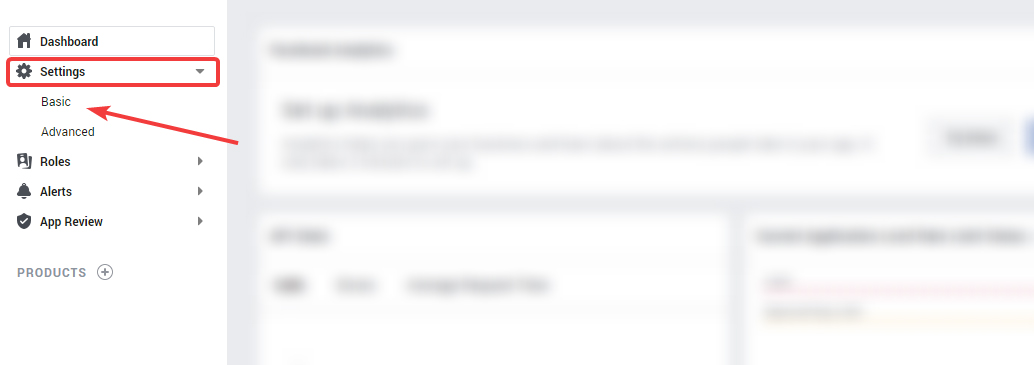
Click the Settings Button, and then the Basic button.
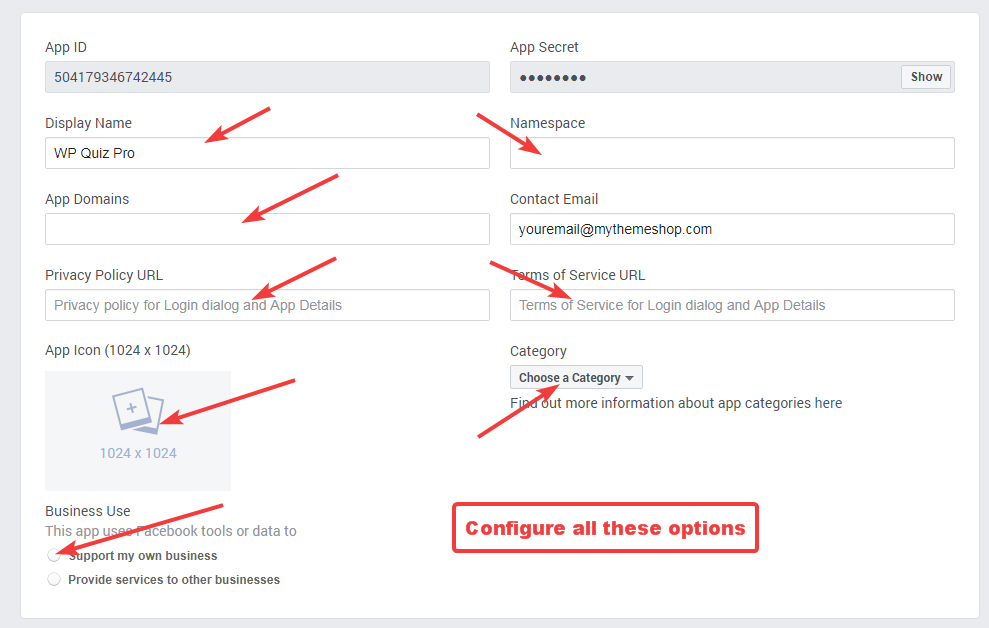
You’ll be taken to another page with a lot of options similar to this.
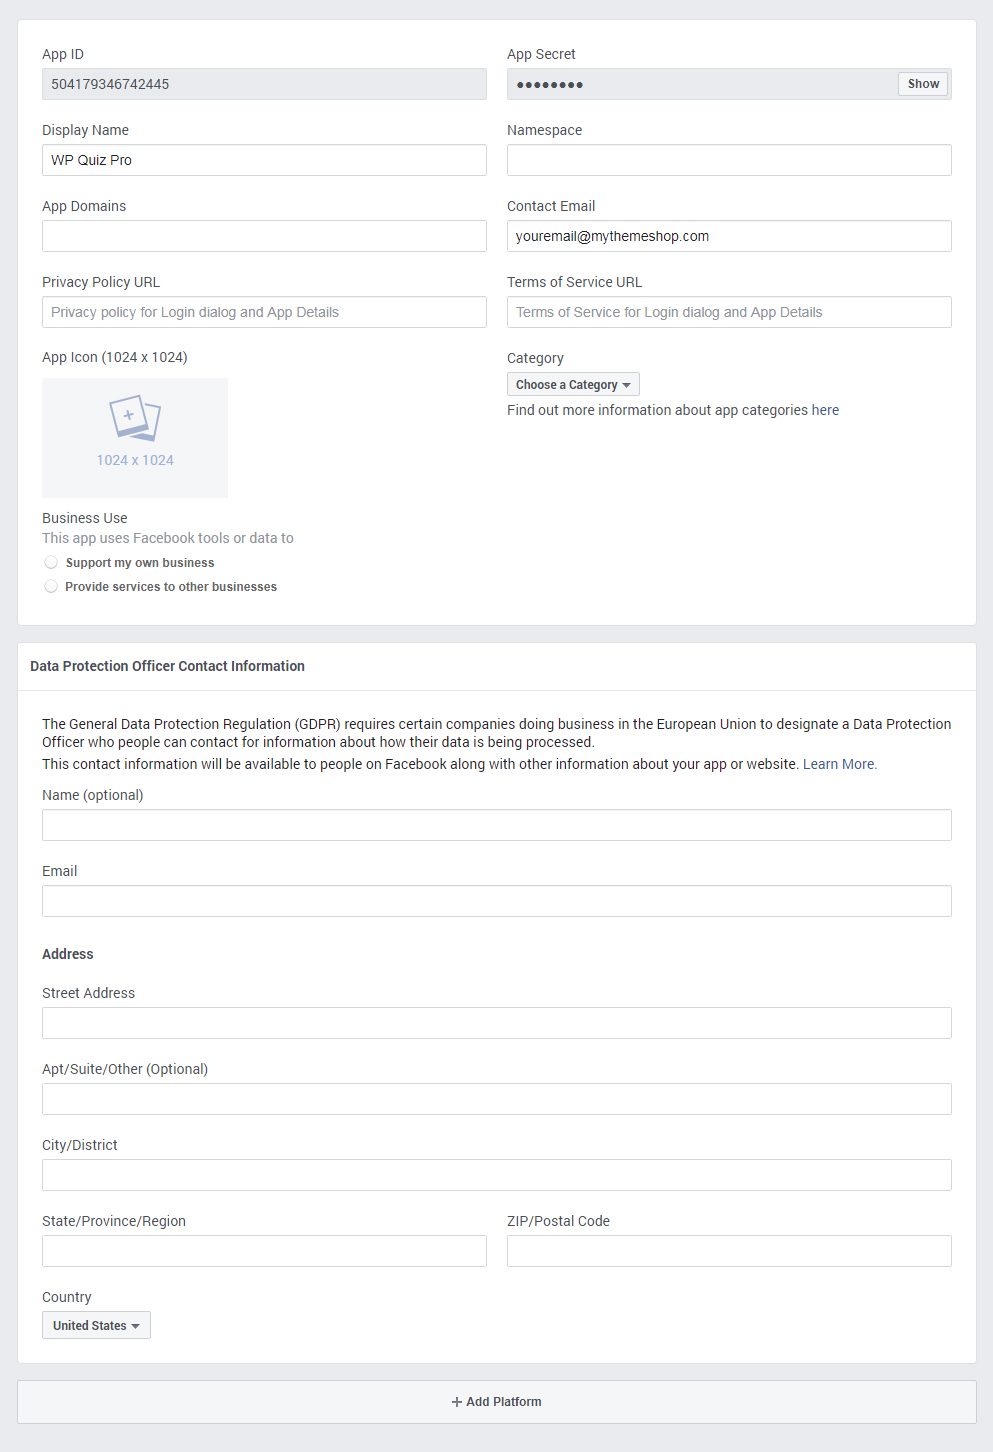
Let us explain how to configure these settings. In the first section, you have to enter a few things.
- Display Name: Enter the name of your website here for simplicity.
- App Domains: This will be your domain name.
- Namespace: This of this as a slug. For simplicity, enter your website’s name without spaces.
- Privacy Policy: Paste the link to your privacy policy here.
- Terms of Service URL: Paste the link to your terms of service.
- Category: Choose the category most relevant to your app.
- App Icon: Upload an app icon here.
- Business Use: Select the first option.
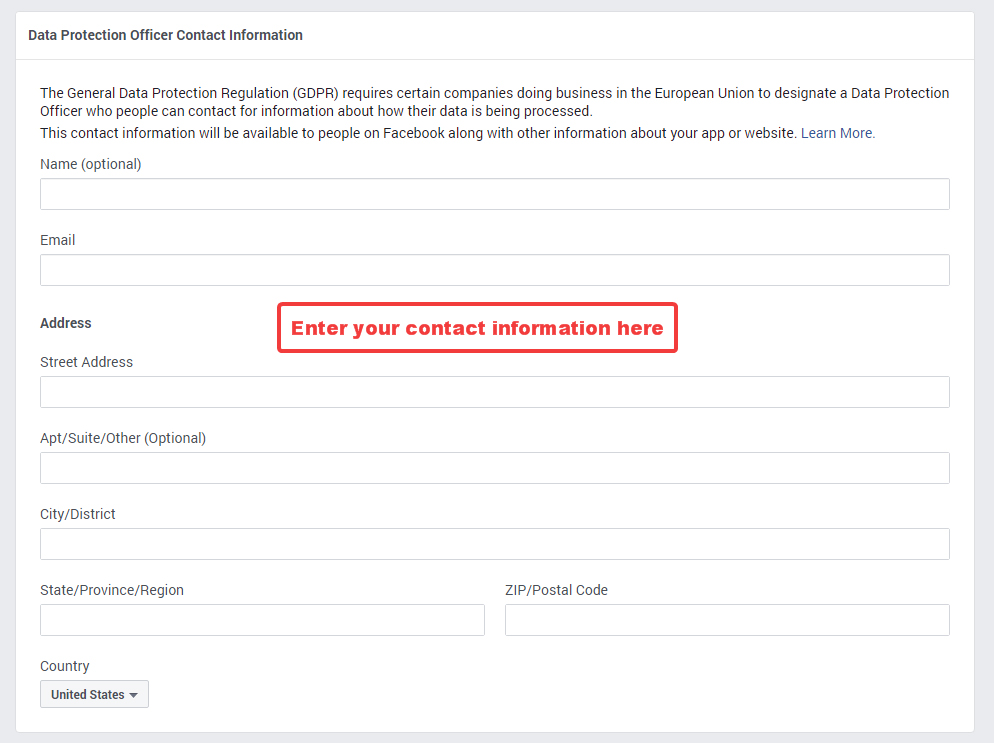
The second section is for GDPR Compliance. After the passing of GDPR, Facebook has changed its app-approval process, and all registered apps need to provide contact information for a GDPR officer. If you’re a one-person blogger or business, enter your own information there.
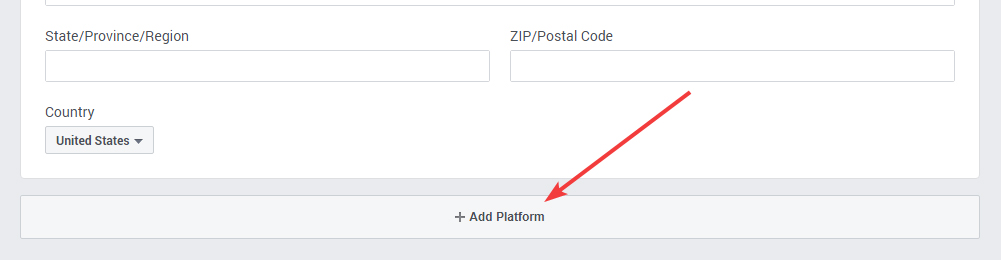
After that, click the Add Platform option.
From the options in the dialog box, choose “Website”, as WP Quiz Pro will work on your website.
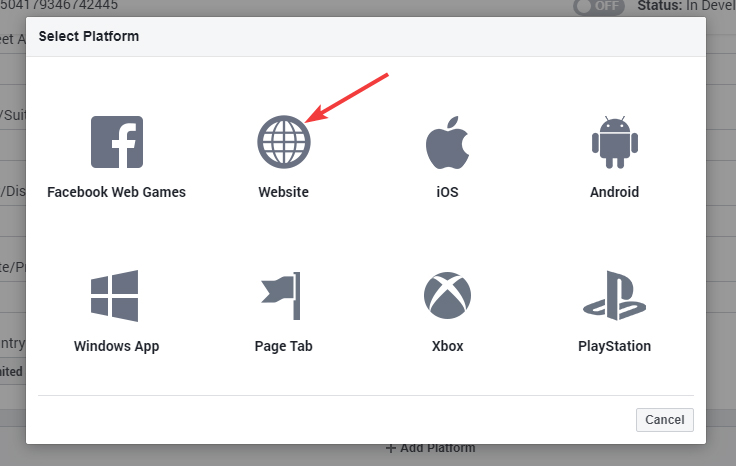
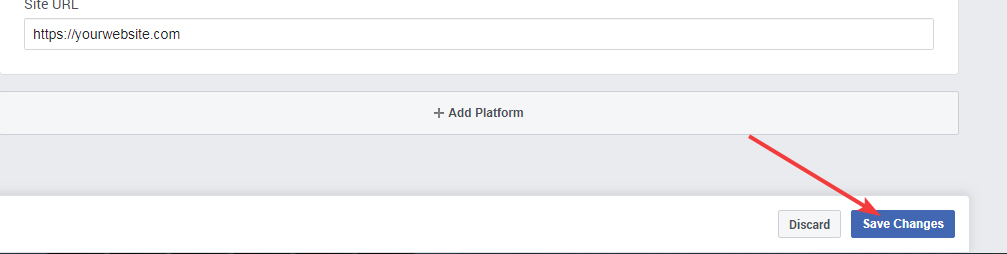
A new field will pop up. Enter the URL of your website in the field.

Don’t forget to save your settings.
Once you’ve configured everything, it’s time to make your application live by switching the live toggle on the top of the screen.
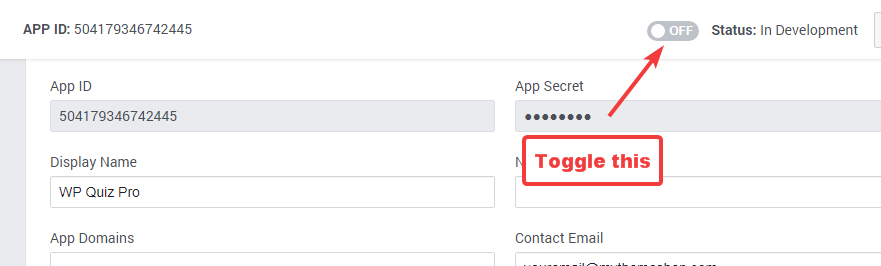
Once you make your app live, it will go through Facebook’s approval process, after which you will be able to use it on your website. In the meantime, you can still enter your App ID in WP Quiz Pro.
Copy your App ID from the top of the screen.
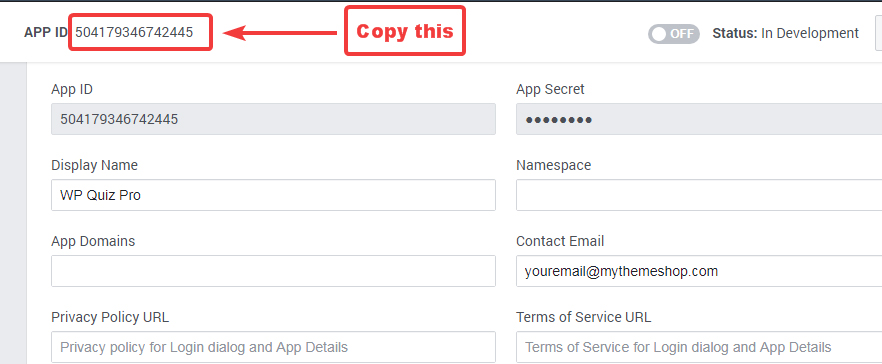
And paste it in the Facebook App ID field in the General Settings.

That’s it. You’ve configured your Facebook app to work with WP Quiz Pro. Just look out for an email from Facebook about your app’s approval. We would recommend not publishing any Facebook Quizzes in the meantime.
Stripe API Key
WP Quiz Pro has an option to make quizzes paid. That means users will have to shell out a little cash to play and enjoy your quizzes. To collect the money, WP Quiz Pro integrates with Stripe.
To process payments seamlessly, WP Quiz Pro needs your Stripe API, which you enter in this setting.
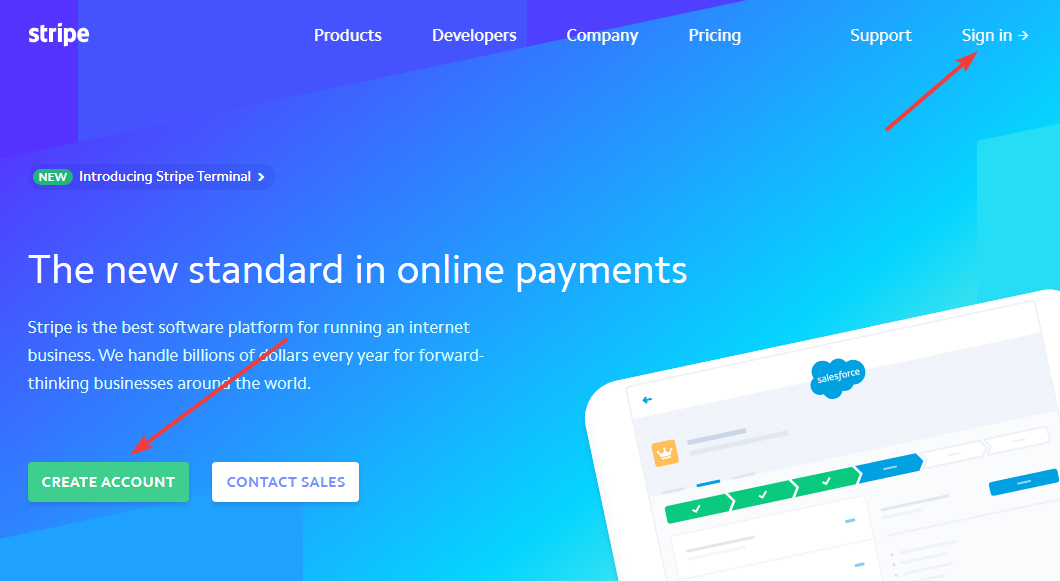
Note that you’ll need to be a registered business to process payments from Stripe. Head over to Stripe.com and create an account, or sign-in if you already have an account.
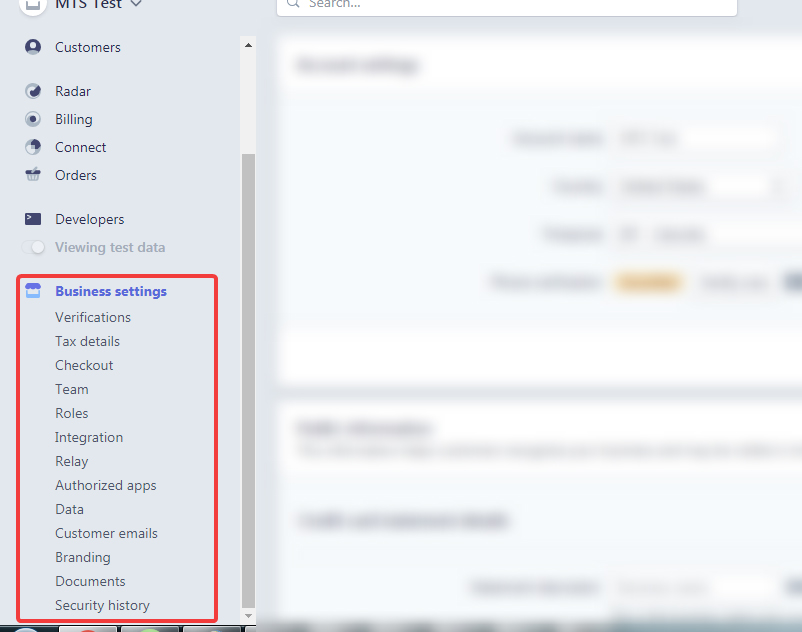
If you create an account, you’ll need to follow some steps to verify your account. Those steps will include verifying your email, phone number, and business registration. You will find most of these settings in the Stripe Dashboard > Business Settings.
Once everything is set up, you’ll need to go to Stripe Dashboard > Developers > API Keys.
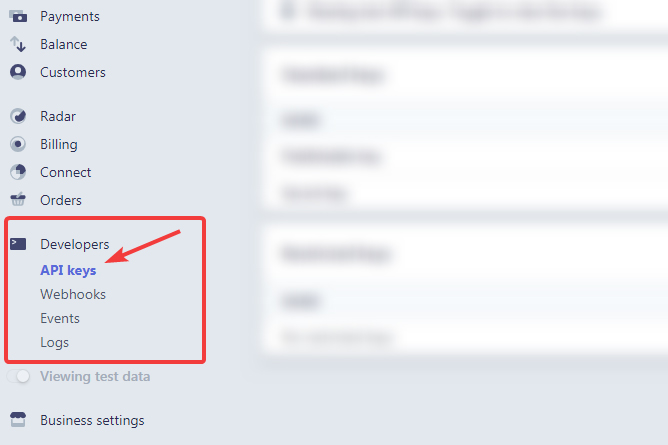
You’ll see 3 keys under the Standard Keys tab. The first one is the Publishable Key, while the second one is the Secret Key. Click on the Reveal Test Key Token button to reveal your secret key.

Your Secret Key will be revealed, and you’ll need to copy it to your clipboard. We’ve hidden parts of the key for security reasons.

Paste the key in the Stripe API Key setting inside WP Quiz Pro.

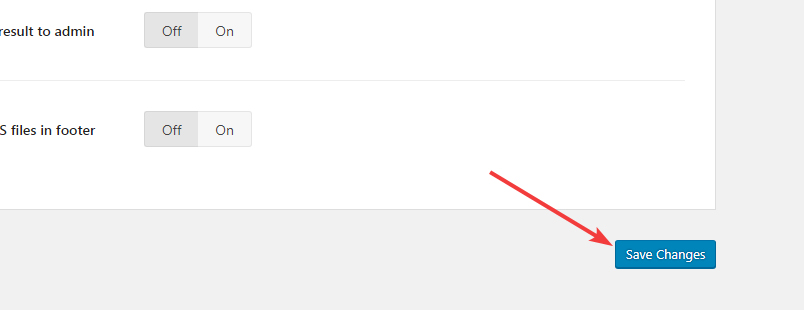
Then, save your settings.
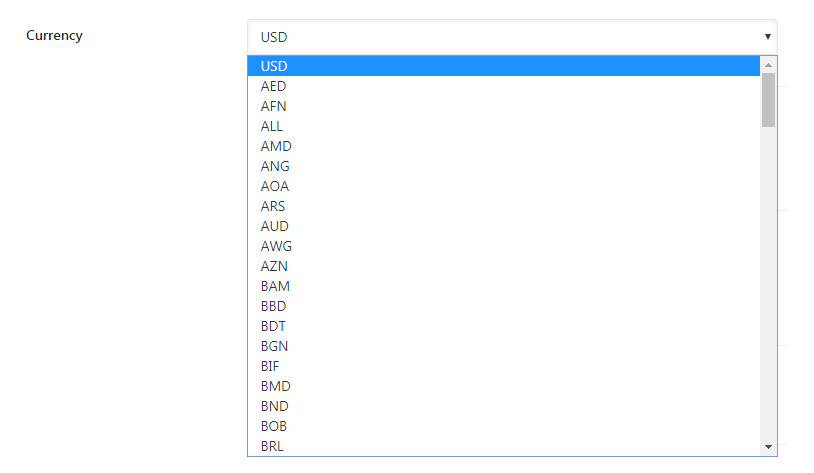
Currency
In this setting, you can set the currency you want your users to pay in. WP Quiz Pro supports all major currencies, a small sample of which can be seen in the image below.
MyThemeShop Username
If you include the WP Quiz Pro and MyThemeShop branding with your quizzes, you can make some money whenever someone clicks on the branding and purchases WP Quiz Pro for themselves. This is enabled by our affiliate program, and each MyThemeShop customer gets an affiliate account, including you.
If you’d like to make money by promoting WP Quiz Pro with your quizzes, all you have to do is paste your MyThemeShop user ID in the field, and we will take care of the rest. We provide detailed analytics about the number of people who click on your link and purchase.
If you don’t know your MyThemeShop user ID, here is how to find it.
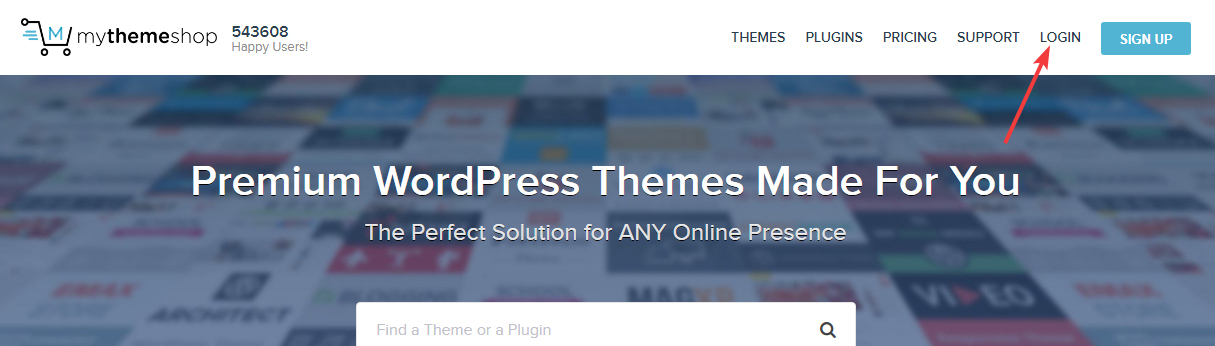
First, log into MyThemeShop with your username and password.
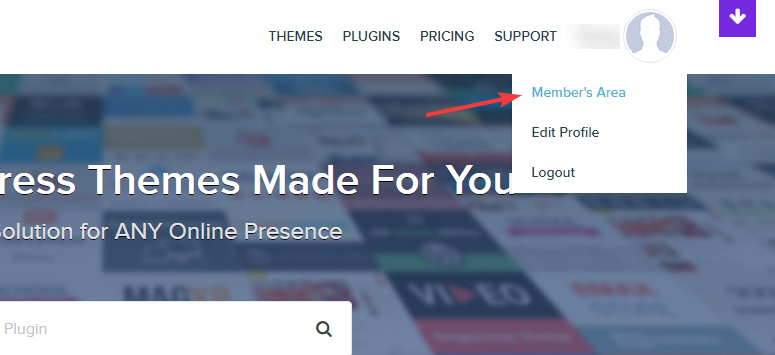
You should be logged into the member’s area automatically. If you aren’t, reach click the link to the member’s area from your username.
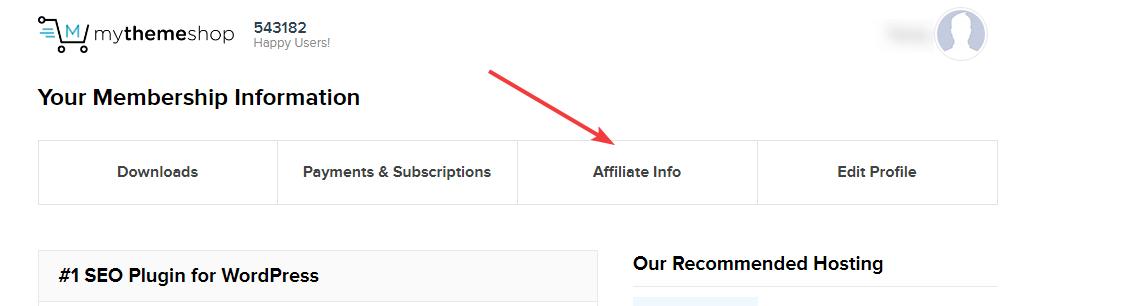
On the member’s page, click the Affiliate Info tab.
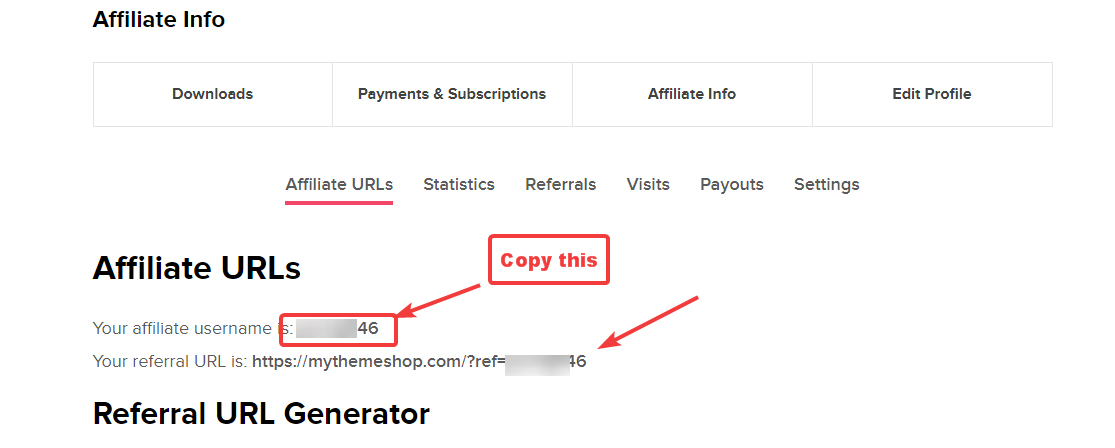
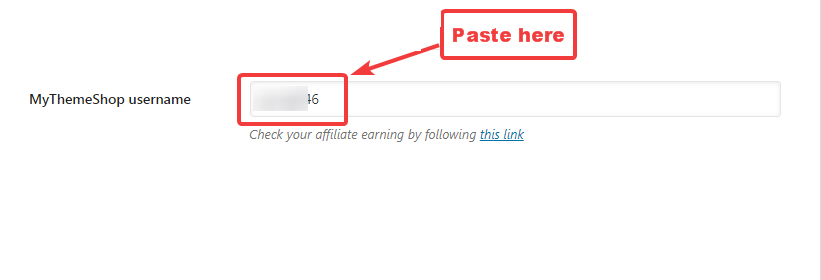
You will find your MyThemeShop user ID prominently highlighted on the screen. Copy the user ID to the clipboard.
And paste it in the MyThemeShop user ID setting.
Don’t forget to save your settings.
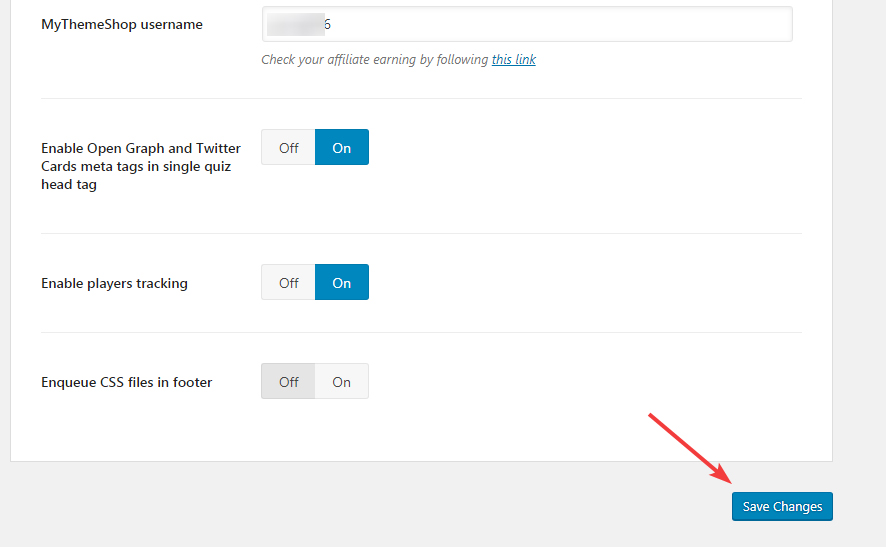
Enable Open Graph Meta Tags
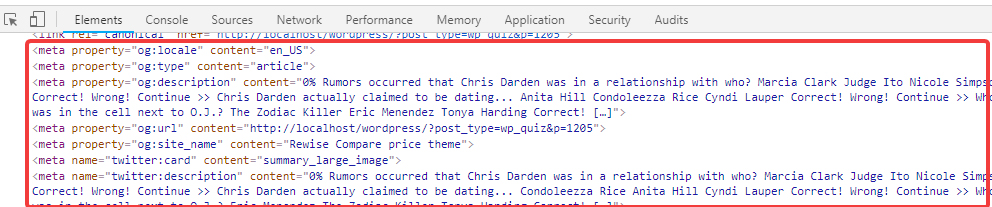
If this option is enabled, WP Quiz Pro will add the appropriate Open Graph meta tags and Twitter meta tags to the quiz page. This will help Facebook and Twitter understand the page better, and in turn, it will be better when your users share content across any of the social media. Here is what the code looks like, just for example.
Enable Players Tracking
WP Quiz Pro has the capability of tracking individual players and their activities on quizzes in detail. If you’re creating quizzes just for fun and engagement, then you probably don’t need to know how each user performed. But there are many cases, such as education, where individual tracking of a user’s performance is an important goal. For those quizzes, you can enable the “Enable Players Tracking” feature.
By default, the feature is enabled, and you’ll see the “Players” option in the WP Quiz Pro menu when it is.
![]()
If you disable the option, the Players menu option will also be disabled.
![]()
Enqueue CSS Files in Footer
Each quiz that you create has some styling associated with it which is stored in CSS files. Whenever a quiz is loaded, the CSS files are loaded with it. While we have worked hard to compress and minimize the CSS files, they will have a tiny impact on your page load speed. On most websites, it won’t even be noticeable. But, if a website’s server is already overloaded, it might cause issues.
For those websites, we’ve added the Enqueue CSS files in Footer option. This option moves all the CSS files for the quiz to the footer area of your website, which means they will be loaded last. This will keep the website’s loading speed unchanged while having minimal impact to the user experience.
By default, this option is disabled. But if you’re experiencing slow load times after using WP Quiz Pro and are certain that the slowness is because of WP Quiz Pro, then you can enable this option.
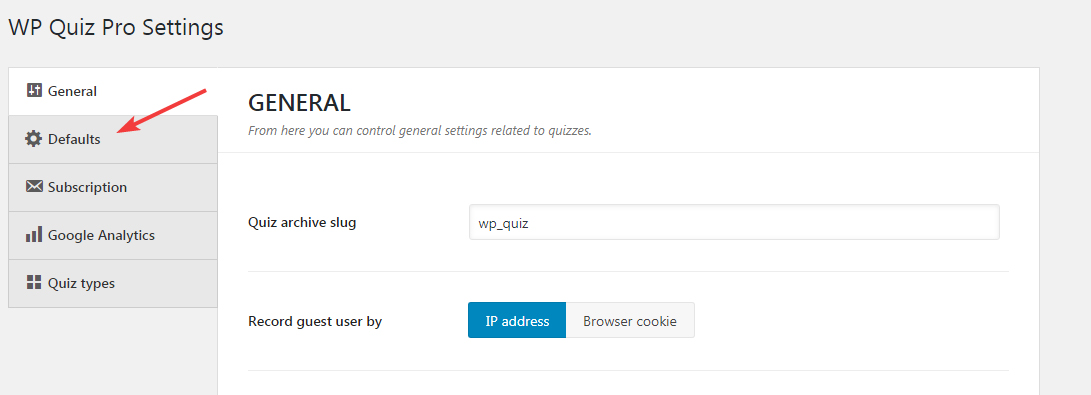
Defaults
Switch to the default settings of WP Quiz Pro by clicking the Default tab in the tab menu.
Before getting into the details, let us get into what the default settings actually do. WP Quiz Pro offers plenty of customizations, and with each quiz you create, you can configure it to your heart’s content. But, if most of your quizzes use the same or similar settings, that means you spend time configuring each quiz for no good reason.
The default settings help in solving that problem. Once you create a set of default settings, all your new quizzes will use the same default settings. This will save you a bunch of time in configuring new quizzes.
Now that you understand what the default settings are, here is a list of all the default settings that you can configure.
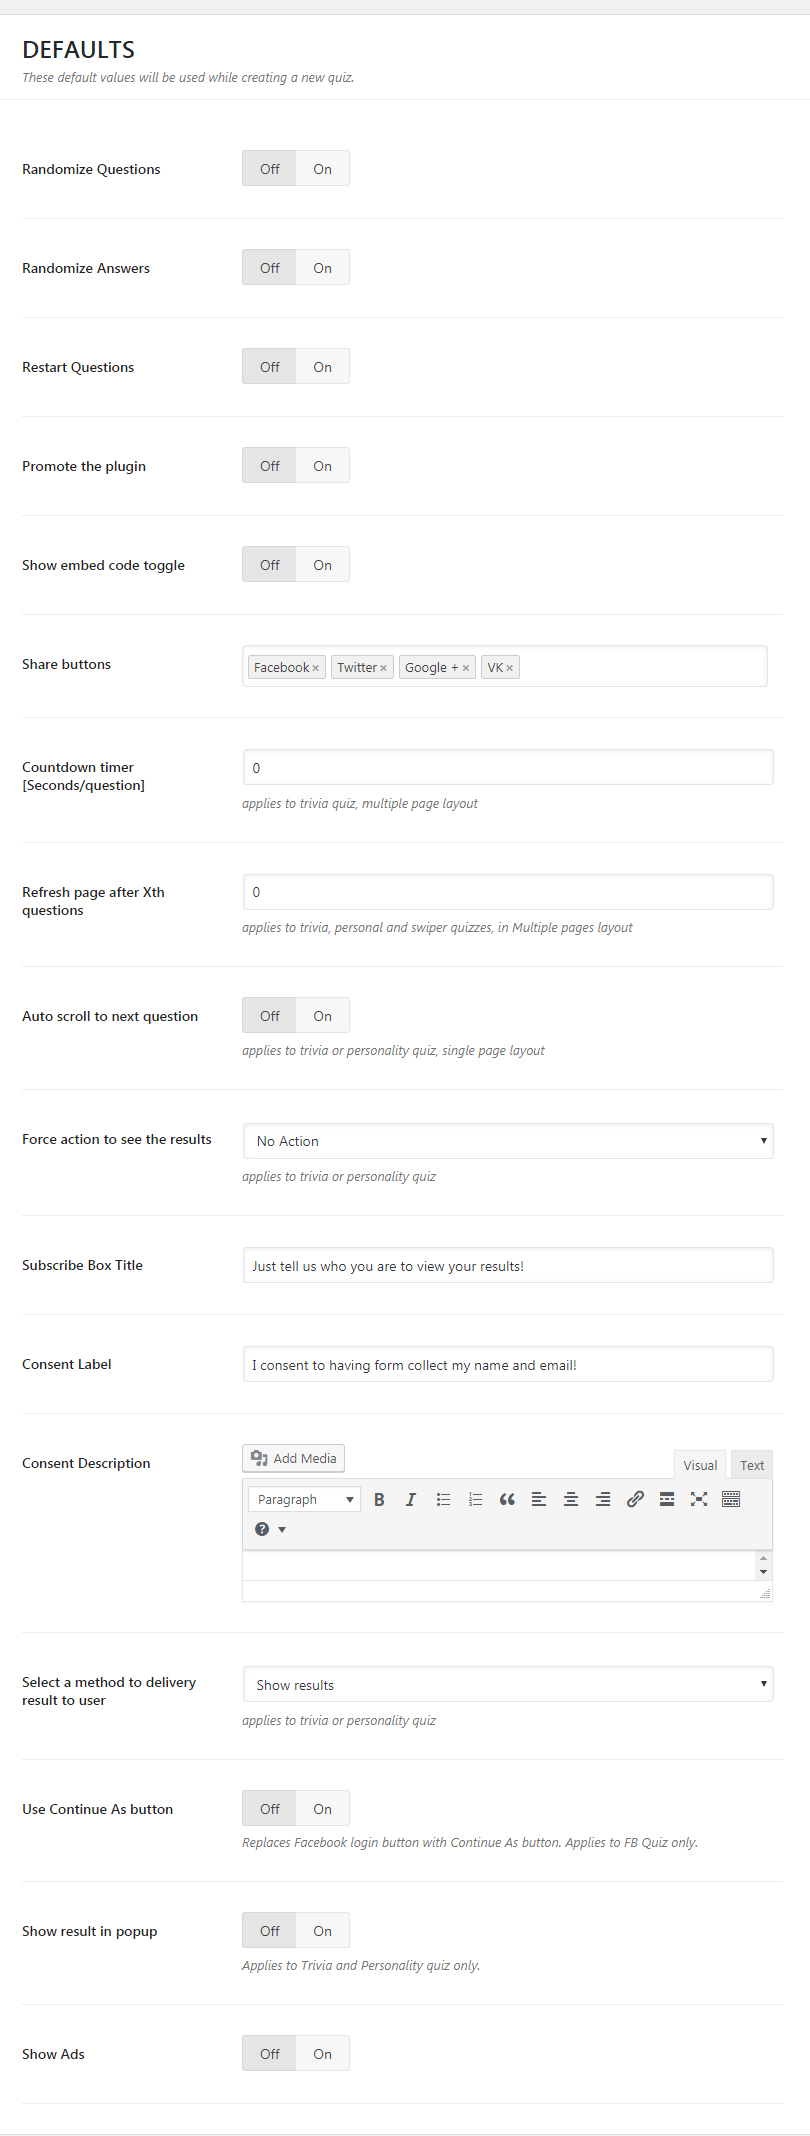
As you see, there are plenty of settings, but they are simple to understand.
Before we explore the settings, it’s important to let you know that all the settings are not meant for all the quiz types. Some settings are only available for certain quizzes, and we’ve mentioned that just below the setting itself. We will also share that information when we discuss the settings in detail.
Randomize Questions
- Applies to: All Quizzes
Each quiz can have multiple questions, and this setting configures if the questions always appear in the same order or not. If you enable the setting, the questions will appear in a random order for each user. Obviously, do not enable the option for quizzes where the order of the questions is important.
Randomize Answers
- Applies to: All Quizzes
In quizzes that require users to select an answer, the quiz can become predictable if the users play it multiple times. If you enable this option, then the order of the answers will be shuffled, and users will have to focus every time and give the right answers to get a good score.
Restart Questions
- Applies to: All Quizzes
The restart questions is a simple little feature that lets players play a quiz multiple times. When enabled, it adds a [] button at the end of the quiz. If the users click the button, they can then play the quiz again. It’s a simple, but powerful technique to get more engagement from users. Here is a simple demo.
Enable the feature.

And this is how the button will appear on the screen.
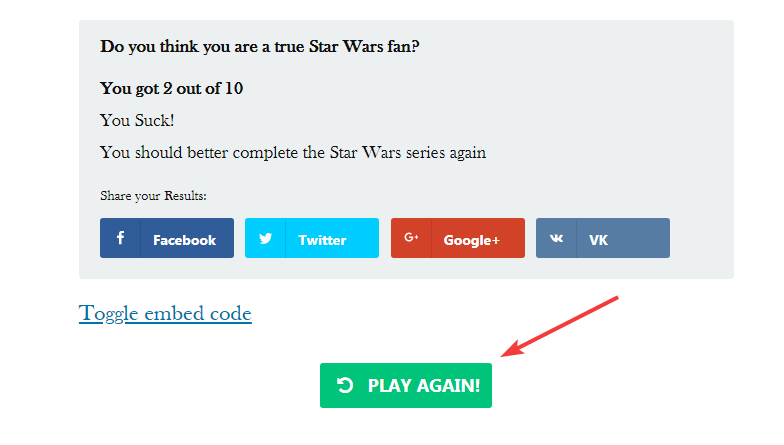
And no, we don’t suck at quizzes about Star Wars.
Promote the Plugin
- Applies to: All Quizzes
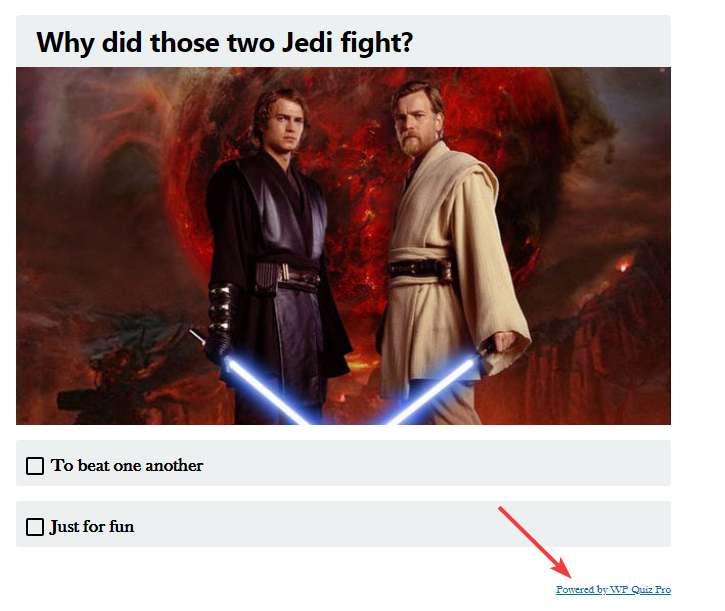
You can make some money by promoting WP Quiz Pro through your quizzes. When this feature is enabled, a small link is placed alongside the quiz which says “Powered by WP Quiz Pro”. If you’ve also configured your MyThemeShop account inside WP Quiz Pro, then the link will automatically be converted to your personalized affiliate link.
Then, if a user clicks the Powered By link and purchases WP Quiz Pro for their website, you will earn a handsome commission. It’s basically free money. Here is how the link appears on a quiz.
Show Embed Code Toggle
- Applies to: All Quizzes
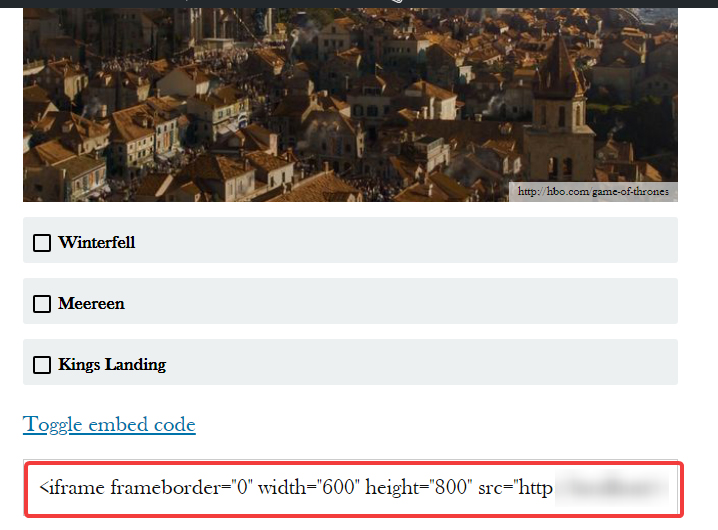
If you’d like quizzes from your website to be embedded on another website, or at least give other websites the option of doing so, then this option will prove quite useful. If you enable this option, an embed code toggle will be included just at the end of each quiz. When a user clicks the link, the code for embedding the quiz will be displayed, which the user can then copy and paste on their website to embed the quiz on their website. Here is how it works.
Option Turned Off.
Option Turned On.
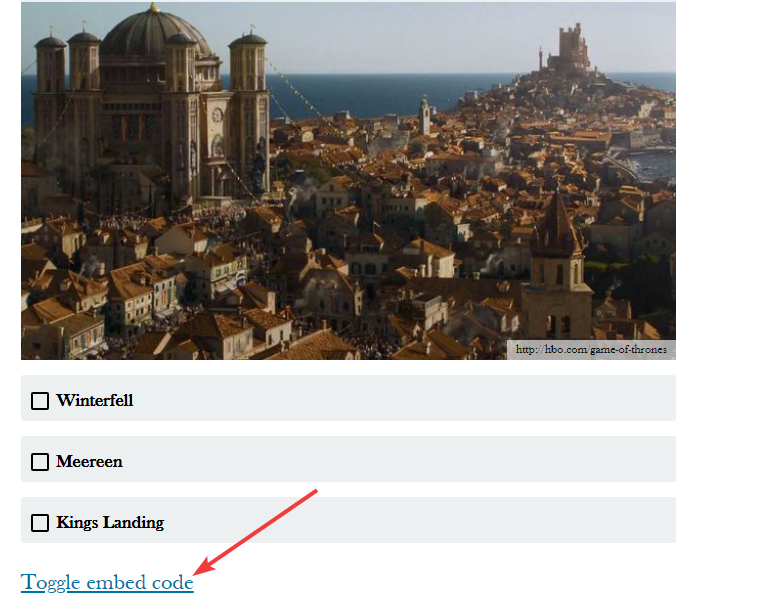
Clicking the Toggle Link.
Share Buttons
- Applies to: All Quizzes

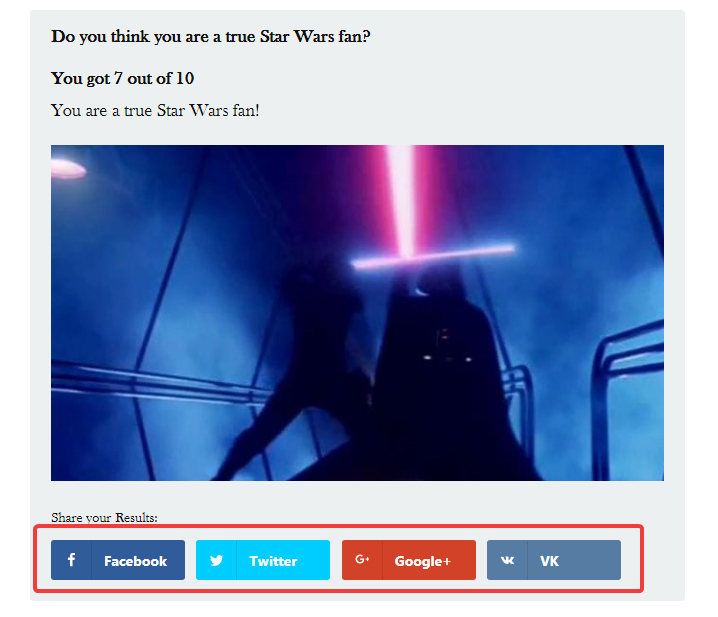
A quiz’s power increases exponentially when it features some form of sharing. This feature lets you configure exactly that. Just type in the name of a social network, and if it is supported, its name will pop up. Currently, WP Quiz Pro supports 4 social networks, and we will keep more networks in the future.
Here are the social networks that are supported.
- Google+
- VK
We know that Google has already announced that they will shut down Google+, but till the time it actually happens, support for Google+ sharing will remain in WP Quiz Pro.
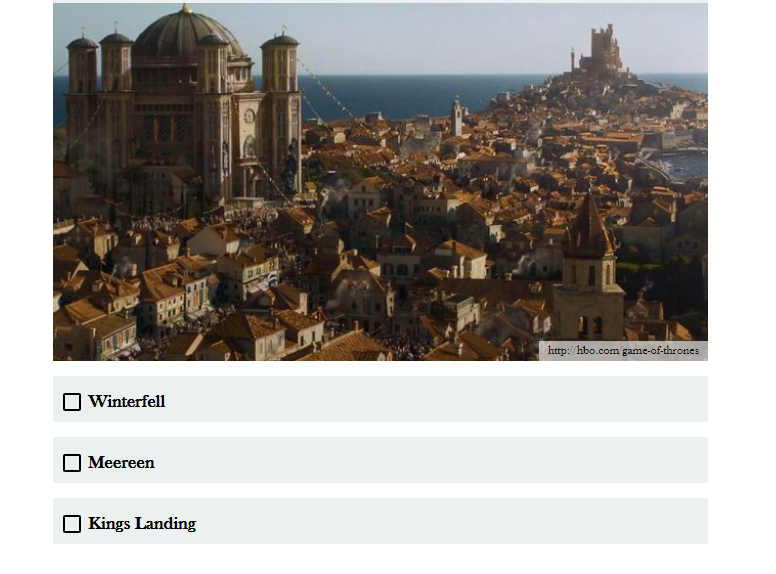
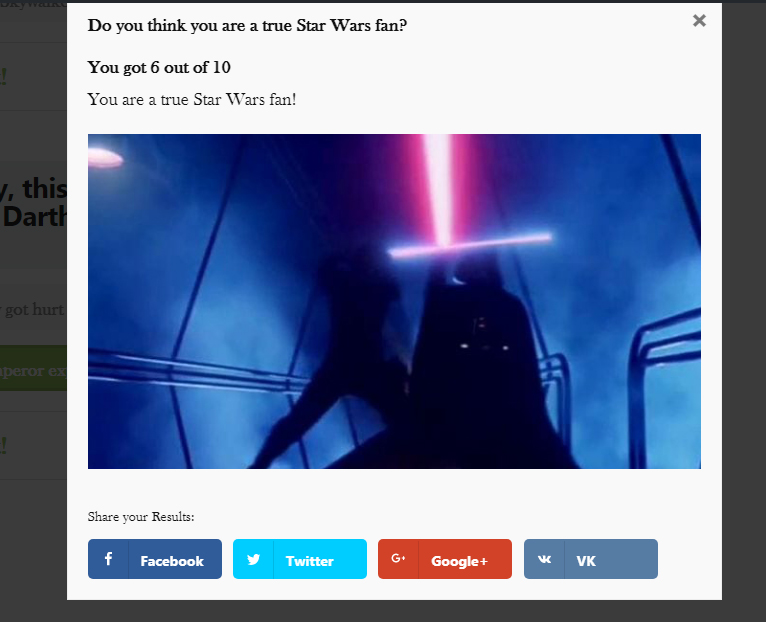
That’s all about configuring sharing. Now let us show you how it works. If sharing is enabled on a quiz, users will see sharing options when they complete a quiz, and the results are displayed on the screen.
Countdown Timer
- Applicable to: Trivia Quiz in multi-page layout

To induce a sense of urgency, you can set a time with the trivia quiz, which will force the users to finish the quiz in the given time. Here, you need to enter the time in seconds that you want to give the user to answer each question. As different quizzes can have a different number of questions, it makes sense to configure the time on a per-question basis.
When you create a trivia quiz, you can create a timer for the entire quiz. But, that will work only in the single page layout of the quiz. We’ll cover that in detail in the tutorial about creating quizzes.
Here is how the quiz-level timer appears in action.

Note that if the timer expires before the user could answer all the questions, then only the answered questions would count towards their final score, and the questions not answered will automatically be qualified as wrong answers.
Refresh Page after Xth Question
- Applies To: Trivia, Personal and Swiper quizzes, but only in Multiple pages layout

The Refresh Page after Xth question is a pretty simple feature which refreshes the page after X number of questions. As we mentioned, the feature is only applicable to certain quizzes in the Multiple Page mode. In that mode, every question of the quiz appears on a different page. WP Quiz Pro uses AJAX to load new questions without refreshing the page seamlessly. But, if you’d like to have the page reloaded, you can use this setting to do so.
Auto Scroll to next Question
- Applies To: Trivia or Personality Quiz on Single Page Layout
This is a pretty useful feature. To get the most responses out of your quizzes, you have to make it as easy as possible for the user to participate. By default for every quiz, the user has to answer a question, then scroll to the next question. While it isn’t much effort, the chances of users dropping are still high. When this feature is enabled, the user is automatically redirected to the next question as they answer a question. As an additional feature, if the user accidentally skips a question and reaches the end, then they are automatically redirected to the question(s) that they skipped.
Enabling this feature almost guarantees that you will get more responses, and that is why we recommend that you enable it. Here is a small demonstration.
Enable the feature.

And see the feature in action.
Force Action To See Results
- Applies To: Trivia or Personality Quiz
Usually, the results of the quiz are displayed to the user as soon as the user finishes a quiz. If you’d like to alter that behavior, then you can use this setting.
This setting gives you 4 options to change the default behavior.
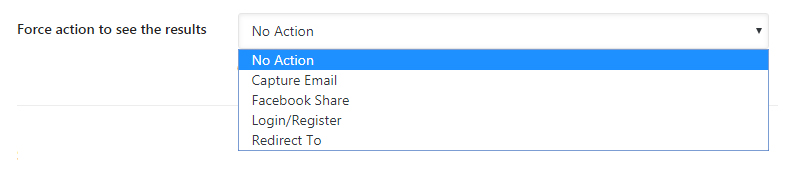
Here are the 4 options.
- Capture Email
- Facebook Share
- Login/Register
- Redirect To
Here what each how each of the options works.
Capture Email
This option helps you capture email addresses of people who play your quizzes.
Simply set the option to capture emails.

And this is how the email capture dialog box will appear once a user finishes a quiz.
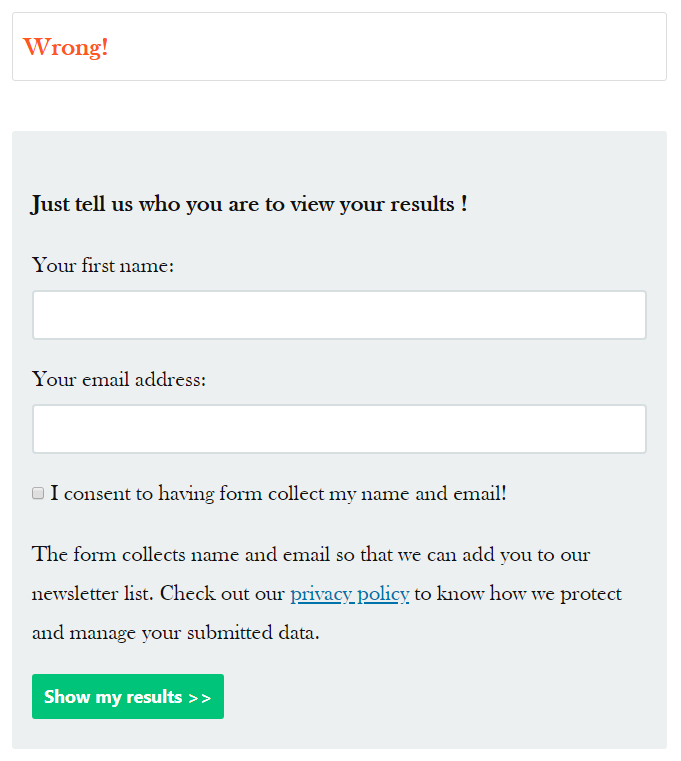
Once the user submits the information, they will receive an email with their results. The source of the email is configured in the Subscription Section.
You can also customize the copy that appears on the email capture form. We will demonstrate that in the next section.
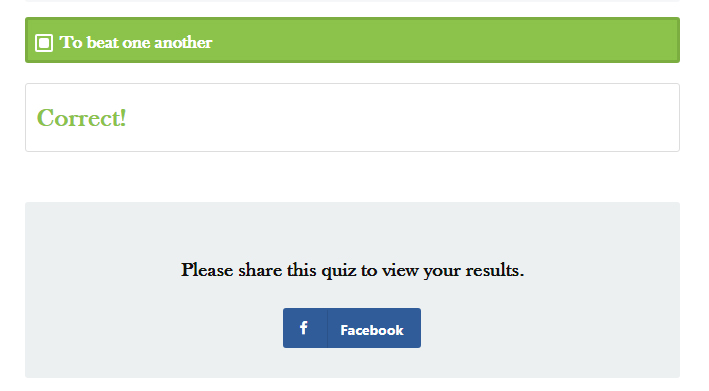
Facebook Share
This option is pretty self-explanatory. It forces the user to share the results of the quiz on Facebook to reveal the results. Here is how it appears.
Set the option to Facebook Share.

Once a user finishes the quiz, this is what he/she will see.
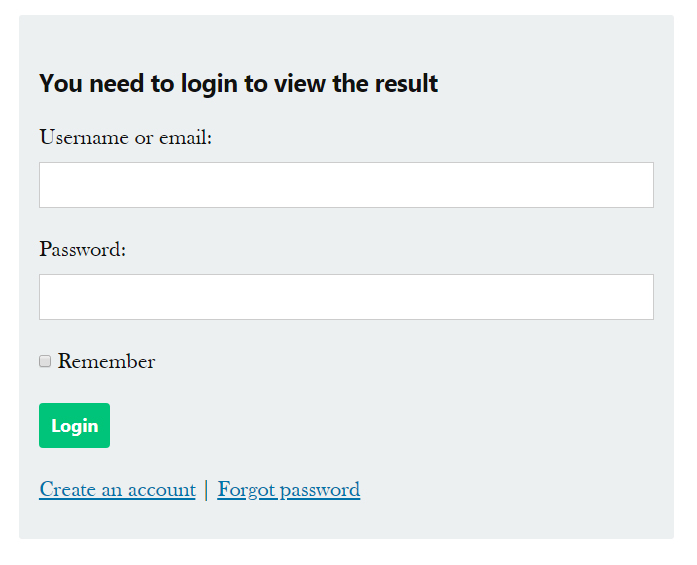
Login/Register
The Login/Register action encourages users to register to your website to see the results of the quiz.
By default, users will be asked to log in once they complete a quiz, but links to register, and even recover their passwords are also handy. Here is how the users will see the registration options.
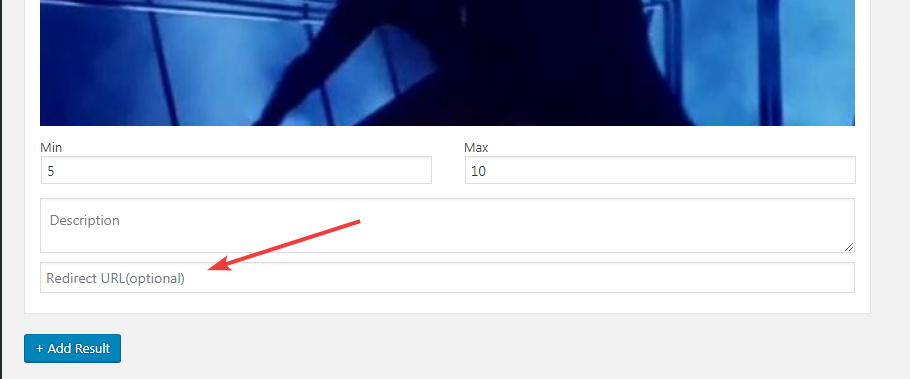
Redirect To
The third and final user action that can be configured is the Redirect To option. This option allows you to redirect users to a specific URL based on the results that the user got on the quiz.
Using this option creatively can open up a bunch of possibilities for segmenting your users. Since the redirect happens on a per result basis, you can redirect them to relevant content, affiliate offers, training videos, or any URL of your choice. You can also create custom audiences on Facebook if you’re using a Facebook Pixel on your website.
Since the redirect is created per result, you’d have to set it up on the Quiz Page, when you create the results for your quizzes. We will cover that in detail in the Quiz Creation tutorial. For now, here is a screenshot of how where you’d create the redirect.
Subscribe Box Title
- Applies To: Whenever the Email Capture is used
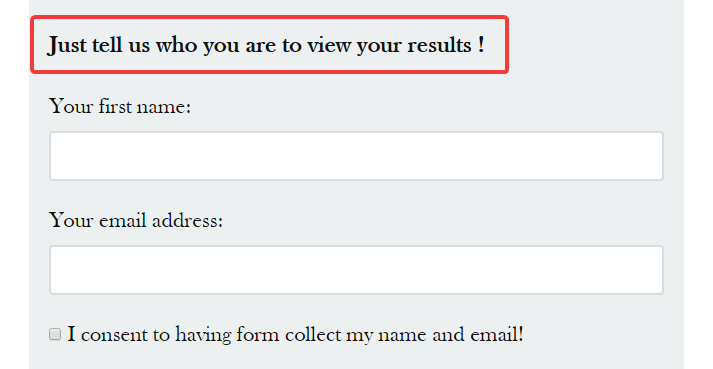
This setting only applies when you’re using the email-capture option. As we showed you earlier in the email capture demonstration, users are presented with a form at the end of the quiz, where they are requested to share their information.
The Subscribe Box Title option lets you customize the title of the subscribe form. Here is the default text that is configured.

And this is where it shows up on the email submit form.
Consent Label
The Consent Label setting affects the consent checkbox on the email submit form. Since the GDPR regulation, it is mandatory to acquire explicit consent before signing up users to any newsletter or email service.
Here is the default description of the Consent Label.

And here is how it appears on the email capture form.

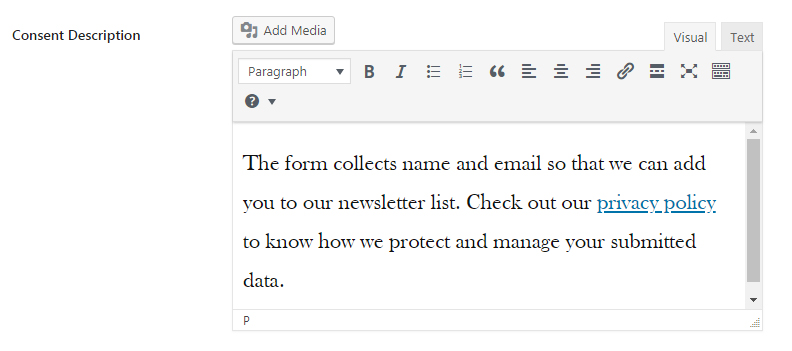
Consent Description
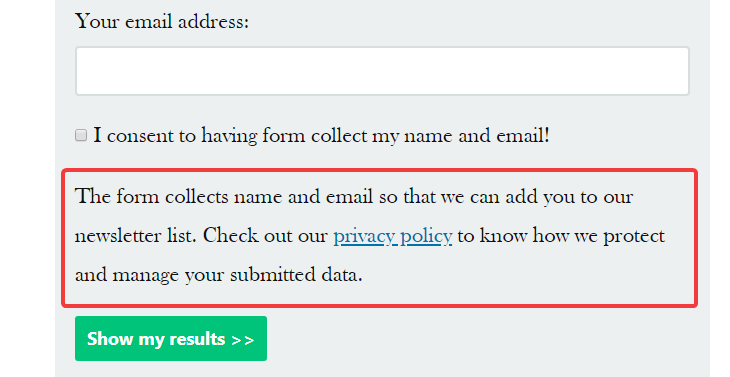
The Consent Description is the text accompanying the consent checkbox. It’s used to describe in brief, what will you do once you capture the user’s information.
It’s important to have a descriptive message about how you will use the user’s information while reassuring them of their privacy. That will make users more comfortable in sharing their information.
This is the only setting that can be configured with the TinyMCE editor as it is recommended that you add links to your Privacy Policy in the text as well.
Here is the how the setting is configured by default.
And here is how the message appears to the user on the email collection form.
Result Delivery Method
This setting is only applicable if you use the email capture option. What this setting does is offer a way to customize the email capture process a bit further. There are 3 options available.

Here is how each of the settings affects the user.
- Show Results: When this option is selected, the results are shown on the screen once the user submits his or her email. No email is sent to the user in this case.
- Show Results and Send Email: In this case, the results are shared on the screen, and an email is also sent with the results.
- Email Results Only: In this case, the user’s results are shared only via email, and are not displayed on the screen.
Use Continue As Button
- Applicable To: Only Facebook Quizzes
This setting replaces the Facebook Login button with a continue button. Both buttons aren’t different, but the continue button is more personalized, which can get better results. Let us demonstrate with an example.
When the Continue As setting is turned off.

This is how the Facebook Button appears.

But, when the setting is turned On.

The button would appear something similar to this.

Obviously, the name and the profile picture will be picked from the currently logged in profile. Basically, every user who takes the quiz will see their name and profile picture on the button.
Show Results in Popup
- Applies To: Trivia and Personality Quiz Only
Till now, you might have noticed that the results of a quiz are displayed just below the quiz. But, WP Quiz Pro can also share the results of the quiz in a popup window.
The benefit of using a popup is that it grabs attention, and users are more likely to take action (sharing, etc.) when results are shown in a popup.
Here is a small demonstration. Enable the setting.

And here is how the results are displayed for a quiz.
Please note that the popup is not compatible with all forced user actions. For example, in the image above, you can see the popup working seamlessly with social shares. But, if the user action is set to email capture, the popup will be disabled.
Show Ads
- Applicable To: All Quiz Types

The Show Ads option is pretty self-explanatory. It helps you include ads between your quizzes to generate some revenue. Enable the setting to see additional options.
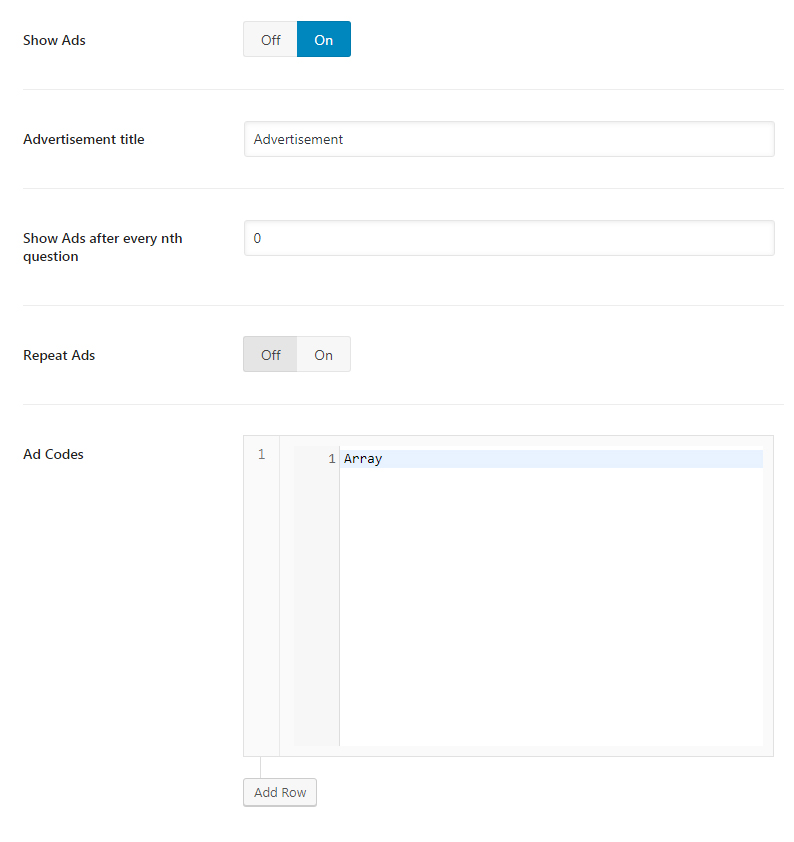
Advertisement Title
This option sets the title that is shown above the ad.
Show Ads after every nth question
This option sets the frequency of your ads by setting the interval between each ad. The number that you put into the setting will set the number of questions after which an ad is displayed to the user. While frequent ads can lead to higher revenue, they can also irritate users and cause them to abandon your website. Keep that in mind while setting this up.
Repeat Ads
If you’d like the same ad to be repeated multiple times throughout the quiz, enable this option.
Ad Codes
Here you enter the ad-codes for the actual ads that will be displayed in the quizzes. You can add multiple rows by clicking the “Add Row” button.
Subscriptions
To capture more leads, we’ve built WP Quiz Pro with an email capture feature. When enabled, it prompts the user to enter their email address to get the results of the quiz.
Email capturing is easy, but you also have to send the results of the quiz to the user. That is where the Subscription option comes in. It helps connect your website with popular email service providers to share results with the user.
Currently, WP Quiz Pro supports 3 email service providers.
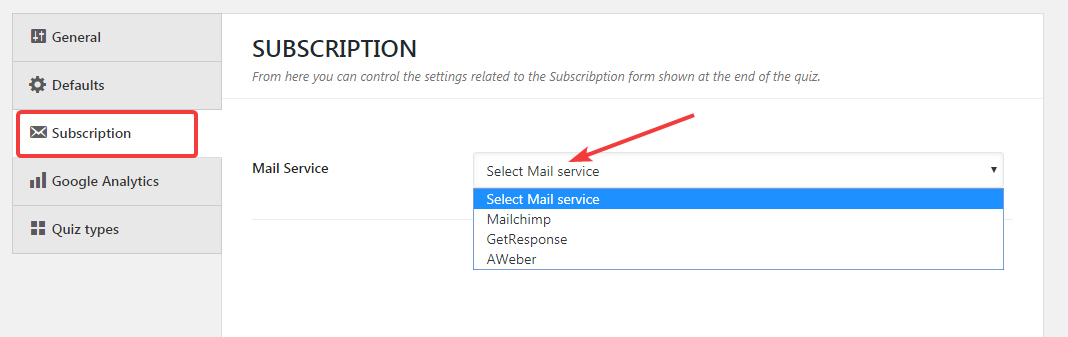
- MailChimp
- GetResponse
- AWeber
We will continue adding support for more services in the future.
Configuring any of these email services is pretty easy, and the process of configuring all 3 is quite the same as well. Here is a quick run-down of the process of configuring each of them.
Configure MailChimp
Select MailChimp from the list of email service providers. You will see additional option come up on the screen.

Here is how the options need to be configured.
- API Key: Enter your MailChimp API key here. To find your API key, log into your MailChimp account and visit this link.
- List ID: Enter the ID of the list you’d like to add people to.
- Double Opt-in: Double Opt-in requires users to click a confirmation link in their email to ensure that they own the email ID that they entered in the quiz. While the additional step reduces your opt-in rate, it does mean all your subscribers are verified.
Configure GetResponse
Select GetResponse to see the options to configure it.

GetResponse needs only 2 settings configured, and here is what you need to enter in them.
- API Key: Enter your GetResponse API key here. To find your key, log into GetResponse and visit this link.
- List ID: Enter the List ID on which your subscribers should be subscribed to.
Configure AWeber
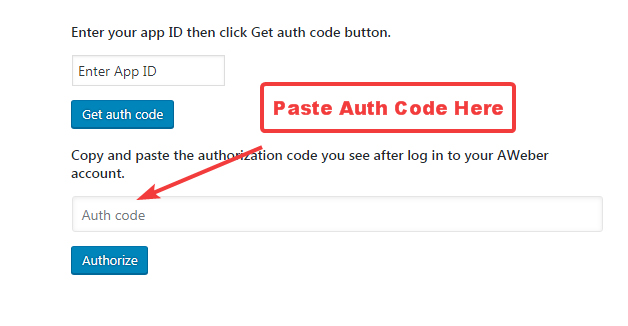
The last email provider is AWeber, which requires only one setting.
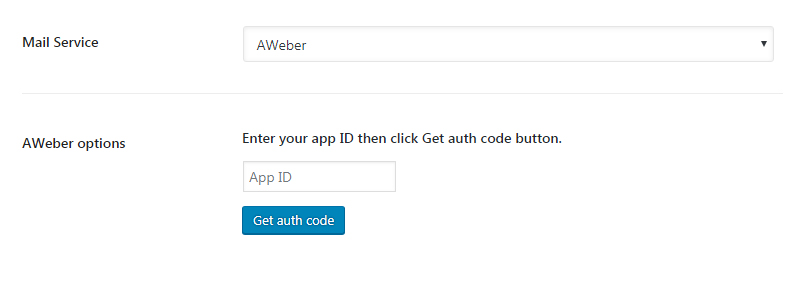
That setting is the App ID, which you will need to retrieve from your account and enter here. Once you enter the App ID, click the “Get Auth Code” button.

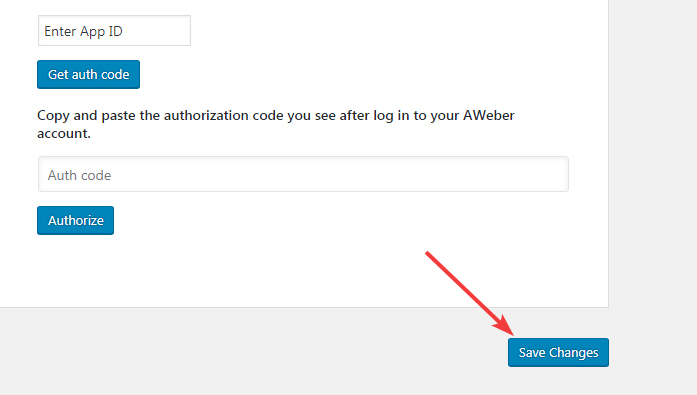
A dialog box will open up with an Auth Code from AWeber. Copy the Auth Code and paste it in the new Auth Code field that appears on the screen.
No matter what email service provider you configure WP Quiz Pro with, do not forget to save your settings.
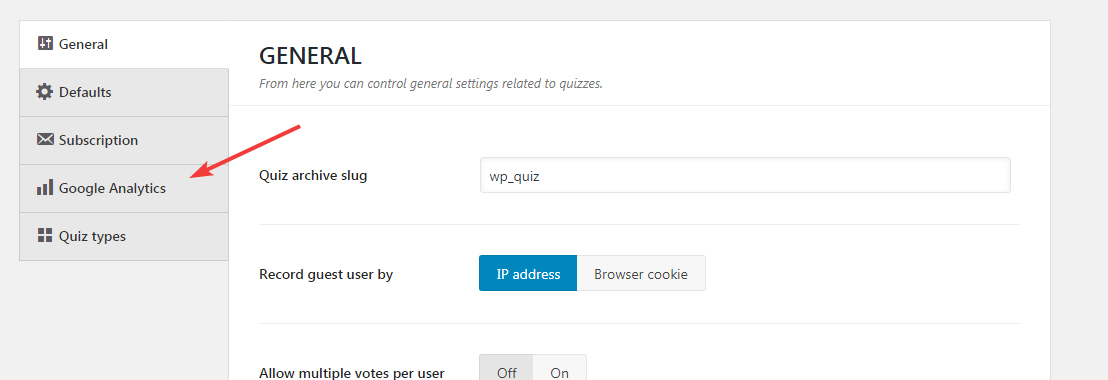
Google Analytics
To see all Google Analytics related settings, click the Google Analytics tab from the tabbed area.
You’ll reach the Google Analytics Settings page which should look something like this:
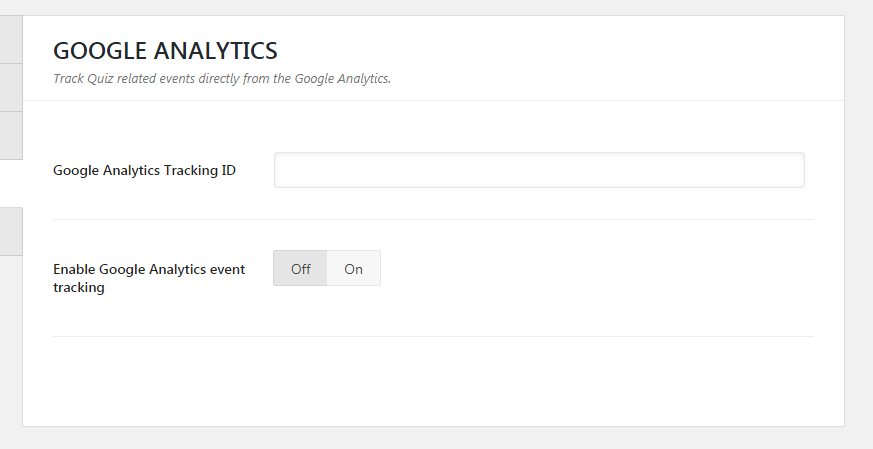
The first setting is where you enter your Google Analytics Tracking ID. Each property (website) that you have in your Google Analytics account has a unique ID associated with it, which helps differentiate it from other websites. Here is how to find out yours.
Go to the Google Analytics website and log into your account.
Once you’re logged in, head over to the Admin Section by clicking the Admin link from the main menu.
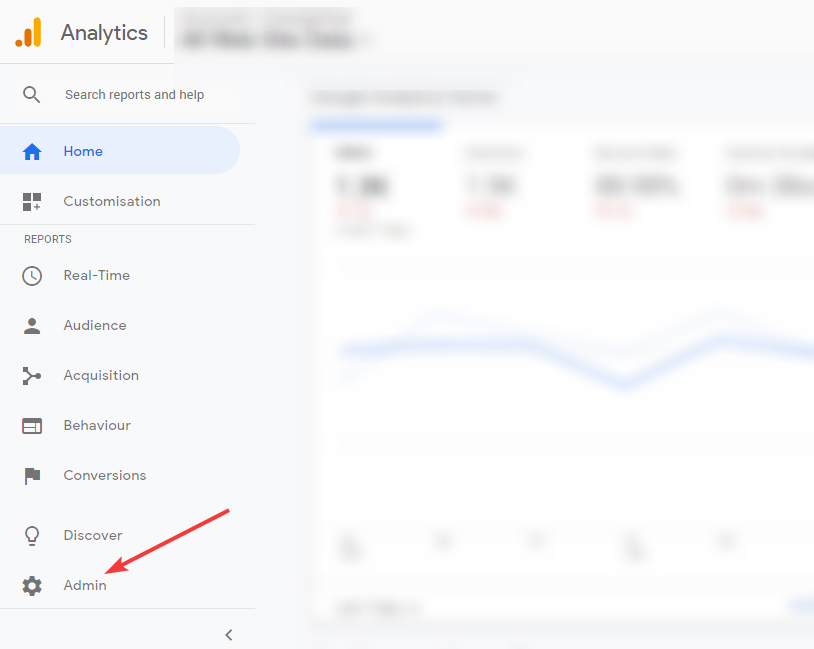
Once the page loads, click the Tracking Info link from the Property Menu.
![]()
From all the options that appear, click the Tracking Code option.
![]()
You will reach a page similar to the one below with your tracking ID listed on the screen. Copy your tracking ID to your clipboard. We’ve hidden part of the tracking ID for security reasons.
![]()
Then, paste the tracking ID in the Google Analytics Tracking ID field inside WP Quiz Pro Settings.
![]()
WP Quiz Pro also supports Google Analytics Event Tracking. Usually, Google Analytics only tracks which pages are users visiting. But, by setting up event tracking, you can also track how visitors are interacting with your page. In the case of WP Quiz Pro, you will be to see data about how many visitors actually participated in the content.
To enable Event Tracking, turn on the setting.
![]()
Once you turn it on, you will see 3 additional settings. Let us explain what the settings mean.
![]()
Event Category
The Event Category is the category that the event would fall in. Since the user is interacting with a quiz, you can leave the setting at its default value.
Event Action
The Event Action signifies what action was taken in the event. The default value of Submit works well in that case.
Event Label
The Event Label labels each event so that you can differentiate the different events of the same type. In the case of WP Quiz Pro, we’ve set it to the default value of <code>%QUIZ_NAME%</code>. The value is a variable, which is populated with the Quiz’s Name when the event takes place. This means that you will be able to identify events inside Google Analytics on a per-event basis, which is powerful.
To summarize, if you want to capture event-based data inside Google Analytics, just enable the Event Tracking inside WP Quiz Pro, and save your settings.
![]()
##Quiz Types
To access the Quiz Types setting, click the Quiz Types setting from the tabbed menu.
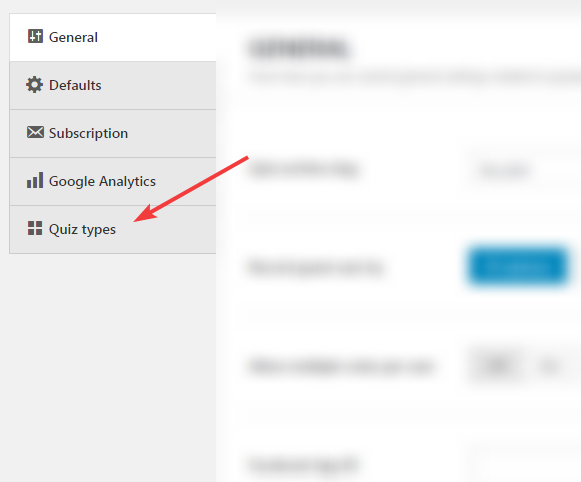
You’ll reach the Quiz Types option. You will see the following screen.
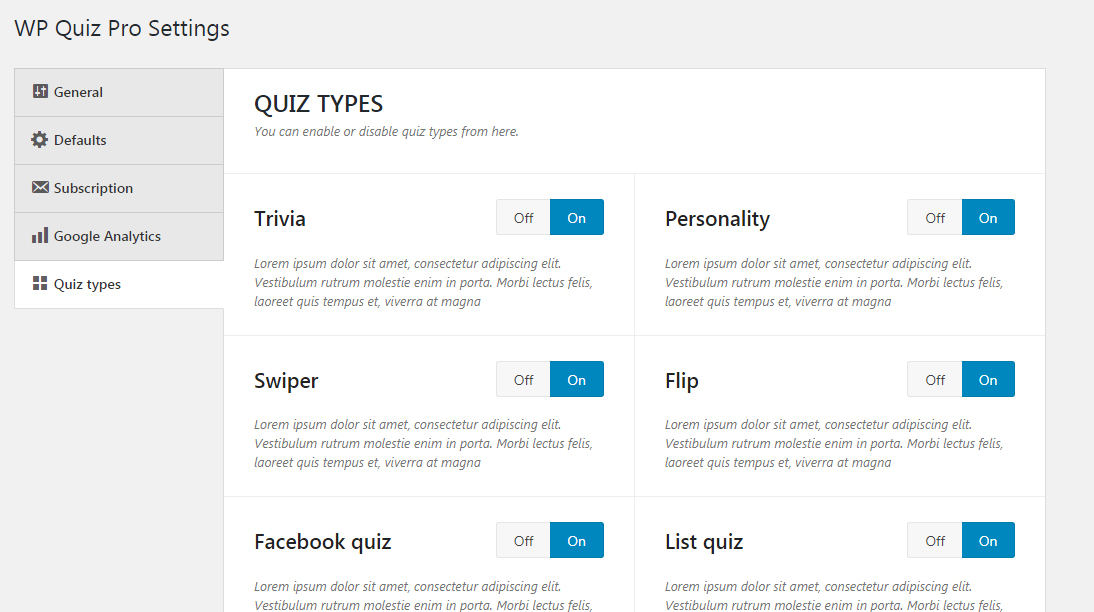
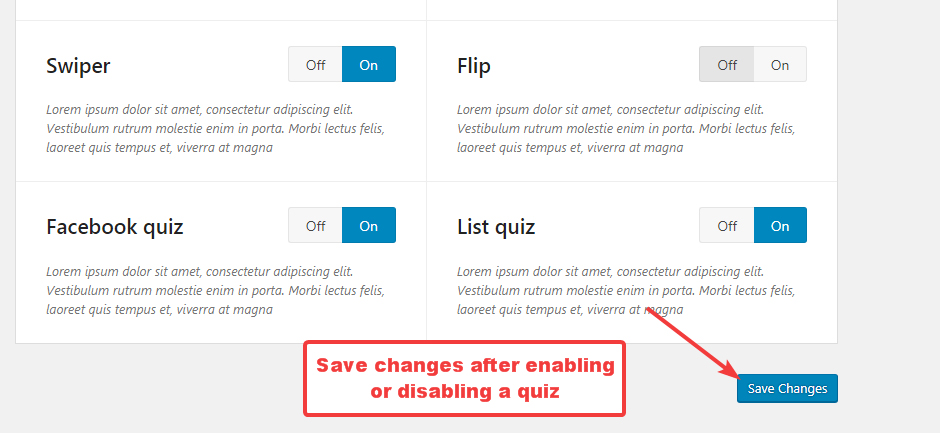
The Quiz Types setting achieves only one thing. It helps you in enabling or disabling specific quiz types.
As you know, WP Quiz Pro supports 6 types of quizzes. If for some reason, you want to disable a specific type of quiz or quizzes, you can do so here.
To disable a quiz, click the Off button adjacent to the quiz. That specific quiz type will then be disabled.
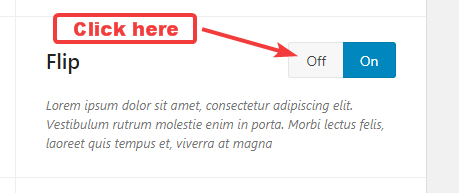
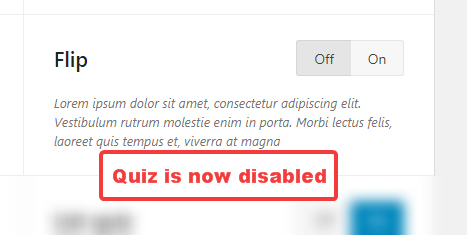
It’s important to save your changes after enabling or disabling quizzes. Your changes will not be reflected in other settings otherwise.
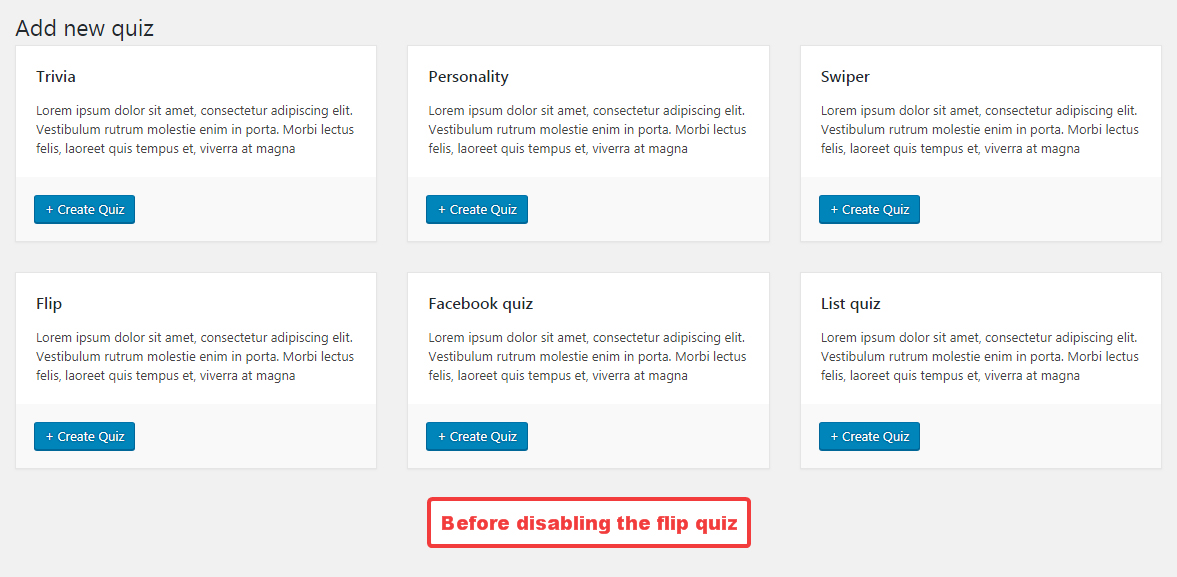
Once a quiz is disabled, you won’t be able to create new quizzes of that type. Here is how the screen appears for Add New Quiz before we disabled the Flip Quiz.
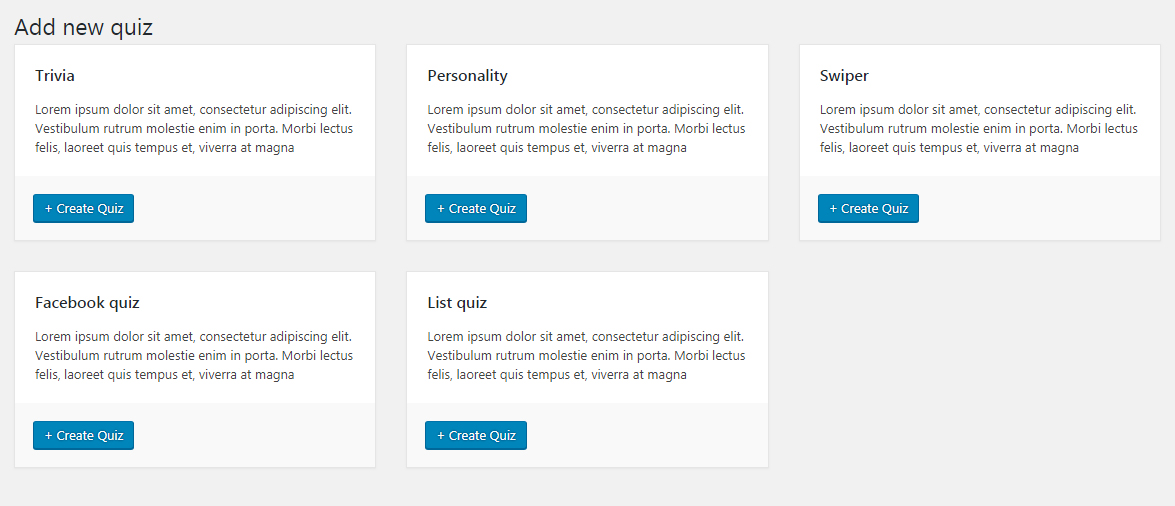
And here is how the screen appears after we’ve disabled the Flip Quiz.
Conclusion
Phew. We hope that you now understand the breadth of configurations that you make on the WP Quiz Pro plugin and how powerful these customizations can be to bring you the results that you desire. We’ve tried to make the tutorial detailed, but also simple to follow, and you shouldn’t have any questions. But, if you do, our helpful support staff is always available to help.
