Before we start, make sure that you have installed WP Shortcode Pro on your website and know how to navigate the features. If you haven’t, we have tutorials on installing WP Shortcode Pro and navigating WP Shortcode Pro as well.
Another thing that we would like to clarify is that since WP Shortcode Pro gives you so many different shortcodes to choose from, covering each of the features separately would not only be impractical, it would also be redundant.
The good news is that there are basic concepts that apply to all the shortcodes equally. We will describe the concepts, with examples, for a few shortcodes and using that information – you will be able to use all the shortcodes in WP Shortcode Pro easily.
Let’s get started.
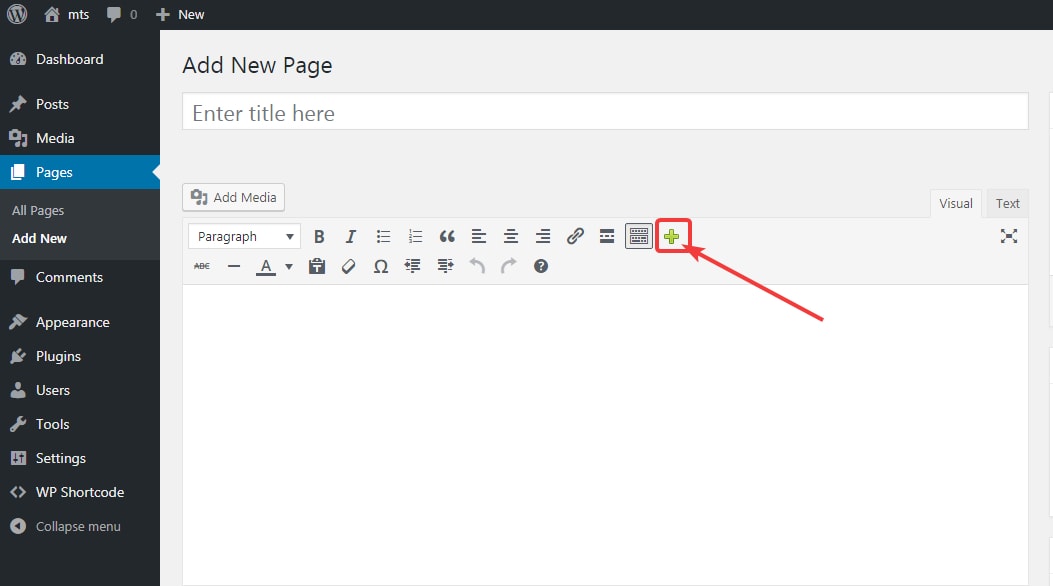
Log into your website’s admin account, and open a new page/post. Click on the green plus sign to open up WP Shortcode Pro.
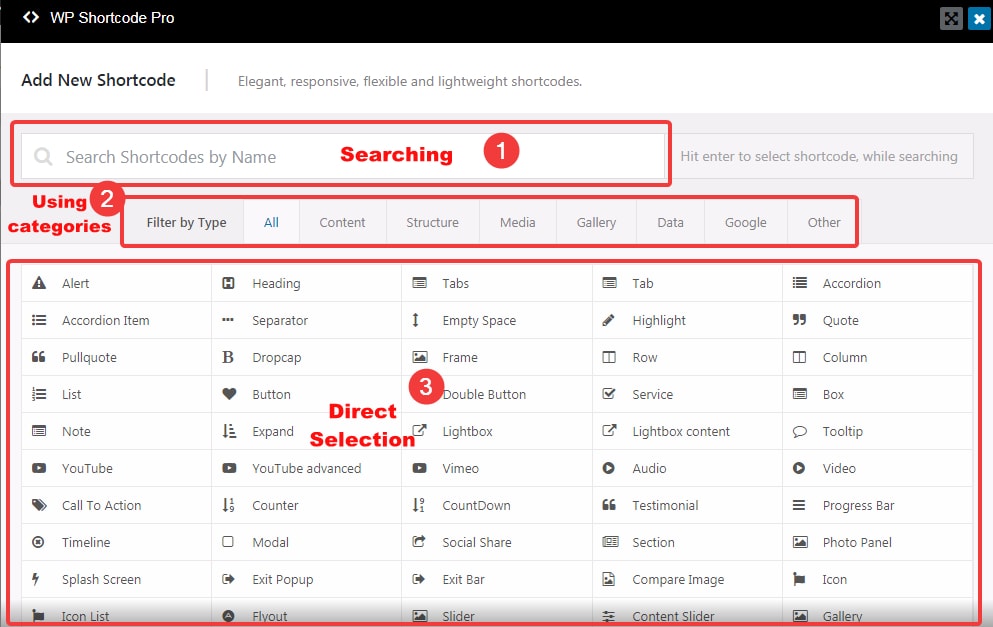
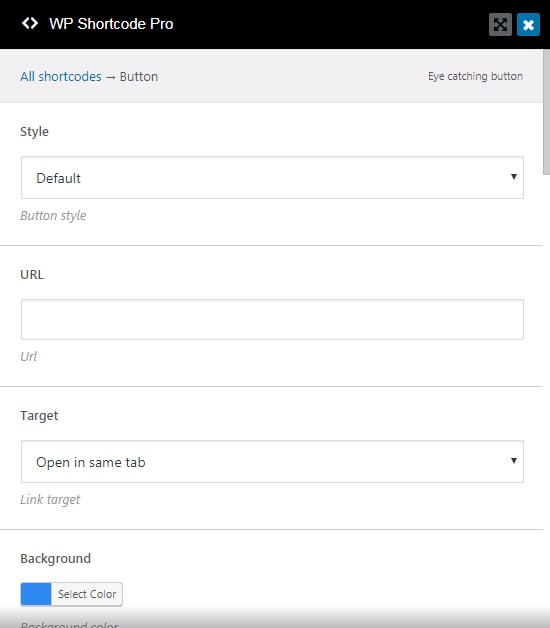
Here is how the options screen looks like.

As we have mentioned in one of our other articles, there are many ways to navigate through WP Shortcode Pro. The following image will serve as a quick guide.
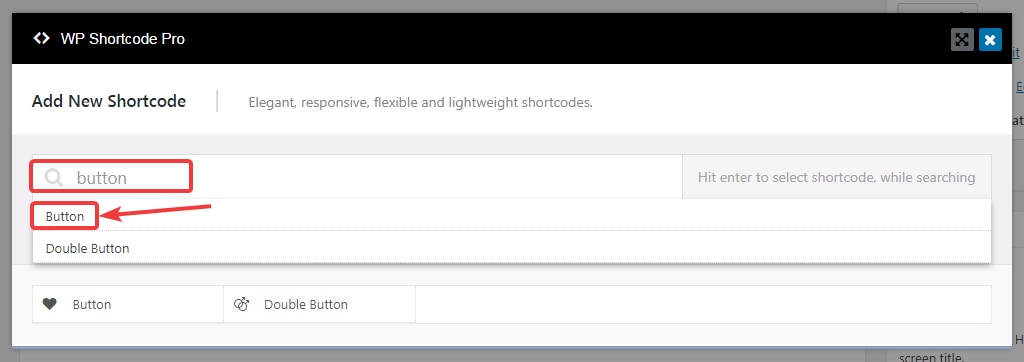
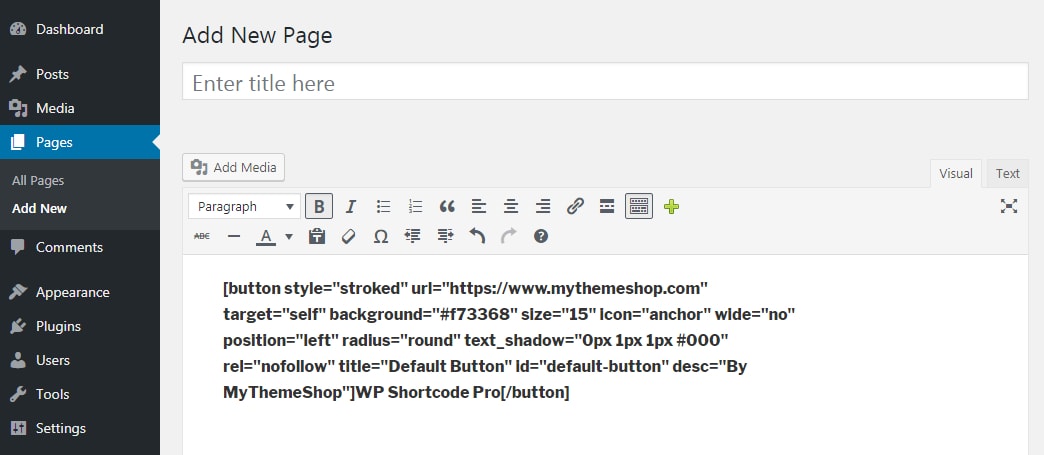
To demonstrate how to use any of the options, let us take the example of a button shortcode.
For this example, we used the keyboard navigation to search for the button shortcode and select it.
Once selected, the options for the button open up. Here is how they look.
Similar to this menu, each shortcode you select will have its options. What options are present with each shortcode is dependent on the type of shortcode.
Let us check out the example of the button in detail to understand the variety of options available. The button shortcode has plenty of options, and here are all the options side-by-side.
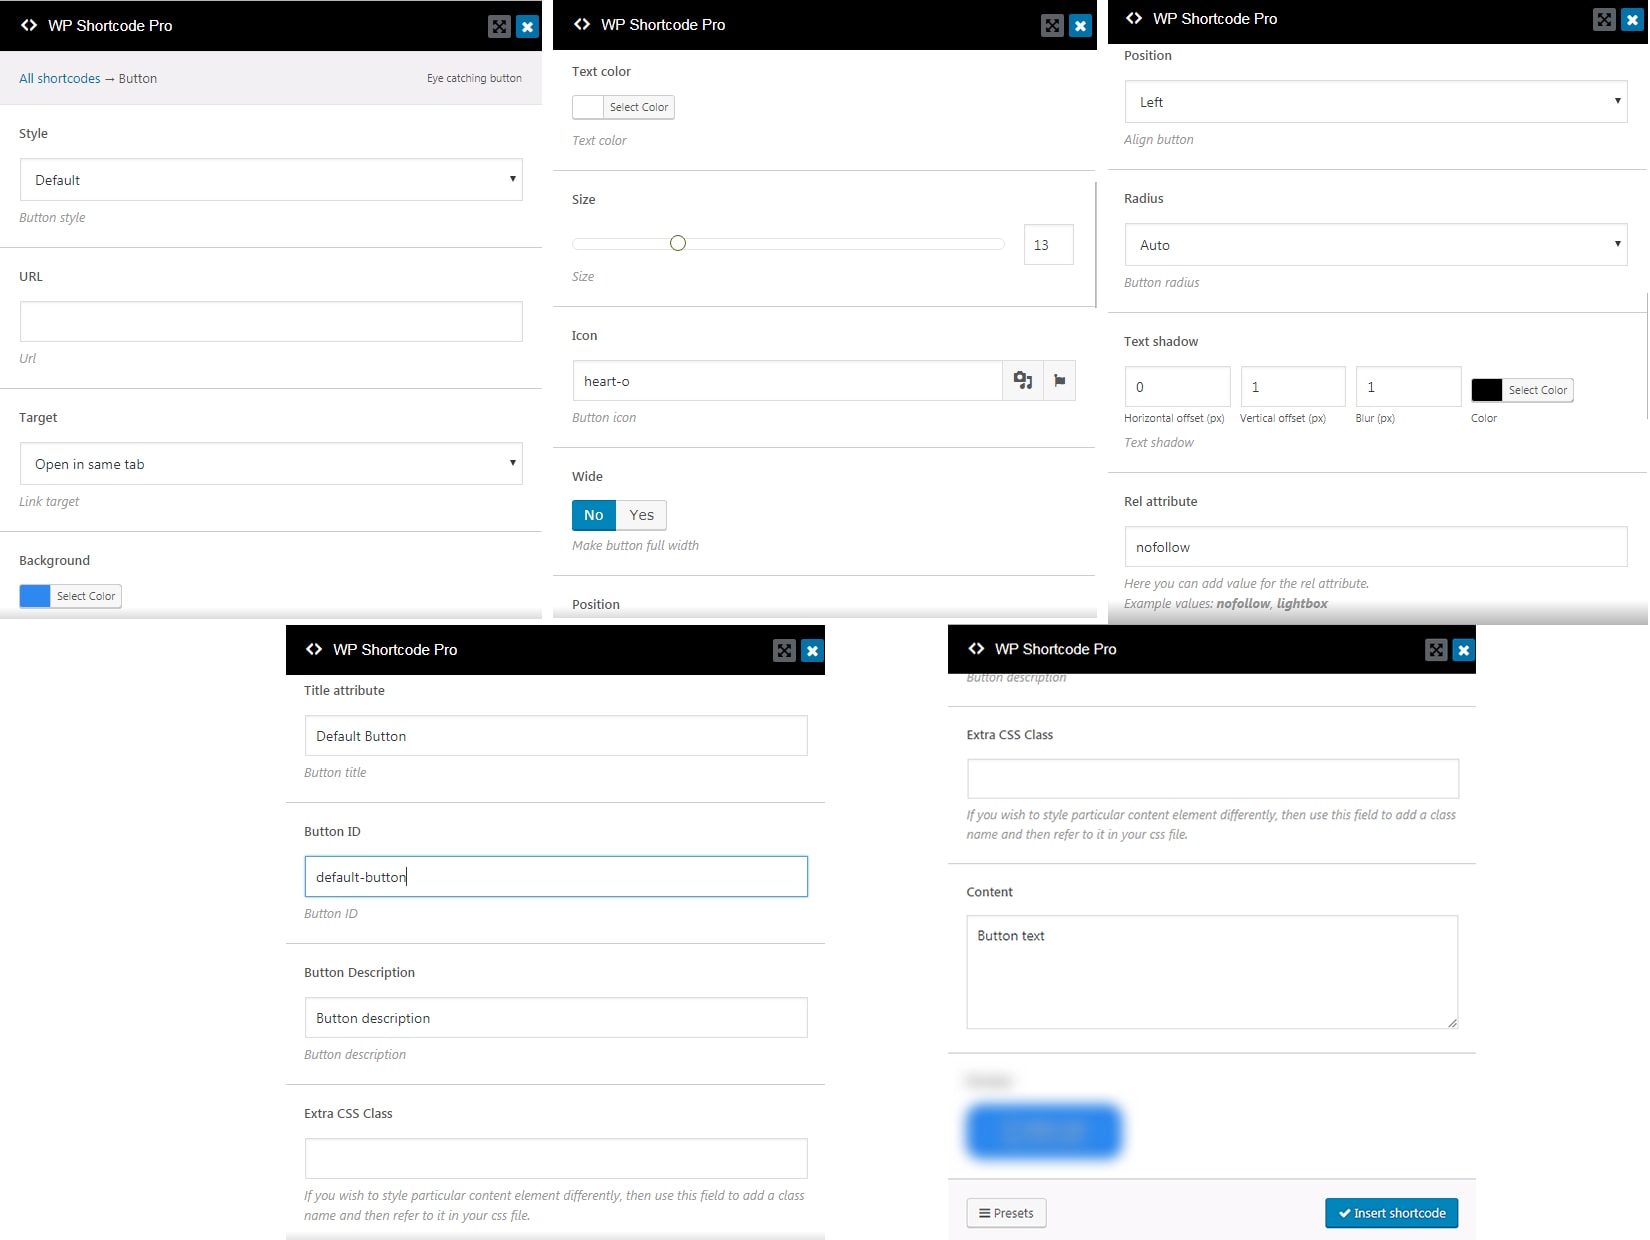
That’s a lot of options. Don’t worry, they are not complicated at all. And yes, we have specifically blurred out some options in the last option menu. We will explain those as the article progresses.
Let’s start by understanding each option in detail.
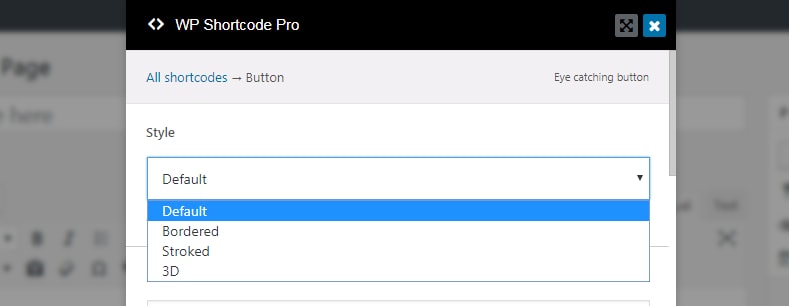
The style option determines how the button will look. Different shortcodes can have different styles built in which you can use directly. For example, the button has the following styles built in.
The URL option specifies the URL which the button will point to. You can enter any URL in here.

The target option determines if you want the URL to open in the same tab or in the new tab. You can select any option based on your requirements.

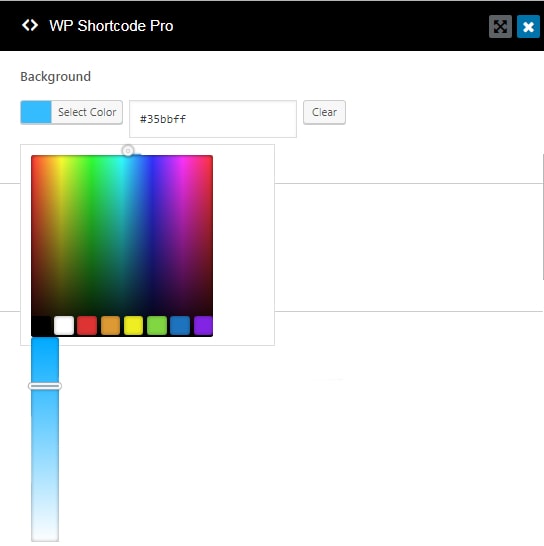
The background color option is used to set the color of the button. You can choose the color picker to pick a color or enter the hex code of the color you prefer directly.
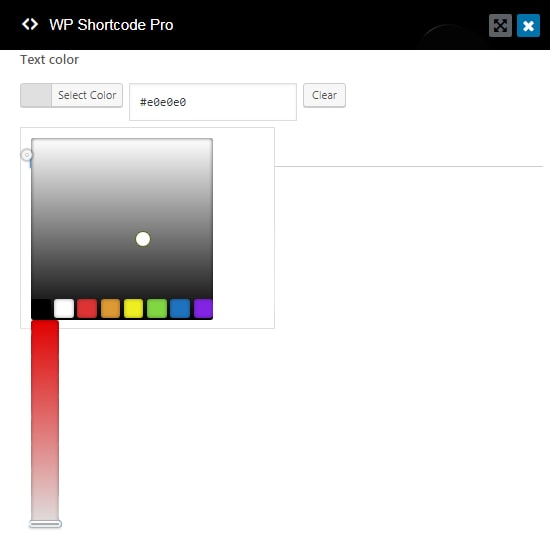
The text color option sets the color of the font. Choose a contrasting color to your button color for maximum readability. Similar to the background color, you can use the built in the color picker to pick this color.
The size option sets how big or small the button should be. You can use the slider to set the size of the button easily.

Your button can have an icon with the text. This option lets you pick the icon you want to place on the button. You can use a custom image, or use the built-in icons. We recommend using the built-in icons for ease of use. The icons also have a filtering option which lets you quickly find a suitable icon for your button.
![]()
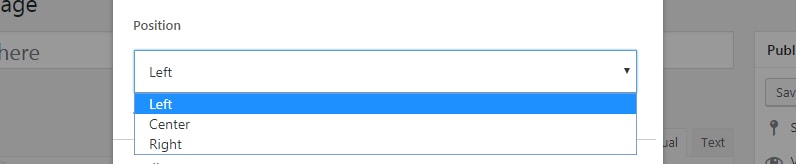
The position option sets the alignment of the button. You can choose left, right, or center alignment.
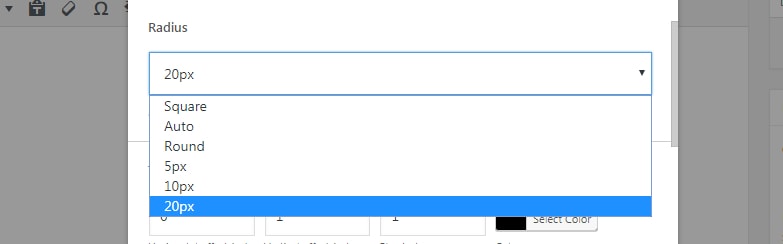
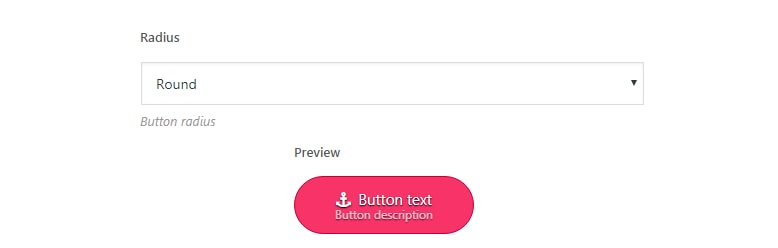
The radius option sets the roundness of the button. There are plenty of options to choose from.
The text-shadow options lets you set a shadow to the text on the button. It offers multiple settings to create the shadow of your choice.

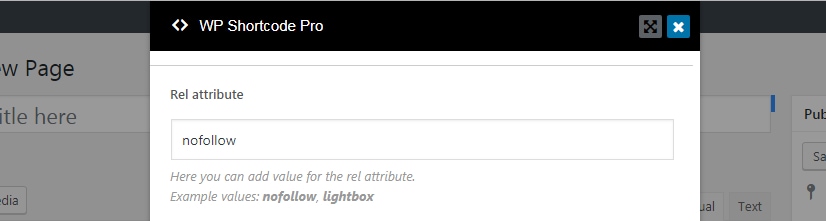
The Rel attribute setting lets you configure the rel attribute for the button. Technically, the button is a URL, and the rel settings here act the same as they would on any URL. You can use the rel attribute to make the link a nofollow, or trigger other popups or lightboxes with it.
The title attribute sets the title for the button. This is similar to setting the title for a URL.

The button ID gives the button an ID which you can use in CSS or JavaScript for some advanced functionality.

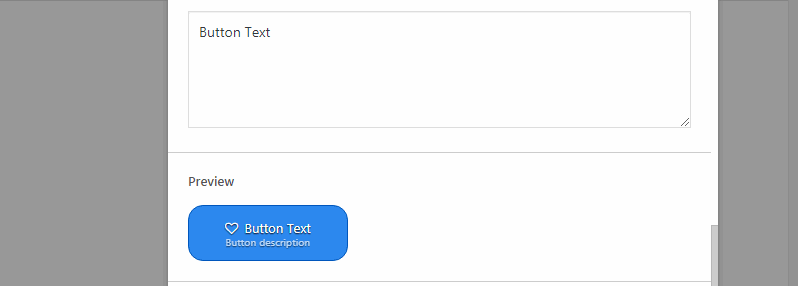
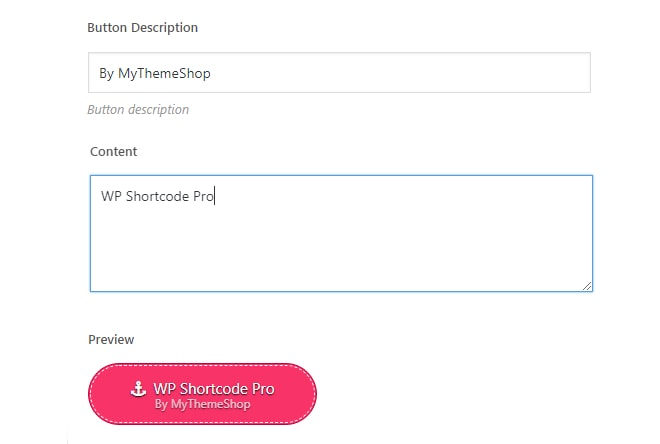
The button description option lets you set a description for the button.

In the Extra CSS Class option, you can assign extra CSS classes to the button which you can then style by referencing them in your CSS files.

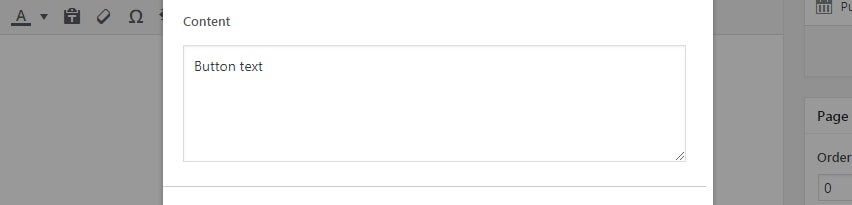
The Content option is where you enter the actual text which will appear on the button.
Checking Your Shortcode With Live Preview
Now to cover the option that we hid in the screenshot above. That feature is the live preview feature. That means when you configure any shortcode with custom settings, you don’t have to go back and forth in the post preview to make sure that it looks right. You can see all the changes you make to your shortcode, in real time.
Here is a small animation that demonstrates how that works.
To showcase live preview, here are some of the changes that we did for the buttons and the results that we got.

![]()
Inserting The Shortcode In Your Post
After you have created the perfect shortcode, the next step is to actually include the shortcode in your post. To do that, all you have to do is to press the ‘Insert Shortcode’ button at the end of the settings window.

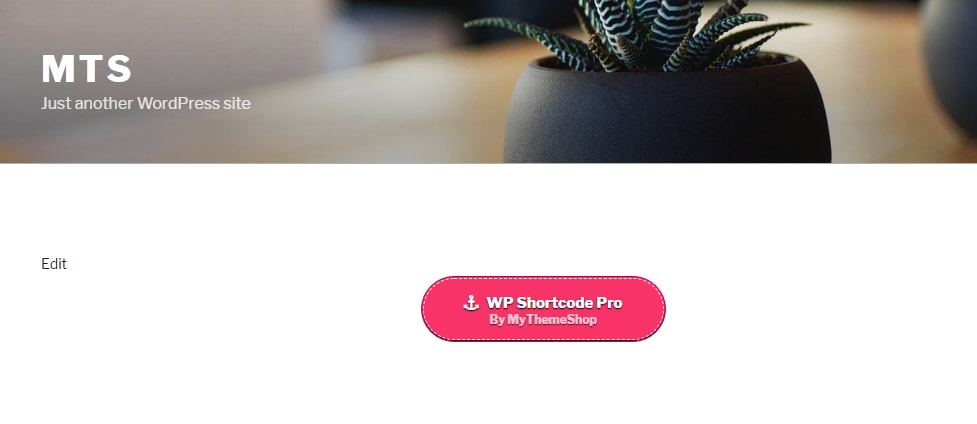
And here is how it looks on the post/page itself.
If you preview the post, you will notice that the button looks exactly the same as it looked in the shortcode creator.
Using presets and their benefits
Another important feature of WP Shortcode Pro which you can use with every shortcode is presets.
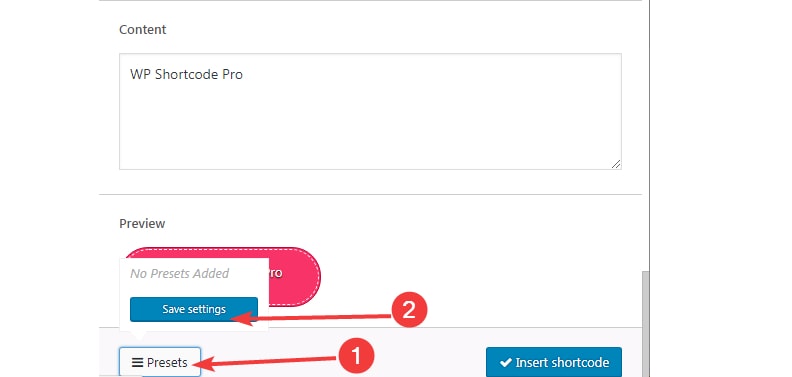
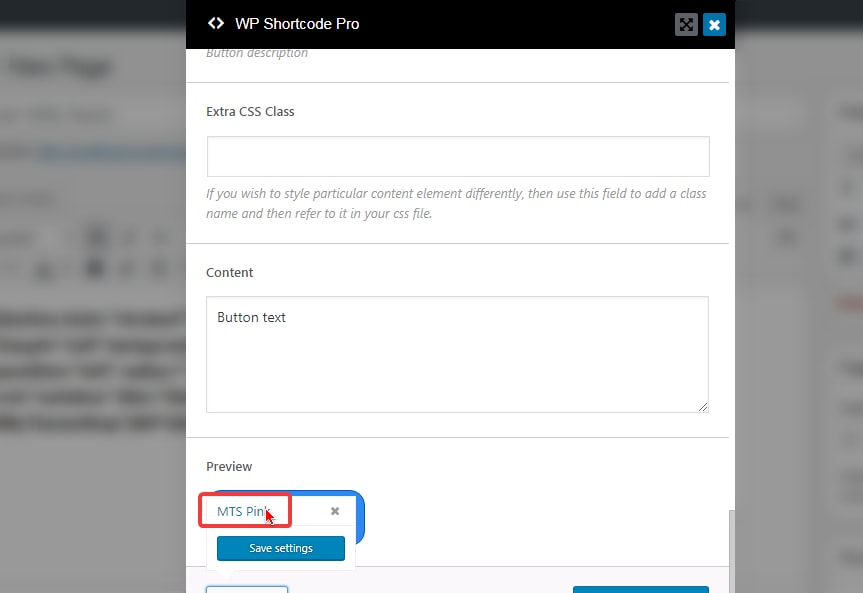
A Preset is a collection of settings that you can save for each shortcode to use later. Let us explain with an example. Let’s say on your website, you regularly need 2 types of buttons. Without a way to save your settings, you will have to reconfigure all the settings every time you need to create a different button. You can imagine that it’s not the best solution in the world.
Presets eliminate this problem by allowing you to save your settings and recall them in a single click. In the button example we created, we can save our complete configuration of the button as a preset by clicking the ‘Preset’ button and clicking ‘Save settings’.
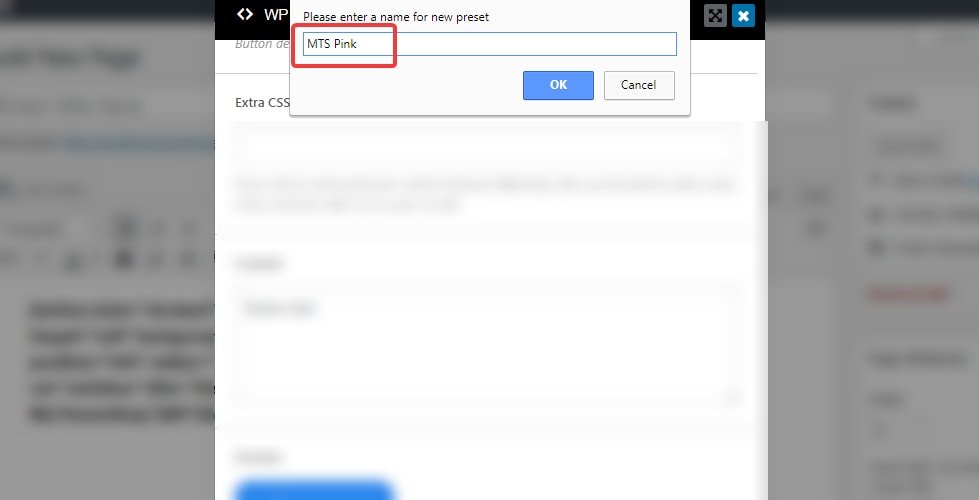
A dialog box will appear that will ask the name of your preset. Enter a name that helps you identify this preset later.
The next time you want to create the button, instead of configuring all the settings, all you have to do is go to the presets menu and select your preset.
As soon as you select the preset, all the existing settings will be automatically replaced with your preset’s settings.
Nested Shortcodes
Another concept that you need to understand is nested shortcodes. The idea behind nested shortcodes is that some shortcodes are designed to be used only inside other shortcodes. This makes the design modular, and the elements inside the parent shortcode can be styled easily.
Let us explain with an example.
Suppose that you have to create a tabbed view on your post. If you select and open the ‘Tab’ option from WP Shortcode, you will reach this screen. Notice the warning on the top.
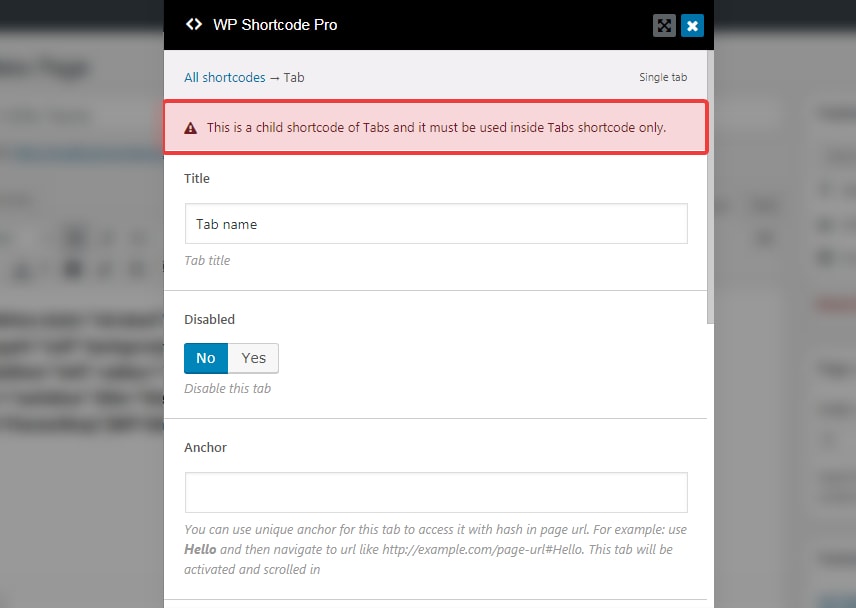
The error or warning is there because the tab shortcode is to be used with the tabs shortcode, not individually.
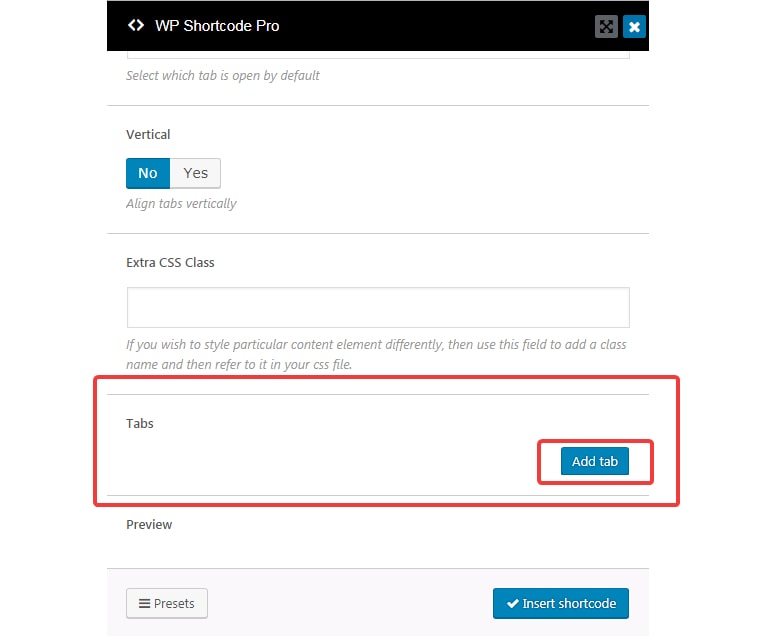
Let us check out the ‘Tabs’ shortcode.
In the Tabs shortcode, you will see an option of adding a ‘Tab’.
Once you click the ‘Add Tab’ button, you will be taken to the Tab shortcode settings, which we saw earlier. We created a tab for this example. After the tab is saved, you will be taken back to the tabs screen, where you will see that the tab we just created is present. The shortcode preview will also be updated, showing the created tab.
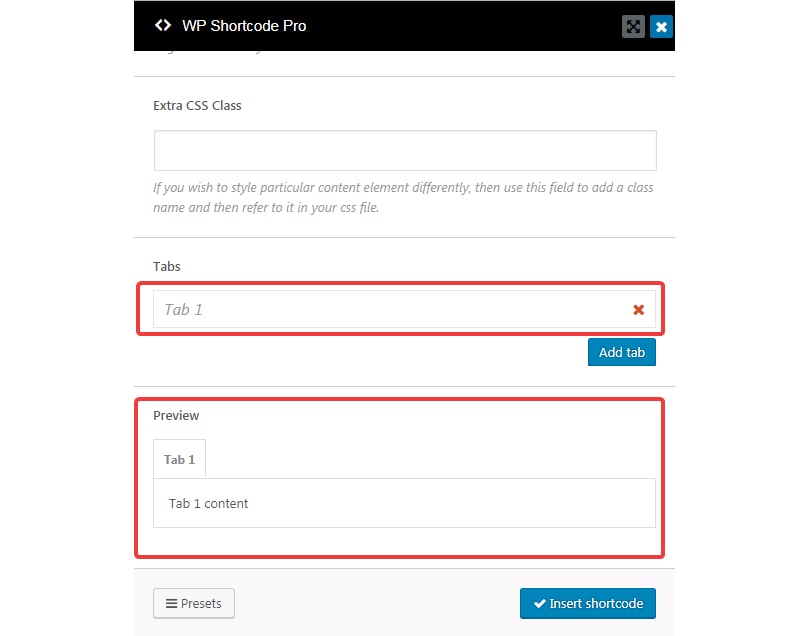
You can create more tabs and add them to the tabs shortcode. The nested design makes it easy to customize each tab and opens up possibilities for creative uses.
The tabs shortcode is not the only shortcode with the nested feature. Just remember this, if you use a shortcode and receive a similar warning as we showed you above, then it’s a nested shortcode.
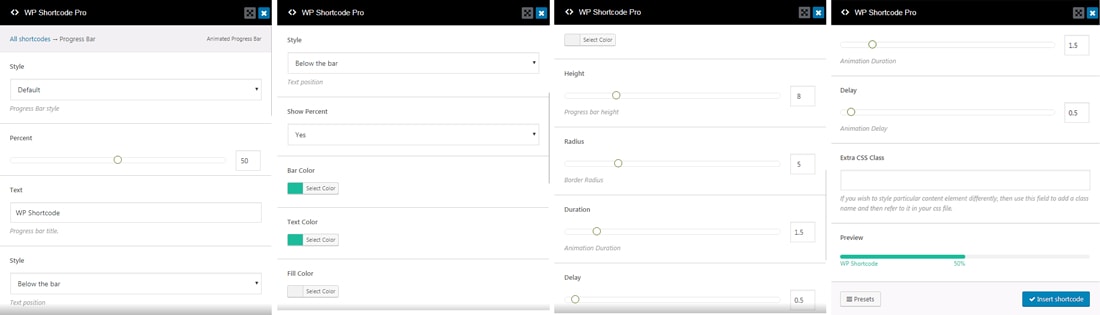
That’s it. That is how you can use WP Shortcode Pro’s individual shortcodes to style your blog posts. Obviously, we haven’t shown you all the shortcodes, but the concept behind using the shortcodes is the same. Just so that you understand better, here are some screenshots of other shortcodes for you to see.
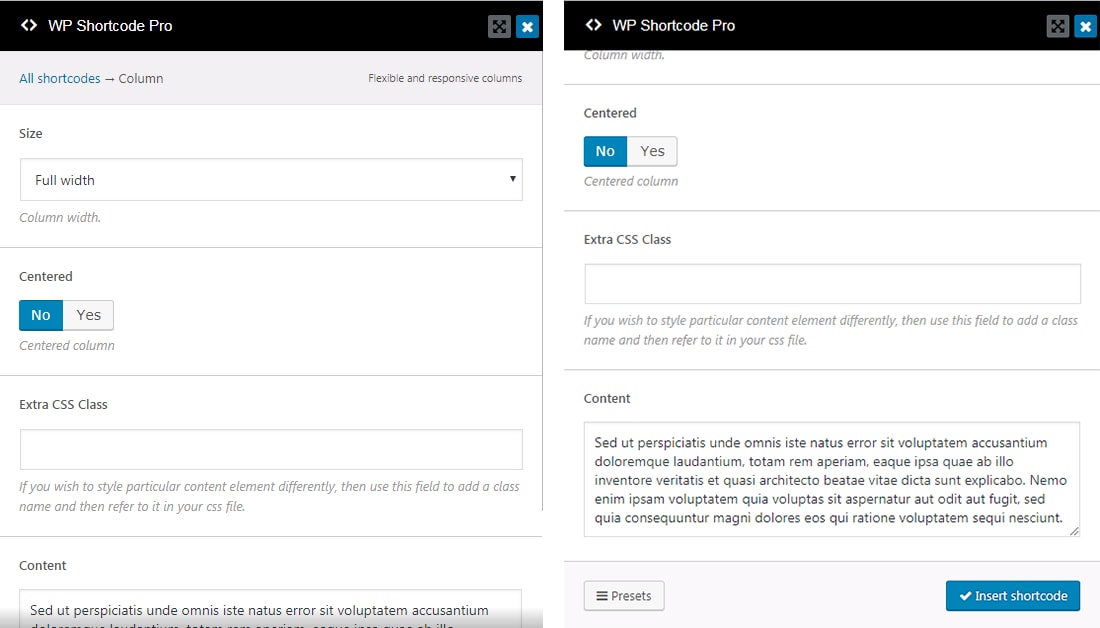
The column shortcode
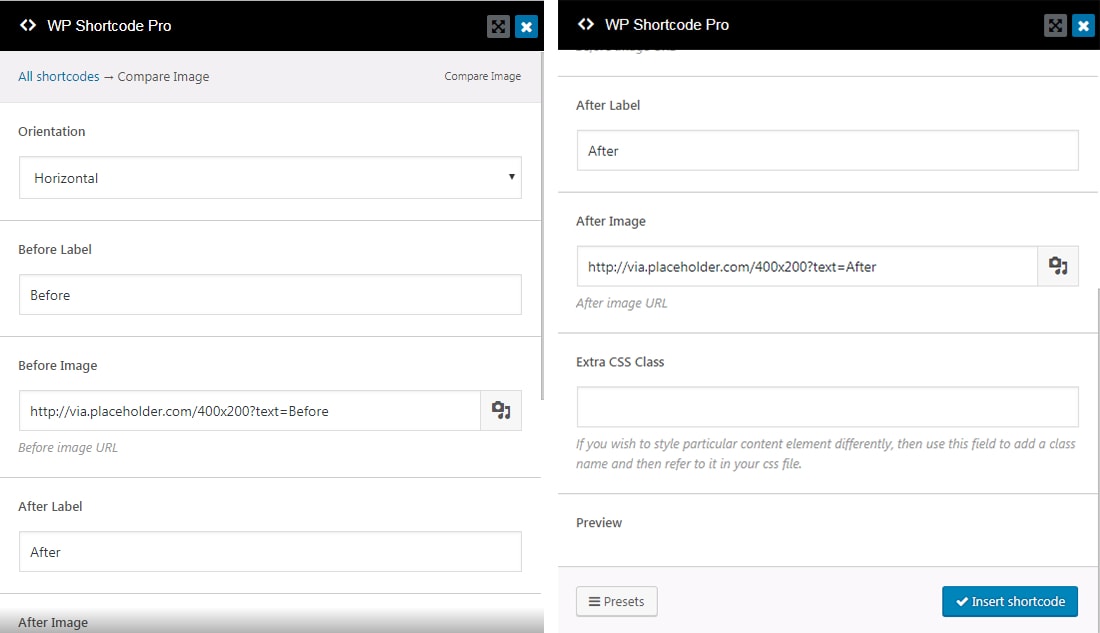
The compare image shortcode
The progress bar shortcode