Chatbot, what?
In this day and age, the word artificial intelligence pops up anywhere you look, and some of the biggest companies in the world are trying to truly build a machine that could mimic human levels of intelligence and understanding.
Bots, on the other hand, have existed for a long time and they are usually programs designed to replace a certain human action.
Whether they are used to farm virtual gold in World of Warcraft, or impersonate simple human textual interaction, the cutting-edge bots of 2017 have finally come into the limelight – as Facebook assistants, willing and ready to interact with your customers and converting them for your business when you are too busy doing something far more important.
Furthermore, chatbots on Facebook are quickly becoming the standard when it comes to a good marketing strategy.
Like their name suggests, they offer a textual interface to your visitors and, if properly programmed, can answer questions, offer insight into your services, or send scheduled messages.
While this might sound like something your company does not have the time, or money to invest in, creating a good starter chatbot can actually be an easy task.
What Do They Do Exactly?
We’ve mentioned their basic function, they mimic a natural conversation with your Facebook visitors, without hiding the fact that they are simply a custom program. Their functions include:
- Integration into e-commerce platforms to help sell products, which translates into greater monetization of your social media account.
- Sending and receiving text and images, and parsing those into actionable steps.
- Answering predetermined questions.
- Sending mass push notifications.
- Offering in-depth analysis of their performance and conversion.
- They become smarter with each use.
Where there was once a big emphasis on using content to promote your business, there is now a bit of shift towards great design and customer experience, and chatbots have proven to be an excellent way of engaging users on a more personal level, without having to invest a lot of money in building an entire customer support department.
Why Are They So Important?
Most of the messages on Facebook pages go unanswered, and chatbots provide continuous interaction on the largest social network in the world.
Facebook Messenger’s audience is actually greater than that of Instagram, Twitter and Snapchat put together. Let that number sink in.
Most people connect online via smartphone, which is why companies have resorted to creating mobile friendly websites, and for well over a billion of those users, Facebook is the preferred online destination.
Keeping up with such a large number of potential customers, it can prove quite difficult without the proper tools.
The chances are, you will need to have a chatbot created in the near future, no matter what kind of business you run.
So, this all boils down to you either building your bot today, or later, when the audience already has much bigger expectations of what a chatbot should and must do.
OK, You Got Me! How Do I Create One?
Imagine playing with Legos, but instead of building blocks you have commands and possible answers.
While the most basic options can be created in a few minutes, you can customize them endlessly to create an even better experience for your visitors.
While a chatbot can be built manually, there are plenty of services that can be used to build one.
For example, the following are some of the few services that offer free bot creation.
What you choose will depend on your personal knowledge of programming languages, your business needs and how complex your chatbot needs to be.
- Chatfuel
- Botsify
- Flow XO
- Beep Boop
- Bottr
- Motion AI
- Chattypeople
- QnA Maker
- Recast.AI
- Botkit
- ChatterOn
- Octane.ai
- Converse.io
- Gupshup
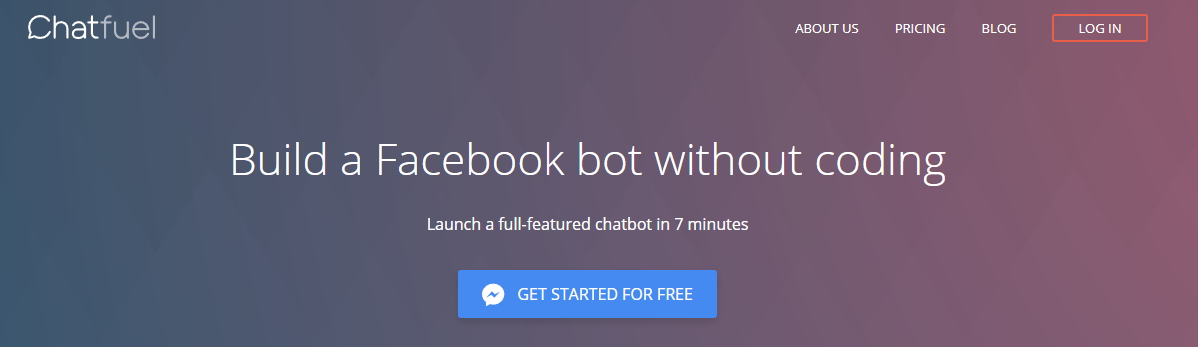
For the purpose of this guide, we used Chatfuel, a free third party service that offers an easy click & drop method of creating all the necessary parts for your first Chatbot.
We have prepared an in-depth guide for you on how to get started, but do not forget, if there is anything you want to change and do differently, please do so, as this is just a general guide for a standard Chatbot.
You will probably find something that suits your needs, and the needs of your business much better if you experiment a little.
1 Create an Account on Chatfuel
Step 1: Go to Chatfuel webpage, where you can start creating your chatbot.
Step 2: Login with your Facebook account that is also the owner of the page you want to create a chatbot for.
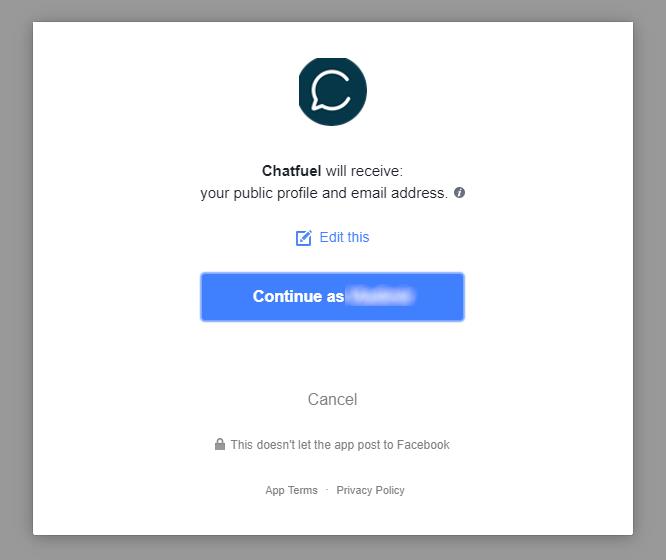
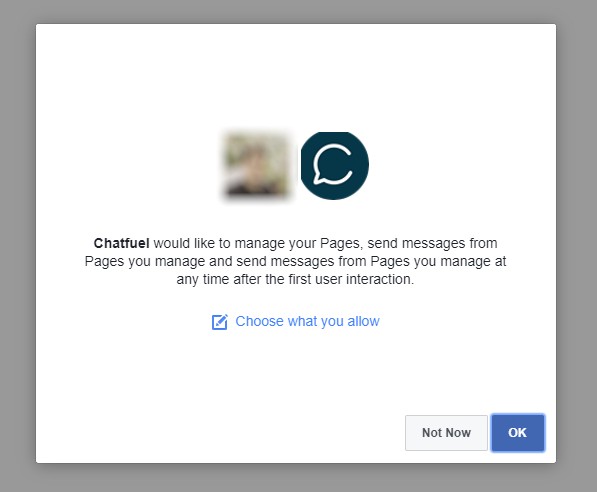
Step 3. Chatfuel will ask for the default permission to access the pages that you manage – this is the standard procedure.
After that, you should select the desired page. When the Chatfuel is correctly connected to your Facebook page, you will be taken to your dashboard, and your Page’s chatbot behind-the-scenes interface.
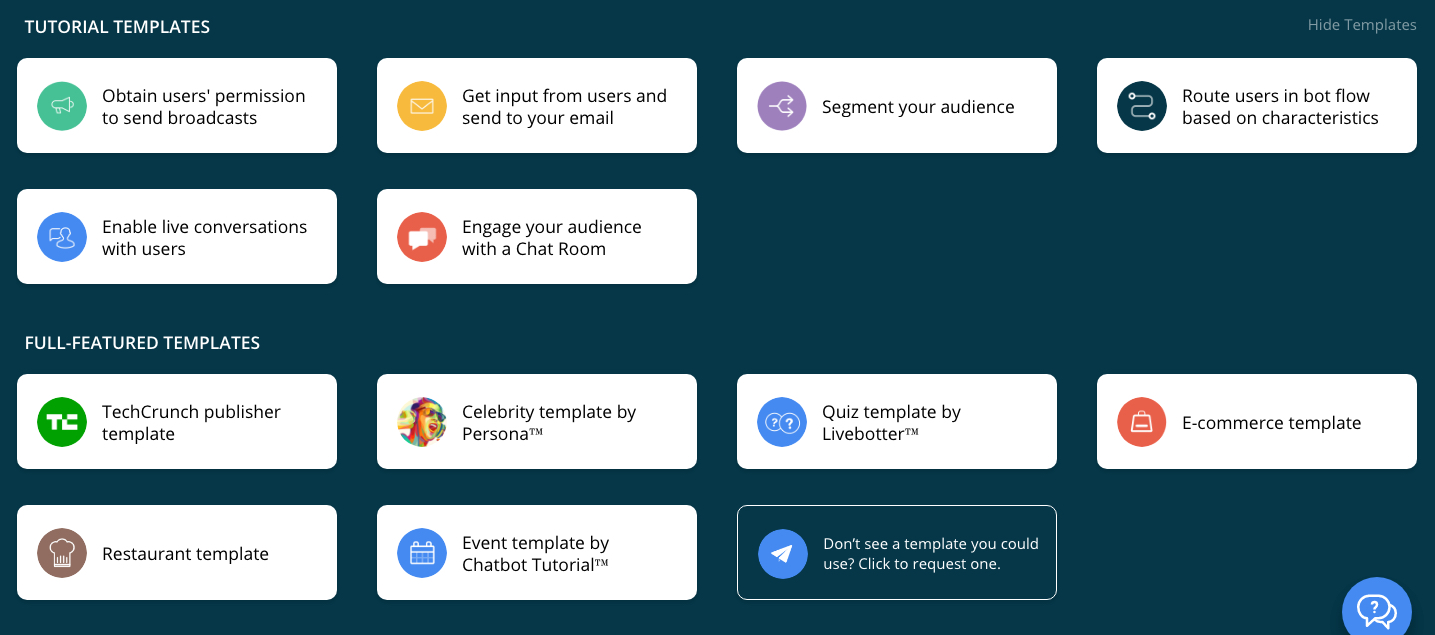
Step 4. Use the visual cues to your advantage as it will help you better understand what each commands does.
On the default display, there will be Tutorial Templates, as well as Full-Featured Templates that are ready for you to use.
But have in mind that, if you’ve connected the page, it will also automatically create “My First Bot” chatbot that will show a connection to your Facebook page, alongside your page’s profile image.
Step 5. You can click your first bot, and open the settings. If you want to start fresh, you can click on the Cog icon in the upper right corner, and type DELETE in order to remove your Chatbot program.
2 Give Your Bot a Name and Choose Your Initial Template
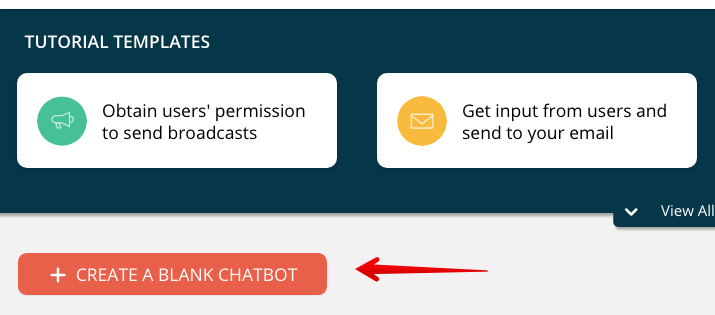
Step 1. There are a couple of pre-made templates that can help you get started. Choosing one can be quite easy, just read the description as they can explain to you what a particular template does.
There are many ready-for-use templates that are already used by some brand. For the purposes of this guide, we’ve selected “Create a Blank Chatbot” – this will allow us to create rules from scratch.
Step 2. When you enter your Chatbot’s settings, you will be automatically be shown Build section, from the left side menu.
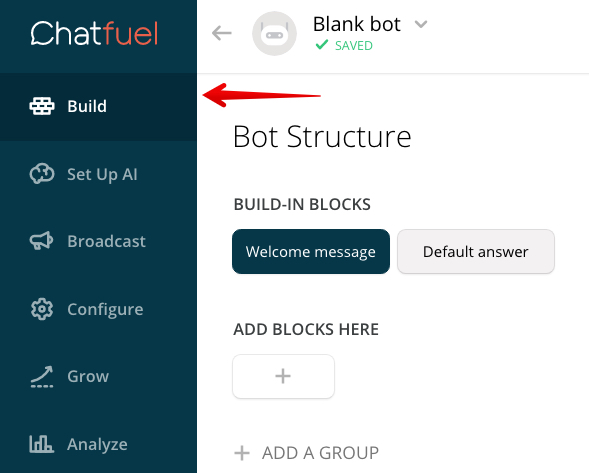
Step 3. In the build section, you are presented with a default Welcome Message and Default Answer, which should be customized to your preferences.
Those two blocks cannot be deleted, as they are the foundation of your chatbot. But we will have to edit them to suit our needs better.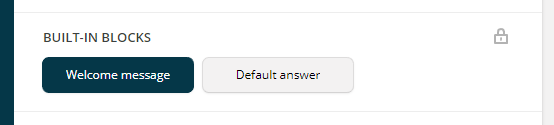
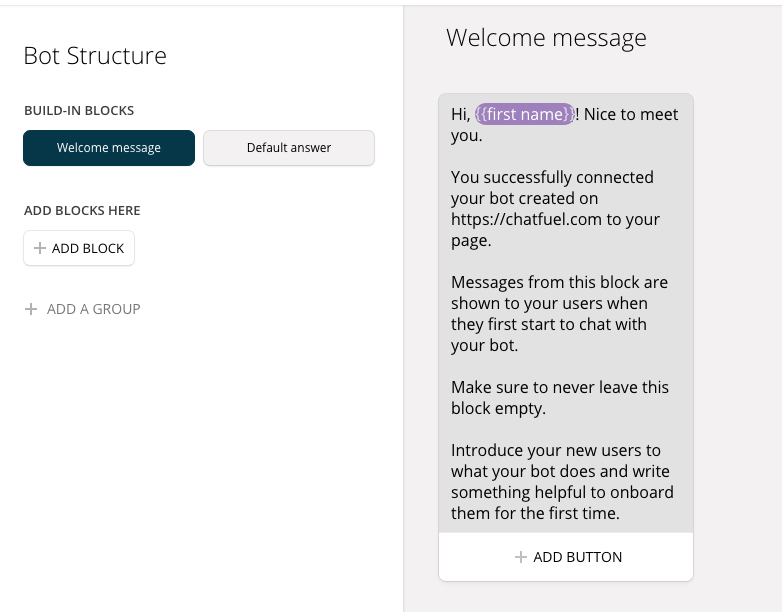
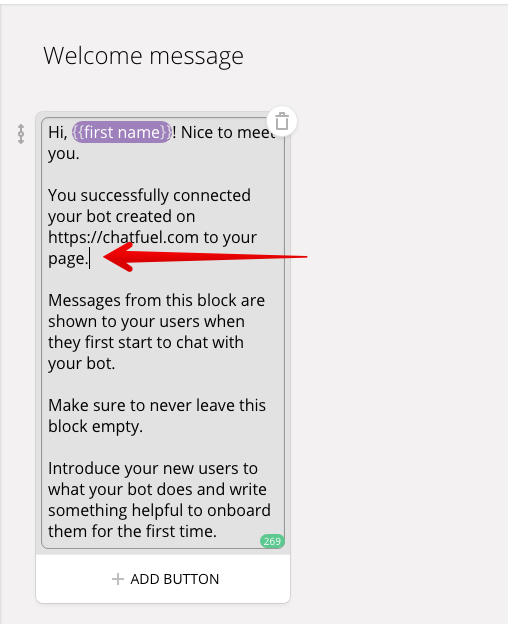
Step 4. The Welcome Message is displayed every time the user starts a new chat. So, a single user will see this message every time they close and open the chat box with your page, and it requires no user interaction – it is totally automatic.
Step 5. Default Answer – due to your bot not being properly set, it will always deliver the same response, no matter what your users write.
Later, we will talk about the rules that will provoke a different response, but for now, the default answer is displayed for any input.
3 Understanding the Chatfuel UI
Step 1. The dashboard is quite simple. On the right site you can see a sidebar with a few options on it:
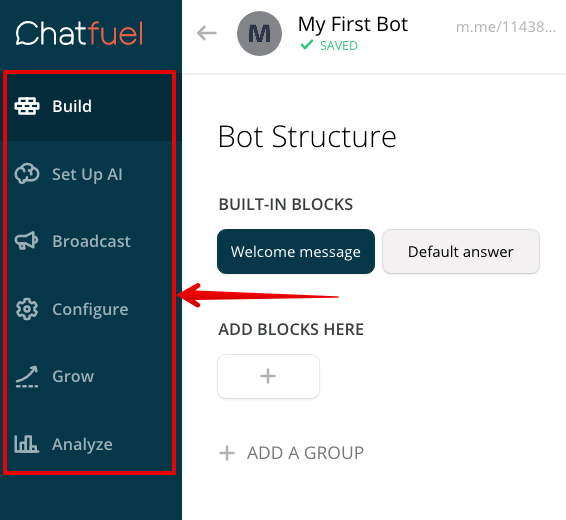
a. Build is the default window and the most important one. It will allow you to organize all the building blocks of your Chatbot, and create as many messages as you require. We’ll go in-depth a bit later, but for now, remember that Build is used to visually represent your Chatbot, and show you all the tools that you have at your disposal.
b. Set Up AI, where you can add different rules for your Chatbot to sound as natural as possible. For example, you can add a rule that when a person types “Hello”, they get an automated response of your choosing.
Naturally, they use specialized algorithms, so that the typed in text is analyzed and attributed properly. That is to say, “Hi”, “Hello” and “Is anyone there” will be treated in the same way, as they all represent a starting message meant to initiate a conversation with your bot.
c. Broadcast will allow you to instantly send messages to all your followers, or schedule them for a later date. This also allows you to filter your users and deliver personalized messages.
d. Configure will open the settings menu. There you can disconnect the bot from your page, you can enable or disable user input (disabling user input will force users to only use Buttons or Quick Replies – and while this might limit some of the functionalities of your Chatbot, it actually gives all the power over the flow of a conversation to you – the page owner).
This will also allow you to configure Persistent Menu, which are actually the buttons that always appear while a person is chatting with your Bot.
e. Grow section will allow you to access special tools where you can reach out to your audience in a much more efficient way. For example, you can send personalized messages to all users that comment on your blog posts. It also offers a section where you can find more Growth Guides that will help you along the way.
f. Analytics will only appear after you have had more than 3 users interact with your Chatbot, so you can gain more insight into what your visitors are clicking and how they are responding to your bot.
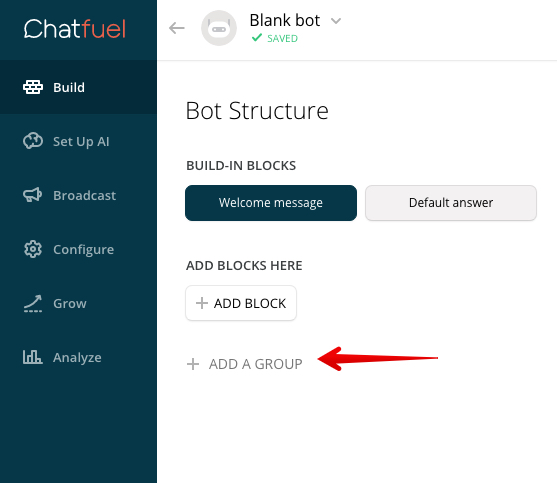
Step 2. Inside that menu is a smaller sidebar that shows your Bot Structure and currently Built-In Blocks with the default Welcome Message and Default Answer. They have a Locked Icon meaning they cannot be deleted, as every chatbot needs to have those two blocks.
Step 3. Add a Group will create a new Group that can consist of many Blocks, and rules will later on use those Blocks. We’ll explain Groups in-depth a bit later on.
4 Change the Default Welcome message and Default Answer
Step 1. In order to edit the message, you just need to click inside the block that is found in the working space. You are free to place any kind of text you want instead of the default templates.
Step 2. You can also add up to three different buttons, and there are three types of buttons:
a. You can add other Blocks that you can create on the left sidebar.
b. You can place a URL that can lead anywhere you want, usually to your website’s landing page.
c. Phone Call will allow you to insert a phone number that will automatically activate the device’s default calling app and ask you to start a call.
5 Adding a Block
Chatfuel enables you to add as many blocks as you’d like. Each block is actually a single message being displayed, or sent, from your Chatbot.
This as a predetermined set of possible responses, so it is only natural that you want to create a Block for all possible answers and conditions that could happen.
What is more important, the Blocks can be later connected to Buttons and Quick Replies, making sure that the user ends up exactly where you want them to.
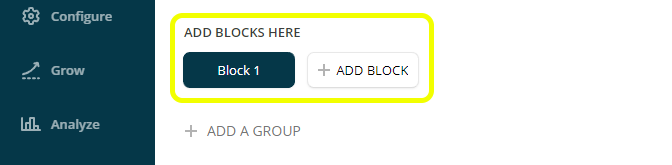
Step 1. Adding new Blocks is easy. You can add new blocks in the predetermined “Add Blocks Here” space, or you can create a new group by clicking on “Add a Group”.
We have added a test block named Block 1. The difference between Blocks and Groups is actually only for organizational purposes. If you want to categorize similar responses into a single group, it will make it a lot easier to find it later on, when you have many more blocks available and configured.
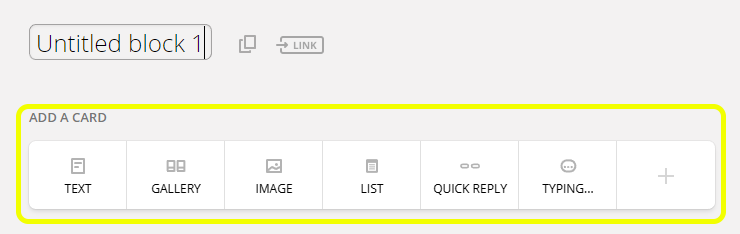
Step 2. In the Working Space a new block will open, and you can rename it to anything you want. The default name is “Untitled block #” and you can call it whatever you want. Do not worry, the end user will not see this, as this serves only to help you organize them better.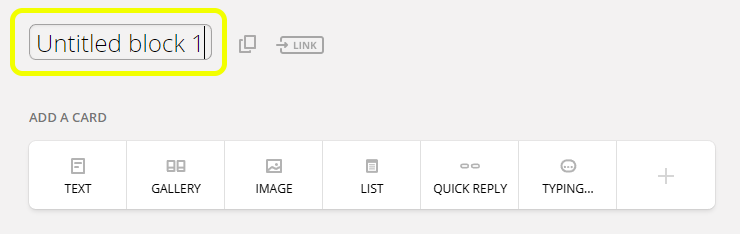
Step 3. Under the name that you’ve given it, you will see different types of elements that can be placed in the block. The simplest element “Text” and it will add a textual message to be displayed as a part of that block.
There is also a Gallery, Image, List, Quick Reply etc, most of those are self-explanatory.
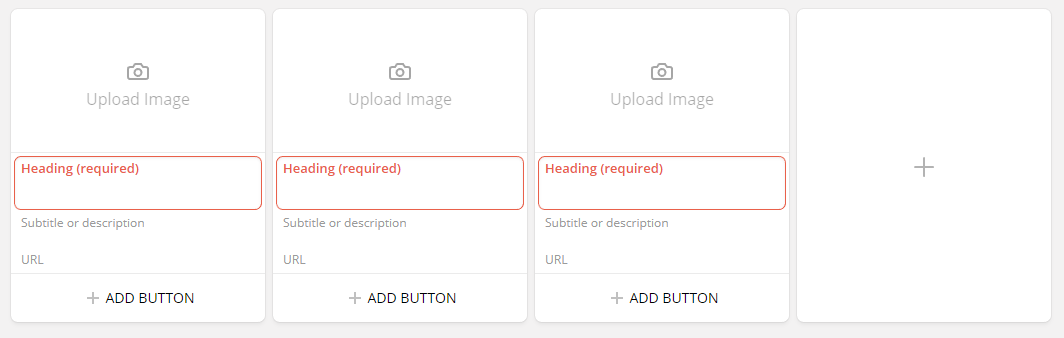
a. Gallery will allow you to upload a few images, and create the gallery type of post that Facebook offers. Under those images, you can add headings (which are required) and an optional description.
Additionally, each of the images you input can have a different URL, so this is a great way of adding items from your shop, and displaying them in a way that won’t occupy much space.
b. “Upload Image” lets you add a simple JPEG, or PNG image to the text. It is displayed in the message box, and it can be saved to the mobile device. It also offers the ability of cropping an image, and you can upload as big of an image as you want.

Step 4. Typing… is used to simulate the action of typing, and will display three dots just like when you’re waiting for your friend to reply.
Step 5. The Plus sign will open additional plugins that Chatfuel offers.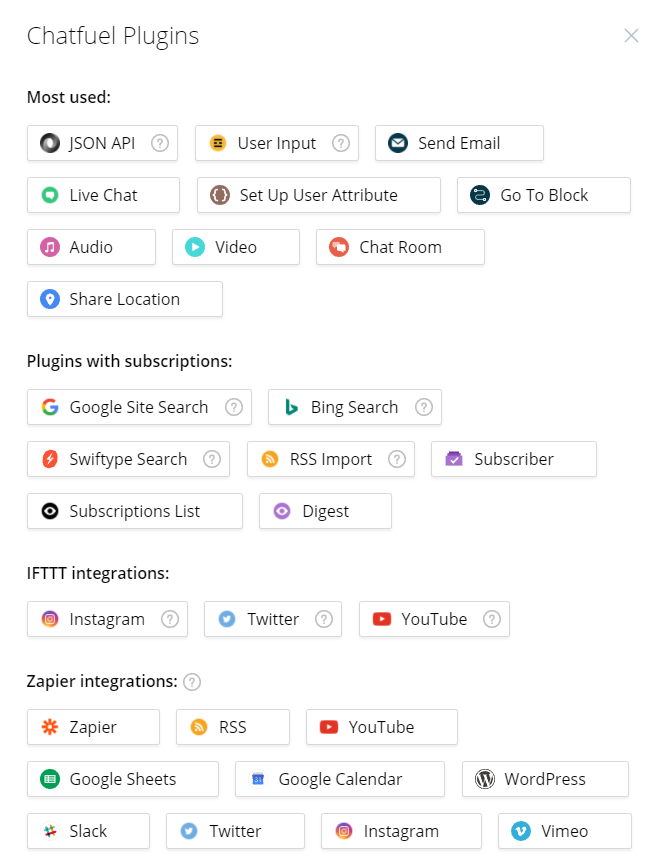
Step 6. Remember, your block can consist of many smaller blocks that are arranged as a timeline, so you can add a Typing… effect then an Image block. After that you can once again add Typing… effect and finish up with an Image.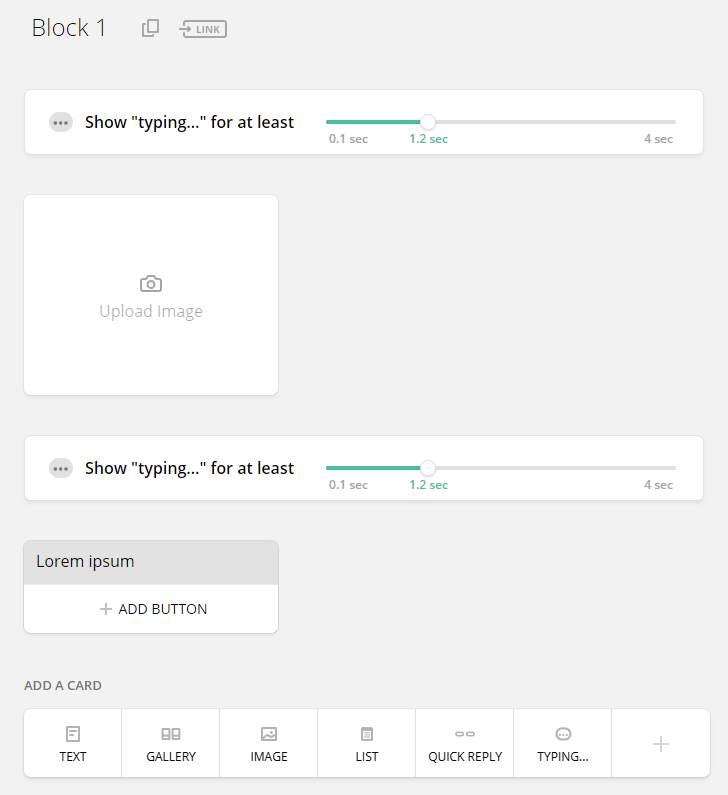
Step 7. Among the more important functions is “Quick Reply”, which allows you to offer predetermined options that are not like buttons, and there can be more of them. They can lead to other blocks, and by carefully using them you can create whole loops that imitate a true interaction.

6 Connecting Blocks
The most important functionality of your Chatbot is how the flow of conversation is happening.
Whenever we’ve mentioned a Button, or a Quick Reply – that means that you could insert the next Block that could open by clicking that particular action.
Step 1. Like we’ve already mentioned, when you create a button, you will be offered the option of either adding a connection to another Block, a URL or starting a Phone Call.
Step 2. To connect a new block, just start typing its name, and it will appear as a suggestion. After that, you are done, and if selected, that button will take the user to the next block with different options.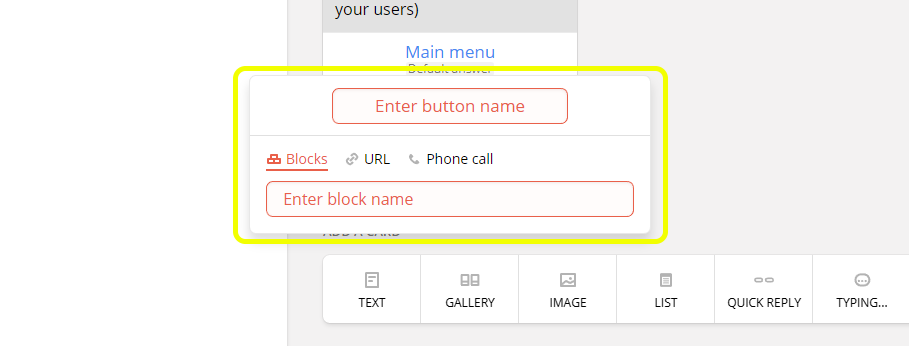
Step 3. Quick Replies are similar to button, but you can add up to 11 quick replies, but they can only be connected to other Blocks so no URLs or Phone Calls.
What makes Quick Replies so special, is actually how you can use them. Quick replies can be setup to be answers to a question.
And when a user selects a desired answer, that answer is saved and connected to that user as a customizable user attribute. Later on, that answer can be used to broadcast messages to users who have specified a single answer.
So, the questions can be something like:
a. Do You Want to Receive a Newsletter? Yes or No – and based on that answer you’ll know to send messages only to those users who have clicked Yes.
b. What Are Your Interests? Cats, Dogs, or Birds – once again, you’ll know exactly who is your target audience for a specific kind of marketing message.

Step 4. Since Quick Replies lead to another Block, you can ask many questions and create a unique profile of your user, so that the targeted messages are much more customized. It can also get you in touch with your audience, so that you can hear their opinion on a subject you are interested in.
7 Testing Your Bot
Once you are done creating and connecting Blocks, you can now officially try and live test it. You can do it like this:
Step 1. Click on the “Test This Chatbot” button in the lower right corner on the Build sections, and it will send a Welcome Message to your connected account. If your account it connected to your phone, you will receive this like a normal message from anyone else.
Step 2. After clicking this button and getting a new message, a new button will appear, “View On Messenger.com”, which will take you to Facebook’s official messenger page, where your new chat window will open. You can then start testing out all the blocks that you’ve created, and see how they work together.
Step 3. If something is wrong, this is the perfect place to find out! Just go back and change the text, or some other element that you want, so that you can create different results.
Once you’ve made some changes, you can click on “Test This Chatbot” button again, to start the whole process fresh. If you want, you can delete your previous conversation with your Page, so that you are not confused.
Step 4. From the other end, if you go to your Page’s setting and inbox, you will find all the messages that your bot has sent in your name, as well as the responses.
This will help you better analyze the flow of the conversation, and add new blocks based on what the customers want! Naturally, you are free to respond to a message once your bot has finished, and continue from there.
8 Website Integration
With a few tries, you will create a bot that you like, and once you do, remember to add a little “Message Us” button on your website. Facebook’s official guide offers a few lines of code that will help you get setup quickly.
No matter what kind of theme your website is using, a little blue box will only invite your visitors to visit your website, to have a little chat with your official Chatbot.
Conclusion
In conclusion, once you’ve set up your chatbot, you can watch it work as it slowly reduces the need for you constantly watching every single message that comes into your inbox.
This actually represents the first step in that AI revolution that we mentioned and that we saw in the movies. A step-by-step process where we teach computers to do what we want, slowly but steadily, is something that doesn’t make for a good blockbuster movie, but it is pretty close to our reality.
This trend of development shows that Chatbots won’t completely replace your need for good customer support, but it will severely reduce the need to handle low level requests, so that your business, and your employees can focus on things that are of greater importance for your future.
Over the time, your Chatbots will be able to handle even more complicated requests.
Who knows, in a few years, we’ll probably talk with our Chatbots, teaching them how to approach our customers and how to better promote our products, and they will have a persona of their own, and will probably represent your company as a great mascot – one that your audience will be able to approach with a question, anytime and anywhere.