In 2017, 24% of the population listened to podcasts. Those numbers are only projected to increase each year. As more people tune into podcasts each year, it’s only expected that more podcasts start popping up. Creating a professional podcast is an excellent way to purpose your content and increase website traffic.
Not sure how to start? We’re here to help. Here’s a detailed guide to getting you started.
1 Begin with Your Tools
Before you start your podcast, you’ll need the appropriate tools. You won’t need state of the art equipment, but good equipment determines the success of your professional podcast.
1.1 Microphone
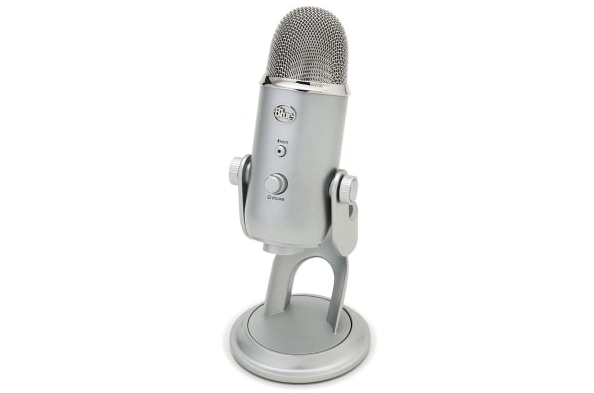
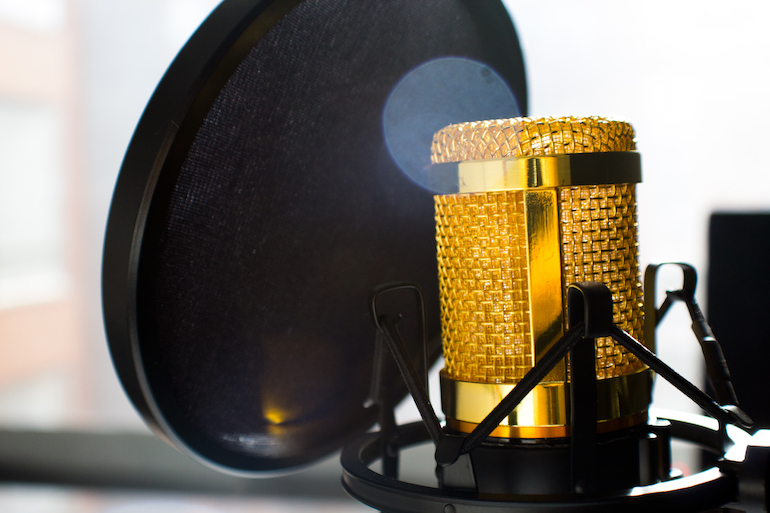
First and foremost, you’ll need a microphone. The quality of the microphone will depend on your budget, but if you’re going to make it in the podcast world, a higher quality microphone does best. There are a few options on the market, and the type you choose will depend on your preference.
1.2 USB Microphone
A USB microphone may be easier because you can plug it directly into your computer. This makes it easy to begin recording immediately. However, because the USB microphone transfers analog sound into digital you may lose sound quality. This option is also a little cheaper if your budget is tight.
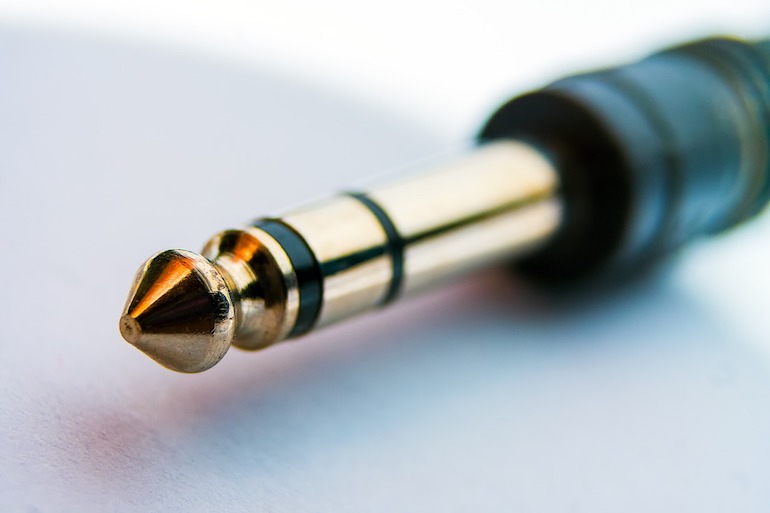
1.3 Analog (XLR) Microphone
Analog microphones use XLR connectors to convert to digital sound. Because this requires another device, this option tends to be more expensive. Analog microphones produce higher quality sound. XLR connectors use an SD card that records and stores all the audio. This SD card then is inserted into your computer. This option is great if you’re trying to record several microphones at once. They also allow you to mute and adjust sound levels in one place.
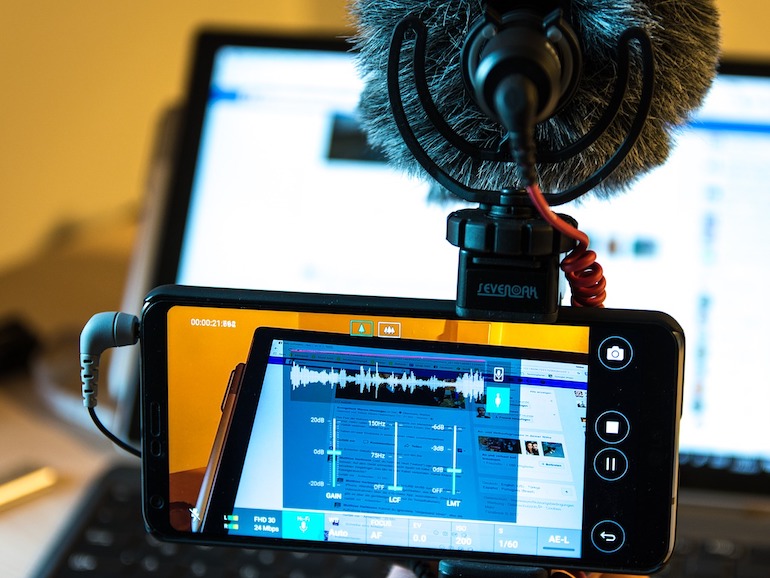
1.4 Smartphone Microphone
If you’re just starting out and on a tight budget, a smartphone microphone will do the job. These can be purchased for usually less than $20. Though they’re better for a tight budget, they still record studio quality sound. These microphones attach to your smartphone, usually via the 3.5mm jack or the charging port.
1.5 A Computer
Any type of computer, whether Mac or Windows, works for creating a podcast. You’ll use this to record, store, and edit your audio files. The type of computer you use depends on the type of microphone you’re using. You’ll need the correct ports to connect the microphone or XLR connector. For example, USB microphones obviously only need a USB port, included on almost all computers. If you’re using an XLR connector, you’ll need a 3.5 mm audio-in jack, USB cord, or a Firewire port, depending on the type you use.
1.6 Audio Editing Software
In order to record and edit your podcast audio, you’ll need a digital audio workstation or DAW. Much of this software will cost money, and some software options can reach upwards of $100 or more. Professional software, like Reaper or Hindenburg, are cheaper options that usually cost under $100. If you’re just starting out, it’s best to start with a free option, such as Audacity. The free software allows you to record and edit your podcast audio well without busting your budget.
1.7 Pop Filter
This is an optional piece of equipment. Pop filters provide a clearer sound that makes your podcast audio sound professional. These are often cheap. If you’re looking for something that fits a smaller budget, you can also make your own pop filters.
This may seem like a lot of equipment, but it’s all necessary to start your podcast. Again, budget may be an issue for those of you just starting out. Start with the basics until you get into the swing of things.
2 Pre-Production Planning
Once you have your equipment, you’ll need to start planning. You may think you can jump on the mic and start recording, but if you’re starting a professional podcast, it’s best to be prepared. Here are some things to think about before you start your first show.
2.1 Industry/Niche
There are tons of podcasts currently streaming. Take a look through any podcast library and you’ll find one on any given topic. Some podcasters choose a broad topic, such as music. Whereas you can go further into the topic and choose a niche such as bluegrass music. The key is to choose a topic that you have a passion for. The more knowledgeable you are on a topic, the more fun your podcast will be. Choose a niche that you’re able to expand on – the possibilities are endless.
2.2 Episode Length and Timing
Remember that people will listen to your podcasts. Most people listen to their podcasts at home or in the car, so longer episodes don’t often work well. The average length of a podcast, according to research done by Edison, is around 60 minutes long. The length of time you decide may depend on the content you’re producing.
Some podcasts are biweekly, or weekly. When you’re planning your podcast you’ll need to decide how often you’ll stream your podcasts.
2.3 Script Writing
Preparing a script keeps your podcast organized and professional. Plus, if you’re planning on keeping with the theme of the podcast, it’s easier to transition into the next episode if you keep on a script. This also helps you keep within your decided timeframe.
3 Recording Your Podcast
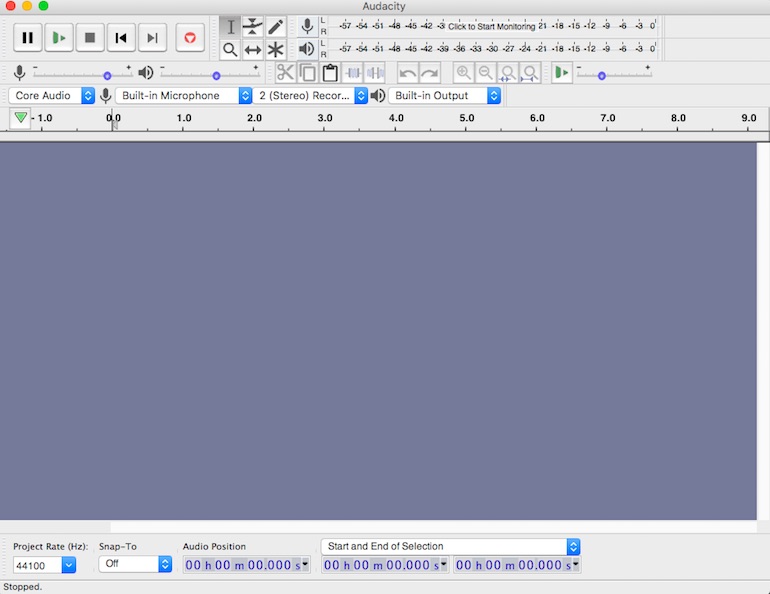
After you’ve prepared for your podcast, you’re ready to get behind the mic! For the purpose of this guide, we’re using the free software, Audacity. This is a relatively straightforward program, so it’s perfect for beginners. Once you’ve installed the program, you’re ready to start recording.
Make sure you’re in a quiet space with little to no background noise (you’ll only have to edit this out later).
Hit the record button, and you’re on the air. The program will begin recording your audio. Once you’re finished, or if you need to pause, click the stop button. Be sure to save your project by clicking File > Save Project As.
Here are some things you should keep in mind while you’re recording:
- Remember your positioning. How you position yourself will change the way you sound. Keeping a safe distance away from the mic, without too much moving around, will make post-production a lot easier for you. It also helps with your volume levels.
- Speak clearly. This should be a given. Your listeners should be able to understand exactly what you’re saying on the microphone.
- Stay on track. This should be easy if you’ve developed a script. It’s fine to deter from the script a bit, especially if you have a guest. But, you should keep an outline as best you can to keep within your timeframe. Otherwise, you run the risk of rambling.
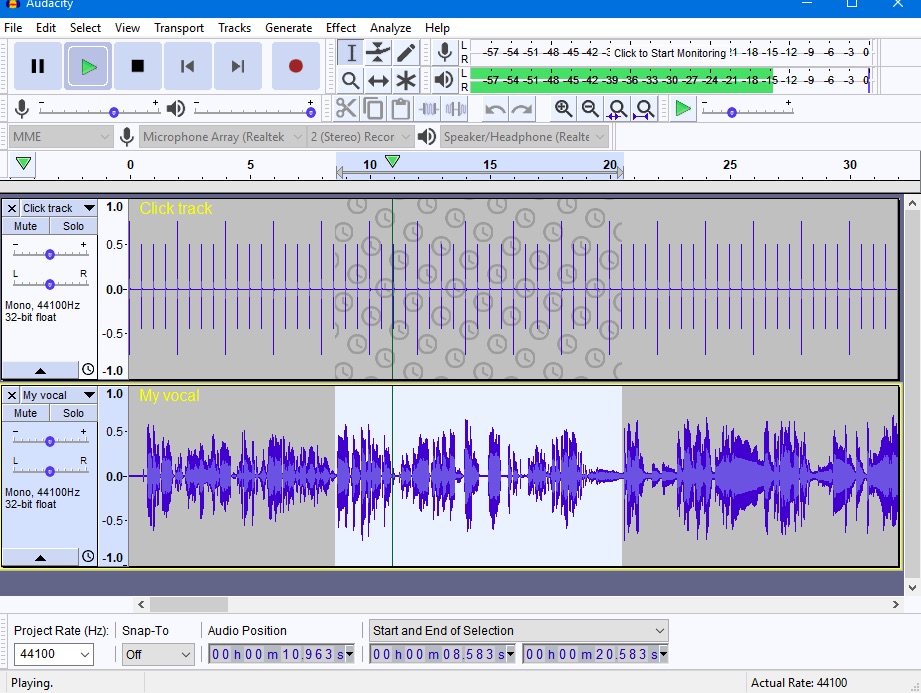
4 Recording with Multiple Microphones
At one point in your podcast journey, you’ll be working with multiple microphones. While Audacity has the capability to do many things, it requires a bit of work to record with more than one microphone. The software only allows for use of one audio input in one recording. However, there are ways to move around this.
For USB microphones:
If you’re using Windows, you’re able to combine multiple microphones using a free software such as Voice Meeter. You’ll see only one voice track in Audacity, however.
MacOS allows you to use multiple microphones without downloading other software. If you need help with this, follow Apple’s official instructions.
For analog microphones:
There are a few options when using an analog microphone. We’ve already discussed the XLR connector. With this option, you can upload the files directly to your computer from the recorder. The section option requires you to use an audio interface device that connects directly to your computer.
5 Edit Your Audio
Unfortunately, your podcast audio won’t come out perfect. That’s where your DAW comes into play. Again, for this example, we’ll use Audacity.
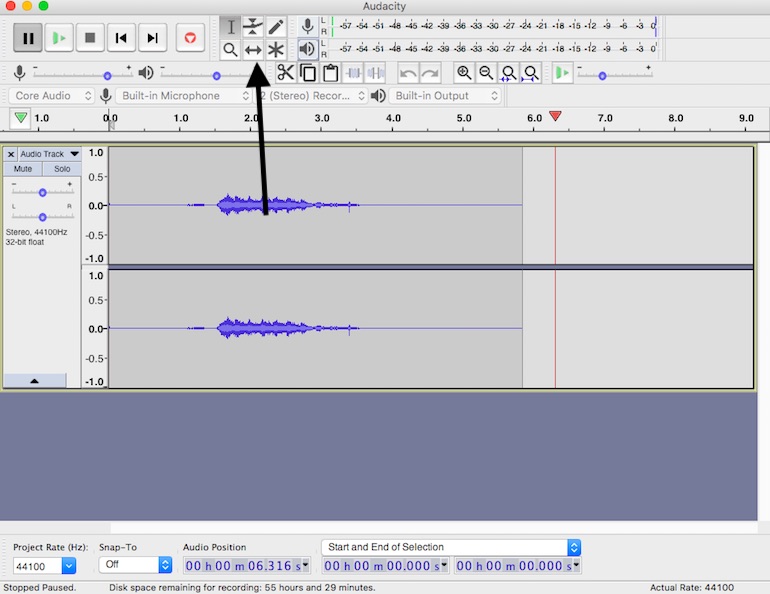
If there’s something you’d like to remove from your recording, it’s easy to remove. Simply find the selection and choose the selection tool. In the toolbar, you’ll see a cut button to remove the piece. This immediately removes the portion from the audio.

The Time Shift Tool helps you link everything together if you’ve removed pieces of your audio. This may require you to play with it until it sounds perfect. You’ll find this tool below the Envelope Tool here:
Audacity, as well as other DAW, help you smooth out the audio. This will require a bit of playing around, and it won’t be the same for everyone. It all depends on how well you recorded. You’ll need to play around with the equalizer settings. HowToMakePodcasts is a great YouTube channel that helps you figure out how to edit your audio.
6 Export Your Audio
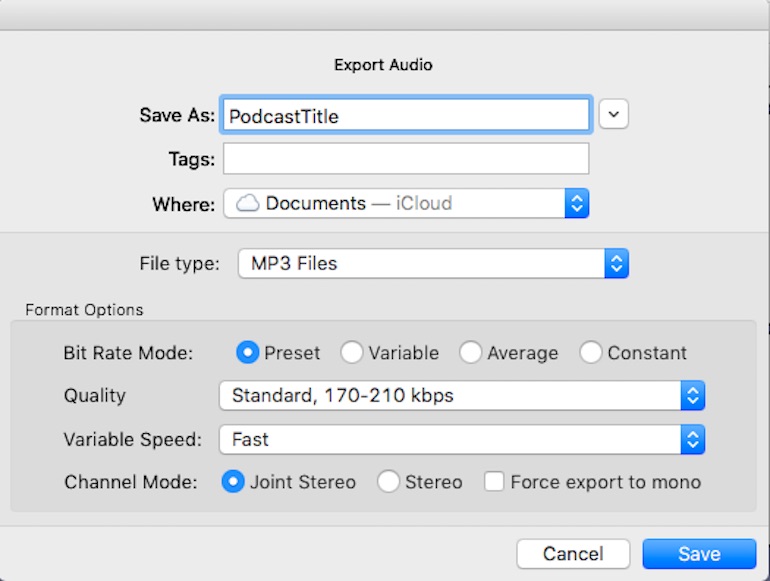
Once you’ve made all the necessary edits, you’re ready to export your podcast audio. You’ll first need to download an MP3 encoder from LAME in order to save in an MP3 format for uploading later on.
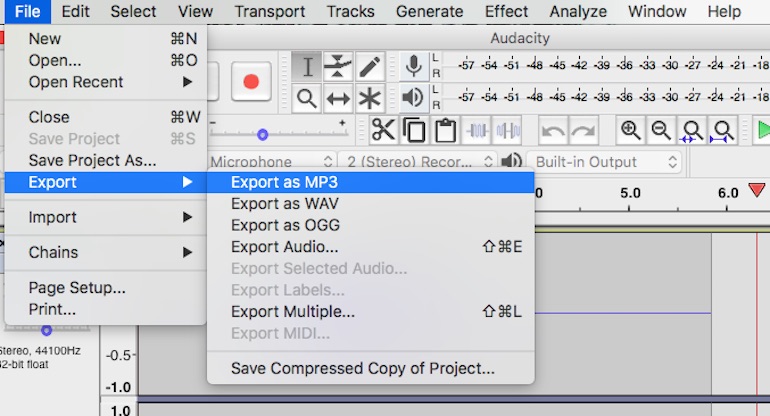
In Audacity, you’ll export your audio by going to File > Export Audio. In the “Save as type” drop-down, choose MP3 file. You’ll then name the file. Generally, this should be your podcast’s name and episode number.
You should then see the metadata window. This is where you’ll enter in your metadata. Your podcast’s metadata is known as the “tag.” This provides information that shows up no matter where you decide to upload your audio.
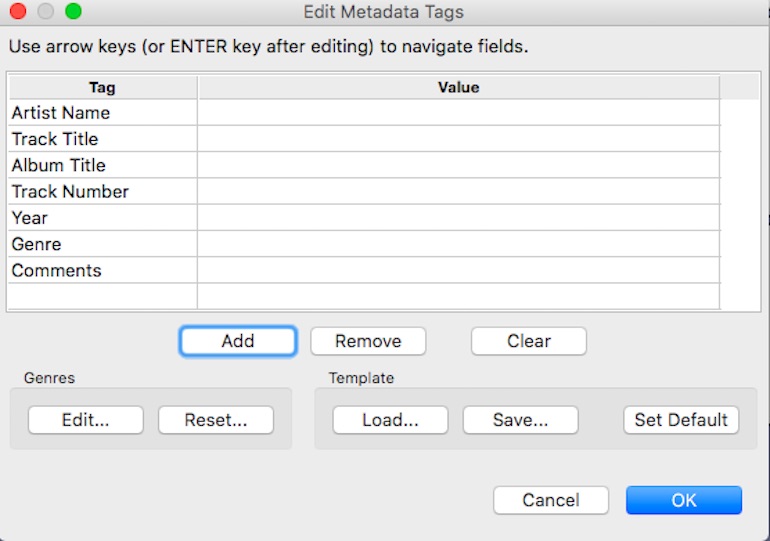
Metadata information includes the following:
- Track: This is your episode number. This helps sort your episodes chronologically for easy listening.
- Title: This should be your episode number and title. For example, 01: Podcast Title.
- Artist: The name of you or your hosts.
- Album: The whole title of your podcast.
- Year of release
- Genre: Choose “podcast” as your genre.
- Comment: This should be a brief summary of your podcasts episode. Remember, this is not the summary of your whole podcast.
- Copyright: Include your copyright information here.
- URL: Your web address should go in this field.
- Cover art: This should include your podcast cover art, which we’ll go over shortly.
There should be a template section where you can save this as a template for future episodes. Once you click “ok” you’ve officially saved your podcast as an MP3.
7 Create Your Name and Cover Art
Like an album cover for a band, you’ll need to choose a name for your podcast, as well as cover art. This information shows up in the podcast directory. You want something that will stand out among the other podcasts within the directories. Like a book cover, you want to ensure your podcast cover represents what your podcast is about. This can be a photo or art you’ve created.
In order for your podcast art to be accepted by most directories, you’ll need to follow specific guidelines. These include:
- A minimum of 1400 x 1400 pixels in size.
- .jpg or .png format
- Readable at 300 x 300 pixels
8 Host Your Podcast
There are tons of places you can upload your podcast. Some of the most major podcast hosting sites include iTunes and SoundCloud. We’ll cover some of the various directories here.
- SoundCloud: SoundCloud offers a free podcast option, as well as two paid options. Here you’re able to issue your podcast via RSS. Your podcast publishes to SoundCloud, make it easy to share it online.
- Amazon S3: This is a paid option. Amazon charges you based on storage and bandwidth. There is a free plan, but this would put a limit on your storage.
- Fireside: Fireside offers a plan for $19 a month. This plan includes unlimited storage, downloads, and episodes, as well as analytics. It also offers you a website on which you can host your podcast.
- iTunes: iTunes is one of the biggest podcast hosting sites available, as well as the most popular. Simply copy and paste your RSS feed URL into the form provided, and you’re all set.
While most of these options have their own upload process, there are a few basics you should follow:
- Use the name of your podcast when you upload it. This should be the podcast’s title.
- Upload your cover art.
- Make sure all sections of your profile are filled in. Most of this information you can pull directly from your metadata.
- Upload your MP3 file and check it to make sure it sounds correct on the platform.
If you’re just starting out, you may want to wait to upload your podcast until you have a few episodes created. Uploading one episode without the others prepared may result in a long wait for your listeners. Plus, it’s less likely you’ll gain more followers if you only have one episode.
9 Uploading Your Podcast to WordPress
For complete control over your brand, you may consider uploading your podcast directly to your WordPress website. In order to upload your podcast to your WordPress website, you’ll need a plugin. There are plenty of WordPress plugins to help you do this. We’ll cover a few of them here.
- Blubrry Power Press: If you’re already hosting on a big name podcast hosting site, like iTunes or Google Play, this is the plugin for you. You’re able to create several podcast channels directly from your WordPress website.
- Seriously Simple Podcasting: This plugin definitely earned its name. It’s simple for beginners who are still learning how podcasts work. Its simple setup and easy to use navigation makes it easy for the beginner. Users can also customize their experience.
- Libsyn Podcast Plugin: One of the many popular podcast hosting sites, Libsyn also offers an easy to use podcast plugin for WordPress users. This plugin helps keep your RSS feed updated while making it easy to store files. All your files are stored on their servers.
10 Conclusion
Creating a podcast may seem daunting at first. But it doesn’t have to be difficult. Ensure you have the proper equipment and planning in place. Remember, you don’t need to start out with the best equipment at first. And your first podcast doesn’t have to be perfect. Once you start feeling comfortable recording and uploading your podcast episodes, you’ll find it’s worth all the effort.