The Internet is a vast network of a large number of networks interwoven together. Web servers power different websites to make them accessible through web browsers.
Unfortunately, websites and other networks are prone to attack by hackers. In the present age of eCommerce, online payments for goods and services, online businesses, security is vital.
Before throwing light on how you can save your website from getting hacked or infected by any outside intrusion, let’s take a look at some important topics that we will be covering in this post.
Table Of Contents
- 1. Security of your website
- 2. Security on WordPress
- 3. What is SSL?
- 4. How SSL makes your website secure?
- 5. What is TLS?
- 6. Difference between HTTP and HTTPS
- 7. Let’s Encrypt
- 8. Let’s Encrypt on WordPress
- 9. Steps to create an SSL certificate using Let’s Encrypt
- 10. Zero SSL
- 11. Using WordPress plugins for creating an SSL certificate
- 12. Configuring website to implement the SSL
- 13. How to update WordPress URL to HTTPS?
- 14. How to update Analytics Settings for HTTPS?
- 15. Conclusion
1 Security of your website
The only website which is 100% secure is the one which does not exist. All sites are prone to attacks by hackers, but as a webmaster, your job is to minimize the possibility of attacks.
You must take the necessary measures to keep your website secure.
There are three primary steps every website owner should take to prevent the damage from an attack if it occurs.
1.1 Username and Password
Don’t use common usernames such as admin and choose passwords that include alphanumeric characters. Make sure that you don’t use the same password everywhere.
Your username and password are critical for your website security. Make sure that nobody knows the username and password of your site unless authorized.
1.2 Keeping System Files Updated
It is important for WordPress users to keep their WordPress version, Themes and Plugins updated. Do not use any Plugin or Theme which is not actively supported.
1.3 Regular BackUps
You must back up your website regularly. In case, some damage occurs to your site; you must be able to revive it back in no time.
If you take these three measures, you significantly enhance your website’s security, but your site remains prone to attacks by hackers.
2 Security on WordPress
WordPress developers take maximum efforts to make sure that the platform remains secure, but it requires effort on your part to make sure that your site remains secure.
The Internet is constantly evolving, and hackers keep inventing new ways of hacking websites. Fortunately, developers keep developing new fixes, and that’s why you always need to keep your system files updated.
Besides taking the primary measures listed above, you must enable the encrypted communication between your site and browser.
Whenever a user accesses your website, server and browser exchange necessary information with each other.
You don’t want any outsider to have access to that communication, but it should remain encrypted and used only by the web browser and the server. For that purpose, you should make your site secure with SSL.
You may also change the login URL of your site from the default WordPress version as it will make it difficult for the hackers to breach your website.
3 What is SSL?
SSL stands for Secure Socket Layer. SSL creates an encrypted layer of data transmission between the two systems.
Whether it is server to server communication or server to browser communication, SSL allows encrypted data transmission and prevents its access to an outsider.
For creating an SSL connection, a server needs an SSL certificate.
![]()
4 How SSL makes your website secure?
The encryption of the transmitted data makes sure that all information remains private. Hackers cannot interpret and steal the personal information such as Credit Card Numbers, etc. transmitted under the secure layer.
If a website is SSL secure, a padlock icon appears in the address bar before the web address.
If the data is transmitted without encryption, hackers can steal the personal information such as Login ID, Credit Car Numbers, Email Addresses, Mailing Addresses, Passwords, etc.
Reputed websites have SSL encryption enabled on their site to protect their own business, customers, and clients. If a site is not SSL encrypted but tries to fake it, the user will see a warning that the ‘website might not be safe to visit.’
- A browser tries to make a secure connection with an SSL secured website after obtaining its IP Address from a DNS server. The web address of an SSL secure site begins with ‘HTTPS’ instead of ‘HTTP.’
- The browser initiates a request for the SSL certificate copy of the server.
- After receiving the copy of the SSL certificate, it ensures that the certificate is not expired, matches the domain name, confirms security standards, such as key length, etc., ensures that it is signed by a trusted CA(Certificate Authority).
- Once the SSL certificate seems trustable, the browser creates a symmetric session key.
- It encrypts the session key with the public key of the website’s SSL certificate.
- The server decrypts the symmetric session key sent by the browser.
- Server acknowledges the encryption.
- All communication between the web server and the concerned browser is now encrypted.
SSL Encryptions: How do they work?
Netscape developed SSL Protocol in the 1990s. There were various flaws in the Protocol and its implementation that made it vulnerable. To deal with such issues, TLS Protocol was developed.
5 What is TLS?
TLS has evolved from SSL, and it is backward compatible with it. They are commonly referred to as SSL/TSL.
SSL/TSL is the most widely used security protocol today. It comprises of two layers, TLS Record Protocol and TLS Handshake Protocol.
TLS Handshake Protocol sets the rules for the negotiation of the cryptographic systems for communication.
It decides how a server and a browser will establish a connection. It also administers the exchange of public and session keys for transmission of the encrypted data.
TLS Record Protocol sets the rules for the exchange of data through SSL. It defines the rules of encryption and decryption of the transmitted data.
The whole process of verification of security certificates remains invisible to the user and completed very quickly.
After the server gets authenticated, a padlock icon appears in the address bar, and the URL changes from HTTP to HTTPS.
6 Difference between HTTP and HTTPS
HTTP stands for ‘Hyper Text Transfer Protocol,’ and HTTPS stands for ‘Hyper Text Transfer Protocol Secure.’
HyperText is enriched Text, a text that contains links, formats, and other elements. The transfer of HyperText through various channels across the network needs a particular set of rules or protocol.
HTTP defines the rules for transfer of data between the browser and the server. When a security protocol is implemented with the HTTP, it becomes HTTPS.
Online Banking, E-commerce websites, Payment Gateways and many other websites that need to handle sensitive information use HTTPS for encryption.
HTTPS is necessary to safeguard the interests of the customers and businesses. HTTP, on the other hand, is used for data transmission between the browser and the server without encryption.
To have an HTTPS Domain name, you need an SSL certificate from a CA(Certificate Authority). You can use Let’s Encrypt to get an SSL certificate and make your website secure for free.
7 Let’s Encrypt
Let’s Encrypt is a CA(Certificate Authority) that gives free certificates for TLS encryption through an automated procedure.
Many companies like Google, Automattic, Mozilla have come together to support Let’s Encrypt to increase an overall security level on the Internet.
ISRG(Internet Security Research Group) maintains it. Its Automatic Certificate Management Environment(ACME) allows you to install a certificate with just a few commands.

8 Let’s Encrypt On WordPress
You can get an SSL certificate from Let’s Encrypt for your WordPress website in many different ways.
It is advisable to make your website secure with an SSL certificate, especially when it is free now.
Besides improving your website’s security, it also helps to build trust among your readers, customers and clients. It can also have a positive impact on your search engine ranking.
Easy Integration with Hosting Services
Hosting services such as Bluehost, Dreamhost, Godaddy, Siteground, WPengine and many other services let their customers create an SSL certificate with Let’s Encrypt on their CPanel.
9 Using Let’s Encrypt to create a Free SSL Certificate
Now we will discuss in detail the steps to create a free SSL certificate using Let’s Encrypt on supported Hosts.
Follow the step-by-step details to create your own SSL certificate for free.
Step 1. Login to your website’s cPanel.
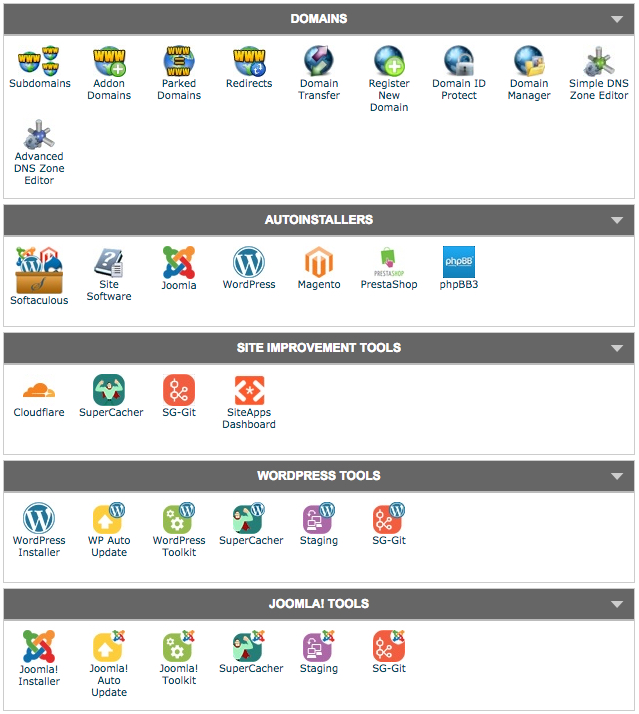
Step 2. Go to the Security Option
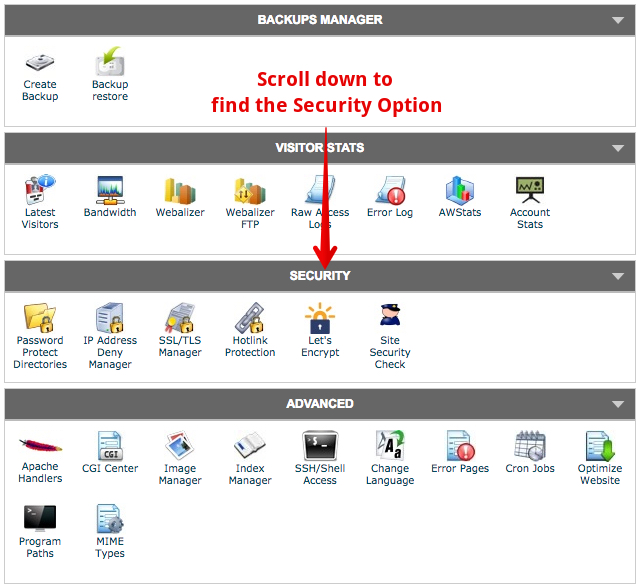
Step 3. Find the Let’s Encrypt option or Secure Hosting option and click it.
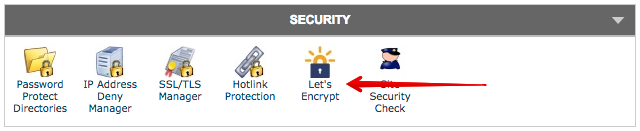
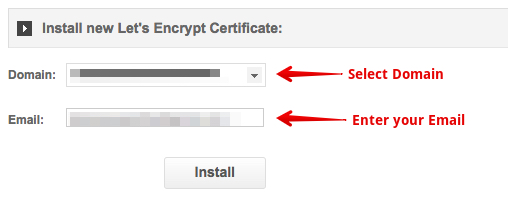
Step 4. Select your Domain Name and fill other options such as email address if asked.
Step 5. Click Install or Add Now option.
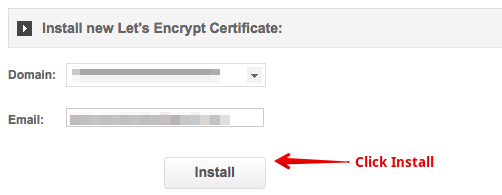
Step 6. Save the certificate after it gets created. We will need it later to load it.
If your web host does not offer a Let’s Encrypt option on the cPanel, you can contact them, and they will guide you through the process. It is more complicated than the steps above and can vary greatly among different hosting services.
10 ZeroSSL
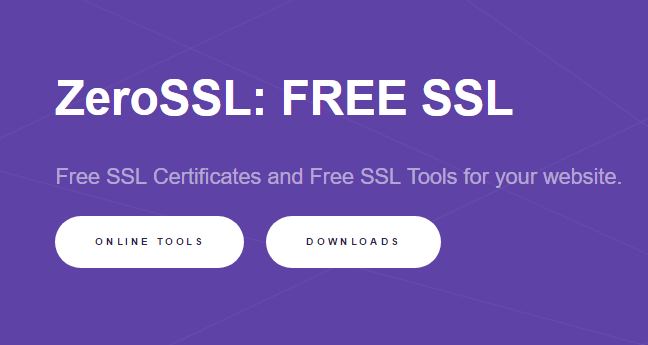
If your web host does not offer an easy option to create an SSL certificate or you just want another alternative method to create your free SSL certificate, you can use a free online service called ZeroSSL.
This service is not recommended as you will have to recreate your certificate every 60 days.
11 WordPress Plugins
There are a few WordPress Plugins, such as WP Encrypt, that allow you to create an SSL certificate with Let’s Encrypt.
However, none of them appear to be actively supported, and it is preferable not to use plugins that can act as the potential cracks for your website.
12 Configuring the Website
After creating an SSL certificate for your domain, you need to configure your website and load the certificate to make it functional.
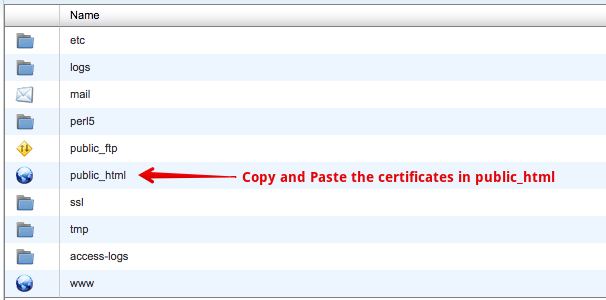
Step 1. Open the cPanel of your website.
Step 2. Open File Manager or FTP.
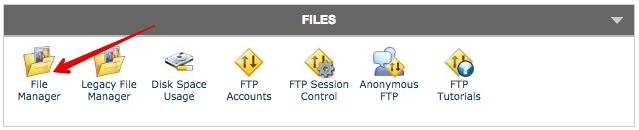
Step 3. Copy and Paste the certificate files in the public_html folder of your website.
Step 4. Close FTP and come back to the cPanel Dashboard.
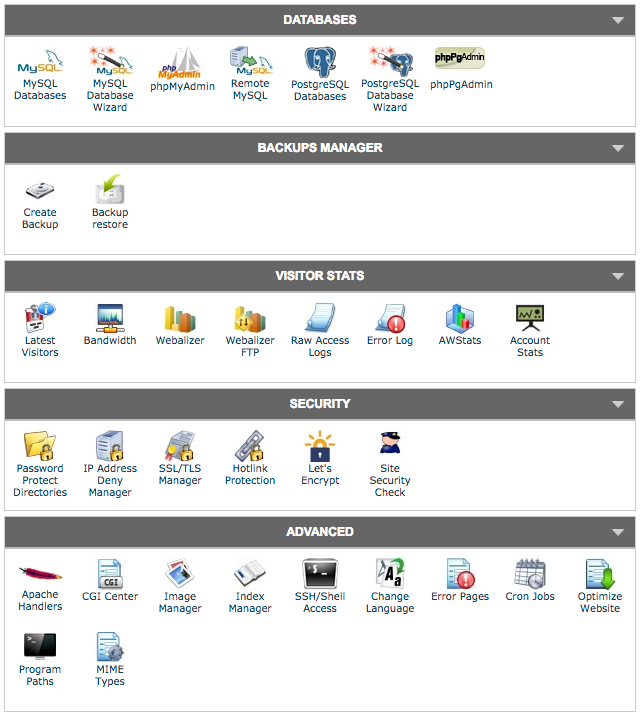
Step 5. Search for SSL.
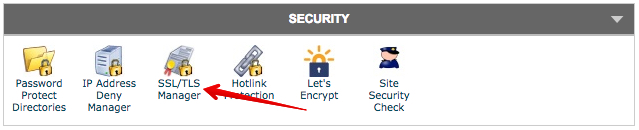
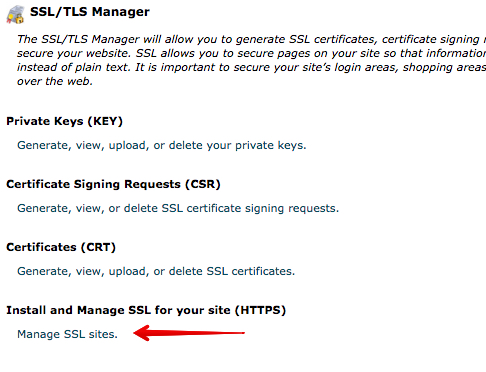
Step 6. Click ‘Install and Manage SSL for your site (HTTPS).’
Step 7. Copy the code from cert.pem, private.pem, and chain.pem.
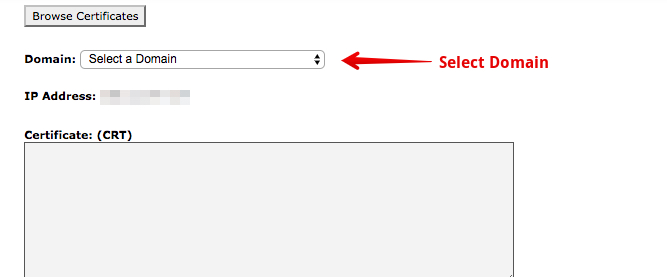
Step 8. Paste the code into the respective boxes for each one of them.
After saving, your encryption certificate should be active on your website.
This whole process should take ten to fifteen minutes.
13 How to Update URL to HTTPS?
After securing your website with an SSL certificate, you need to change your URL from an HTTP one to an HTTPS URL. Without changing the URL, the SSL certificate won’t work, and your website won’t enjoy any extra security.
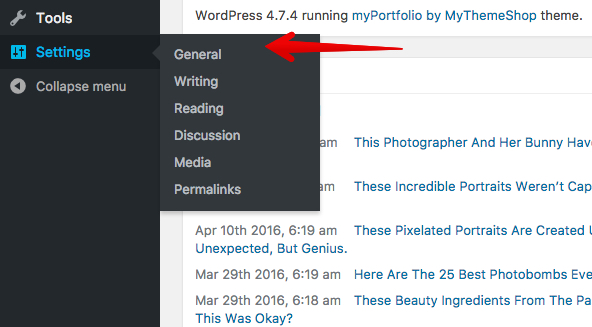
Step 1. Go to your website’s Dashboard.
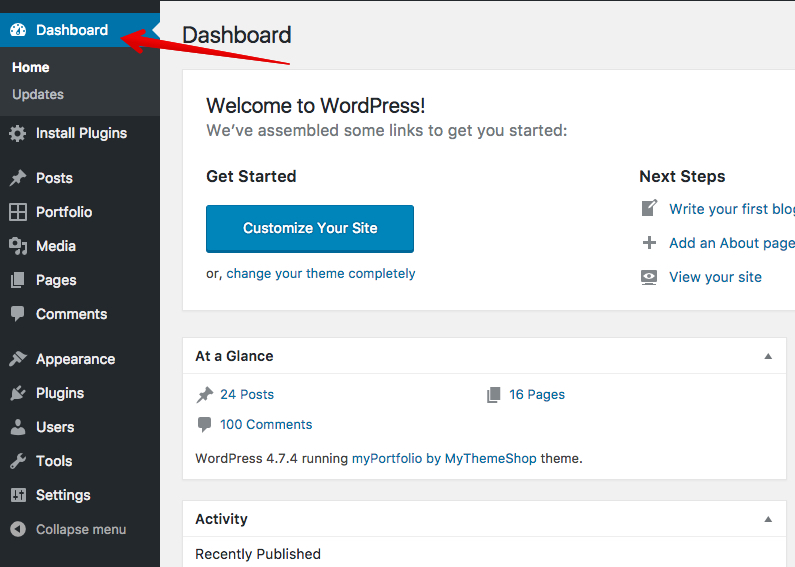
Step 2. Hover to ‘Settings’ and click on ‘General.’
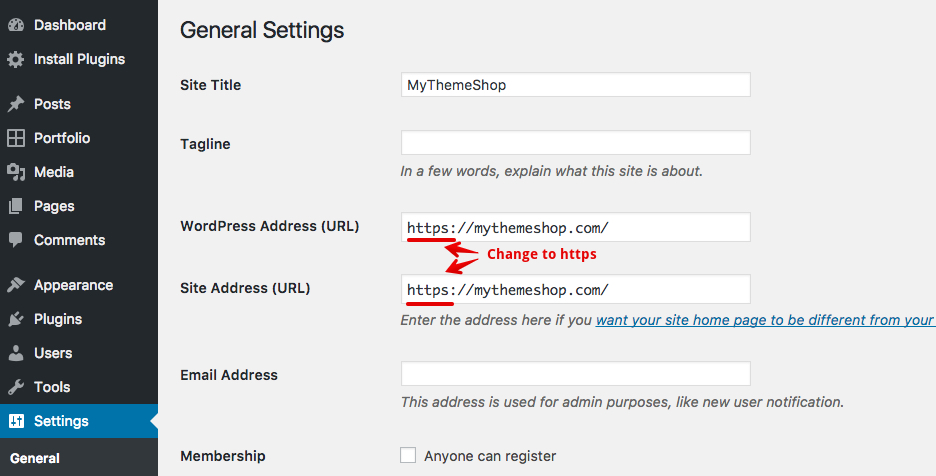
Step 3. Change the WordPress Address and the Site Address and use ‘HTTPS’ instead of ‘HTTP’ in the beginning.
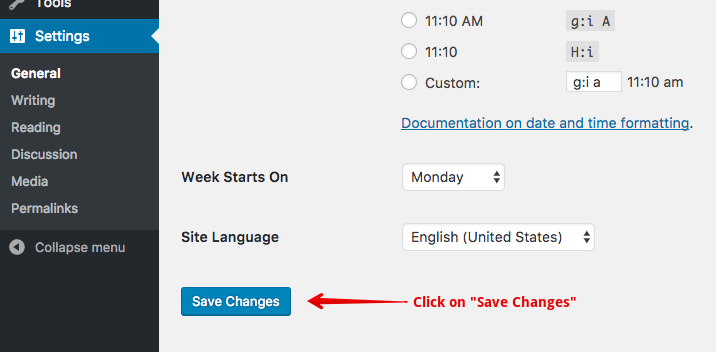
Step 4. Click ‘Save.’
After completing the above steps, your website has become an HTTPS website with an SSL certificate installed on it.
If you have a new website, then the process is complete, but if you already own a website that has many pages indexed on Google, then it will create some issues.
Some of your website pages will load using HTTP protocol, and other will load with HTTPS.
It can be very counterproductive for your search engine rankings. Also, many backlinks that use ‘HTTP’ before the address of your page, will no longer work.
Fortunately, there are a few plugins like ‘SSL Insecure Content Fixer‘ and ‘Really Simple SSL‘.
These plugins detect your website’s SSL state and configure it run over HTTPS. All HTTP references will be turned into HTTPS ones, and you will not lose any traffic.
It is important that you back up your website before you use these plugins or any plugins in general. You should get in the habit of taking backups of your website if you avoid it. Backups are extremely crucial for your website’s security.
Once, you update your website URL to HTTPS, you need to update your settings on Google Analytics too if you use it for traffic analysis of your website.
14 How to Update Analytics Settings for HTTPS?
Step 1. Login to your Analytics Account.
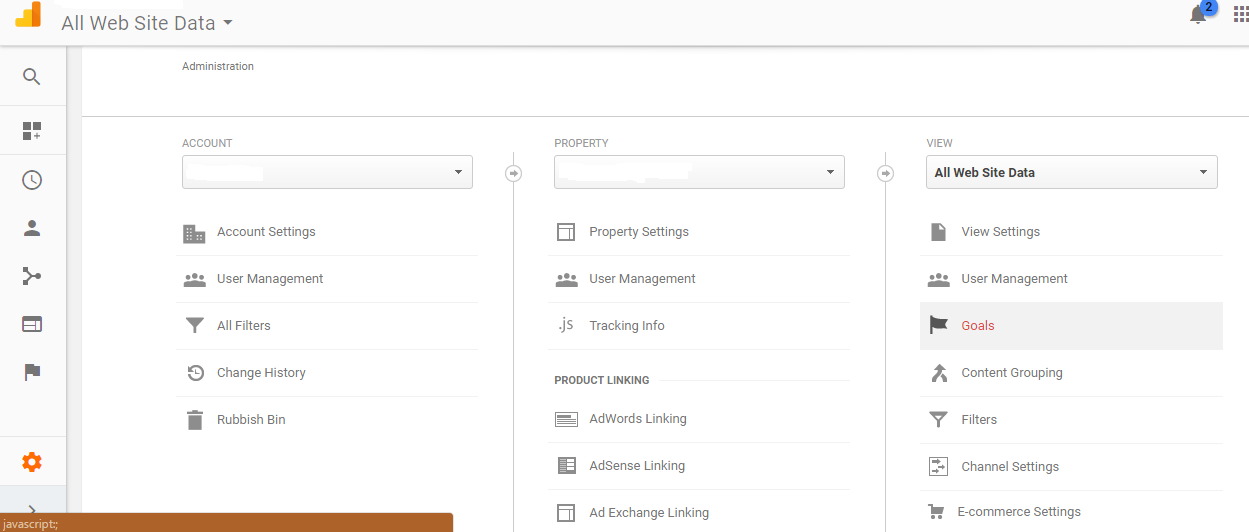
Step 2. Go to Admin.
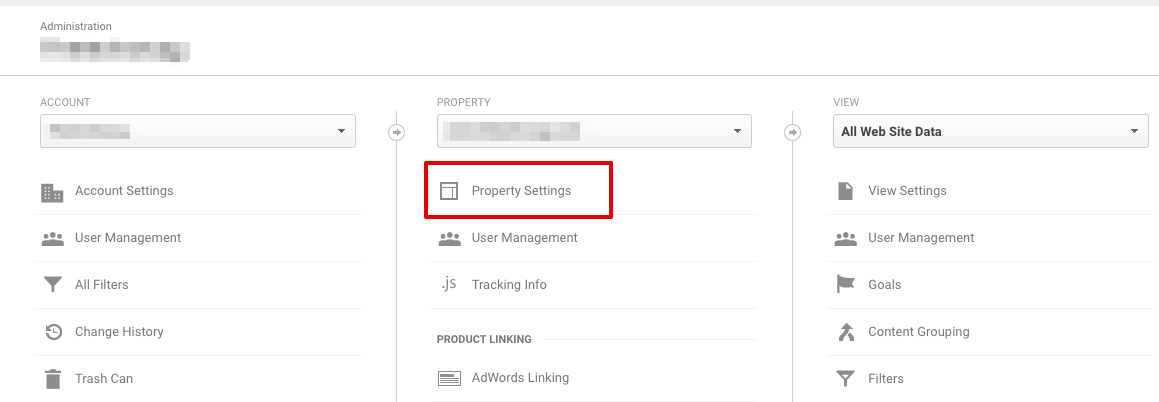
Step 3. Open your website settings by clicking property settings under your domain name.
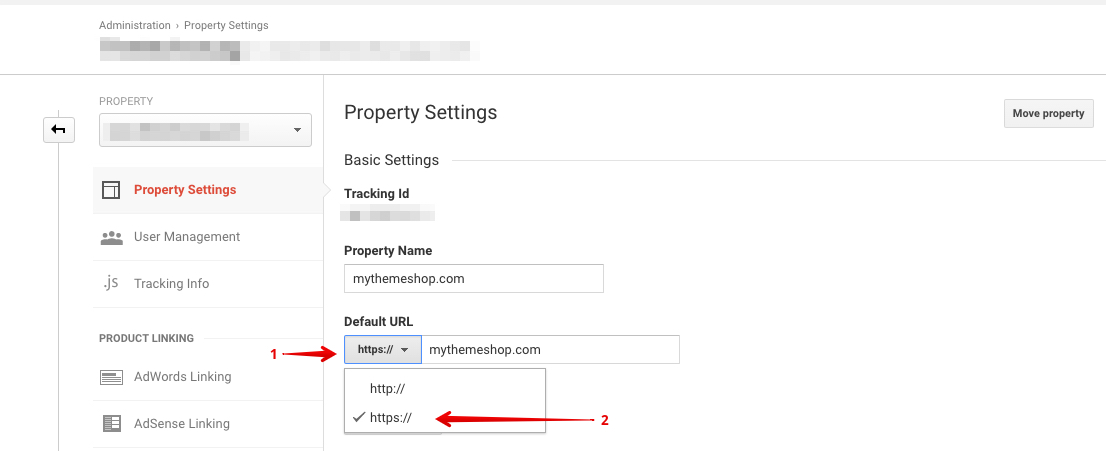
Step 4. Click on Default URL. Select HTTPS from the drop down menu.
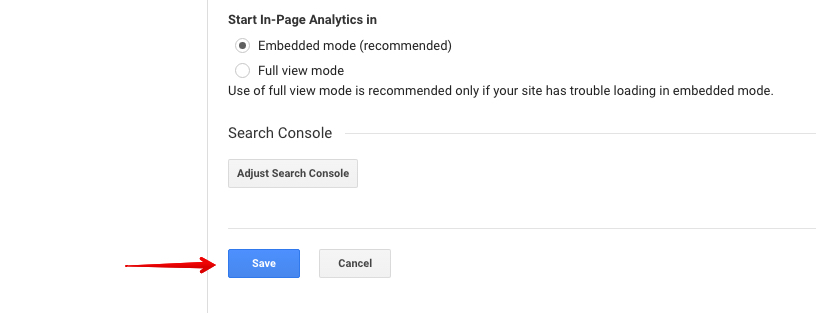
Step 5. Click Save.
Now, you will receive correct reports of your SSL secured, HTTPS website on Google Analytics.
15 To Sum Up
Installing an SSL certificate can look a little daunting in the beginning, but it is not that difficult to make your website secure with an SSL certificate.
You must enhance your website’s security with SSL, especially because you can install it for free using Let’s Encrypt. It can save you from a large number of hacking attacks and keep sensitive information protected.
Besides enhancing your website’s security, an SSL certificate also builds trust for your site and improves your site value for search engines.
Besides SSL encryption, don’t forget to keep your website fully updated, protect your login id and password and taking regular backups.
Installing a Let’s Encrypt generated SSL certificate on your WordPress website is very easy with the hosts that have Let’s Encrypt add-on on their cPanel.
You only need to load the generated certificate on your website, update a few settings and your site’s security gets enhanced.
Don’t forget to share this post with your friends who are currently using WordPress for their blogs and websites. It would certainly help them to keep their website secure and safe from any unauthorized intrusion.