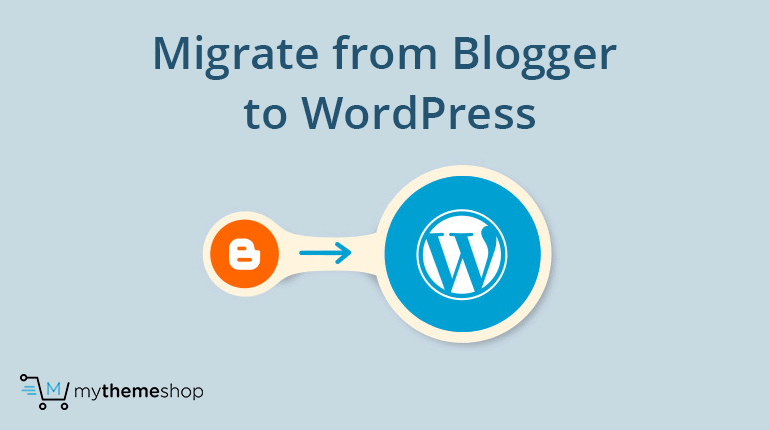
Blogger is a renowned platform by Google for creating websites and online portals.
If we survey a group of bloggers and ask them how they started their blogging journey, “Blogger” or “Blogspot” would be a very common answer to hear.
This is because it is one of the oldest free platforms that you can use to create a website.
Well, being a free service, the Blogspot platform has many limitations also. You cannot really expect to scale up and do the advanced stuff using the Blogspot platform.
Once your website starts getting traffic and user engagement, it is always a good idea to shift to a self-hosted WordPress blog.
This is because WordPress offers greater flexibility in customizing the website according to your needs and controlling who edits it. You can update and change the features of your website and make it remarkably stunning for your user.
You won’t regret your blogging decision once you are on WordPress as it becomes easy to use and scale. The best part- Blogger to WordPress migration will take hardly 5 minutes if you follow this step-by-step guide.
You can migrate from Blogger to WordPress using these 5 simple steps:
To completely transfer your old Blogspot blog to a custom WordPress blog, the migration will include-
- Migration of all the posts and comments to WordPress
- Migration of the images to WordPress
- Migration of visitors from Blogspot to WordPress
- Redirecting users from posts in Blogspot to posts on WordPress
- Migrating Feedburner Feeds by keeping the subscribers
The above migration will completely transfer your Blogspot blog to WordPress without affecting the traffic and the Google Page Rank.
For easy migration from Blogspot to WordPress, WordPress provides a one-click option for importing all the content.
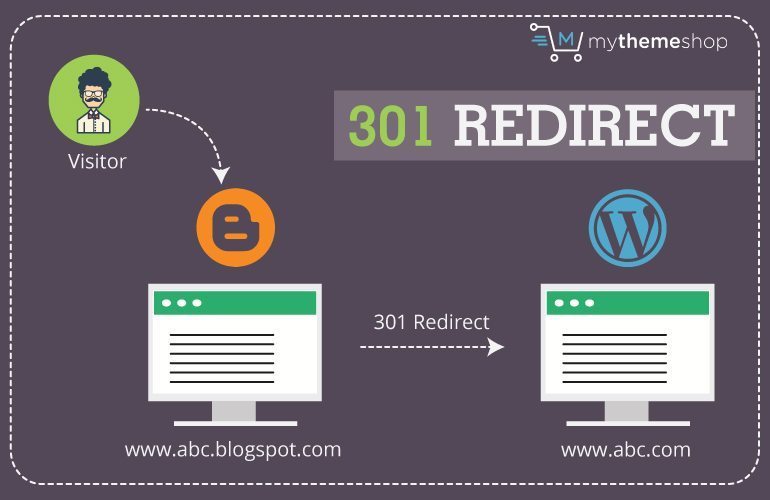
This is simple but, to pass all the Link Juice from your old blogspot.com domain to your new WordPress blog, you will need to follow few more steps.
If you are not aware, Link Juice is passed when other blogs and website give links to your site. This is a major Google Page rank factor for ranking your website on the top in the search engine.
Follow this step by step Blogspot to WordPress migration guide. This will also help you in transferring the Google Link Juice from your old Blogger domain to the new WordPress site.
Blogger to WordPress Migration- Step-by-Step Guide
1 Step 1: Create Backup for Blogger
Before starting up the migration process, it is always a good idea to take a quick backup of your old Blogspot blog.
The backup will include all the blog content including the blog posts, XML template, and comments. This is a good practice and prevents you from loosing data in case of any failure.
2 Step 2: Installing WordPress
- It is always preferred to purchase a custom domain name for your WordPress website.
For eg: your old Blogspot link looks something like- www.abc.blogspot.in
For WordPress, you can purchase a domain name of your choice – www.abc.com (Always go for top-level domains like .com and .net) - Install WordPress manually or using Softaculous.
- Open your WordPress Dashboard.
Go to posts -> Delete the default post “Hello World.”
Go to pages -> Delete the default Sample Page
3 Step 3: Migrating to WordPress
- Open the WordPress dashboard. In the left menu, you will find “Tools.”
Click on Tools -> Import, select the option for Blogger. Authorize the WordPress account to access your Blogger Account. Select your blogspot.com blog and proceed. This will copy all the content from your Blogger domain to the WordPress site including blog posts, comments, and pages. - Under Appearance -> Select Editor. This will lead you to your Theme codebase. Every Theme codebase usually includes a functions.php file. If not, you can manually create one using the cPanel. Copy and paste the following code snippet inside the function.php file and click on “Update File” to save changes.
- Now open the Blogger Dashboard and choose Templates. Scroll down the page and select “Revert to Classic Template.” This will shift the view from XML-based Blogger template to the classic Tag-based template.
- Copy and paste the below code snippet in your Blogger template editor. Do replace all the occurrences of xyz.com with your actual WordPress site URL. For e.g. your WordPress site link is www.abc.com, replace xyz.com with abc.com in the given code snippet and save the changes. Do the same for the above code snippet as well. Change xyz with your domain name (Only the middle part. Eg. if the domain name is www.abc.com, use only abc)
Now, open any page on your old Blogger blog and it should redirect you to your corresponding WordPress page. This is because we are using permanent 301 redirect which will pass all the Google Link Juice to your new WordPress website.
This method works for a regular blogspot.com URL and also country specific domains like blogspot.co.uk, blogspot.com.au or blogspot.in.
In this case, you have just moved all the posts, pages and comments but not your image files.
Although this is still fine because the images on your WordPress website will still be linking to your blogspot.com domain because the images are still hosted on your blogspot.com domain.
4 Step 4: Switch RSS Feed to WordPress
So now that you have successfully migrated from Blogger to WordPress, the RSS feed URL needs to be changed for your new website.
Go to Blogger -> Settings -> Other and select Post Feed Redirect URL under Site Feed. Type the web address of your new WordPress RSS feed here. This will move your existing RSS subscriber to your new feed.
5 Step 5: Match WordPress permalink to Blogspot Permalink
You will now need to match the WordPress Permalink structure with the Blogspot Permalink Structure.
On your WordPress dashboard Settings> Permalinks
Change the permalink structure to the Blogspot version as given below:
/%year%/%monthnum%/%postname%.html

What’s Next?
So now that you have successfully setup your new WordPress blog, there are still few points to ponder:
- Submit your WordPress site to Google Webmaster by verifying the site ownership. Also, submit the XML Sitemap listing all the links of your new site. You can also use the Rank Math SEO on your WordPress website which will help you to manage the SEO strategies for your blog.
- Add quality content to your blog and use the essential plugins, at many times, premium WordPress plugins to enhance the user experience on your website. This will generate more traffic after which you can also monetize your blog to earn money out of it.
Conclusion
Blogger is the best platform to start your blogging journey. It is a free platform where you can develop your website development skills and learn the basic working of how a website functions.
On the other hand, WordPress is the best platform for taking your website to a whole new level.
The enhanced features of WordPress provide greater flexibility in connecting with your target audience. With WordPress, you can enhance the look of your website by using premium WordPress themes with just a few steps.
You can typically mould a WordPress website according to your way. The flexibility of customizing almost every single feature places WordPress among the top platform for setting up a clean and professional website.