Google takes many factors into account when it tries to determine the relevancy of any web page it crawls. Some of them are quite visible, and we all know what they could be.
The quality of the content is among the top factors that is analyzed, but it does not stop there. From over 200 factors that are examined, most of those are completely hidden from an ordinary user.
This is naturally done so that the system cannot be cheated – even the best SEO agencies in the world can only guess and no matter how good those guesses might be, or how much results they might show, no one can say anything with 100% certainty.
Since this is Google’s tool, we’ll focus mainly on that search engine and its algorithms.
As we all know, Google ranks pages by measuring quite a few signals that it can find on a website, and it has a special algorithm for that, meaning that it automatically does its job based on a set of predetermined factors. But it also means that it is smart and that it can easily adapt to newer situations.
That algorithm does exactly what you think. It ranks pages based on their overall relevance for the particular keyword. This is calculated both from quantitative data and qualitative data.
1 Quantity vs Quality

Quantitative data was calculated based on the number of links that lead to a particular page. This approach was widely used in the initial versions of Google’s PageRank algorithm, which is basically dead, and it was a simple popularity contest.
The links that lead to a particular page were counted as votes, so the more links you had leading to your page the better – that sounds as a pretty good idea, right?
But what happens if, for example, an extra-large debate is brewing on the web about the scandal that enveloped a particular company, and a lot of users are linking that company’s web page.
Does that company deserve all the attention and a higher position in according to the older PageRank? This situation might be complicated, but it is not far from real life scenarios that Google needs to take into account.
Think about this for a second: a company pays spammers to send millions of comments where they will link their landing page or their service page.
Judging from the number of links, that spammy (commonly referred to as a black hat technique) would produce results and raise the position of the page in Google search.
Especially if the technique was done covertly, and could fool the algorithm. This is still done, and you are probably aware of the WordPress comment spam territory and how quickly it got out of hand.
To combat this behavior, Google created another important factor for their algorithm.
Qualitative data is a recent invention that has actually been created by a much smarter algorithm.
It takes into account more important factors such as the relevance of the link, where it is posted (social networks, high-quality blogs, low-quality blogs, comment section), and where it leads.
It also takes into account the anchor text, how relevant it is, and the overall theme of the website pointing to a certain link.
Google has become quite good in text analysis and can quickly determine what the website is about; whether it is about plumbing services or dental health.
Now imagine a scenario where a plumbing service website has an ordinary link pointing to another website that also deals with plumbing – that link is worth more than if it comes from a dental website; as there is a natural difference in categories.
In the end, this changed the paradigm: it was not important to have more links but to have higher-quality links.
2 Black-Hat

It was important to have a general knowledge of how Google’s algorithm functions, and where its future lies.
Now, think about the scenario we mentioned: a company buys a lot of links leading to a particular page in an effort to increase their own rankings.
As a result, Google’s algorithm would automatically detect those and disqualify them, as well as inflict penalties on the targeted website, reducing its overall ranking. They did, after all, try to forcefully increase their search engine ranking.
And they all lived happily ever after…
But wait, what if the company pays for a black-hat technique for their competitor’s website? Now, we’ve opened another (quite a hypothetical) situation.
Why should you and your website suffer, if links are coming like crazy from sources you simply have nothing to do with, and you do not want them influencing your website ranking for whatever reason?
This is where Google’s Disavow Tools comes into action. It basically allows you, a domain owner, to negate the influence (either positive or negative) coming from a specified domain, or a page.

This tool is a double-edged sword. It can help your business a lot if used properly, or damage your rankings if you make a mistake with it. This is why, originally, it was said that Google’s Disavow Tool was only meant for an extremely small part of the internet that was skilled enough to properly use it.
This created all kinds of myths and misconceptions about this tool, but luckily for you, we’ve prepared this guide to dispel those fables and guide you to disavowing links that you do not want.
This tool also allowed Google to punish negative links with a much greater force than it previously did, and it is an easy way for a webmaster to defend their website from spam, but it also practically shifted responsibility from Google to webmasters. Google can punish much more severely, but you need to make sure you’re not affected.
3 A Word of Caution
Like we’ve said, there are a lot of myths about this tool, but the bottom line is the same: it should be used carefully. It tries to emphasize that point a few times before you actually have a chance to actually do some damage.

It should be used only against those links that were made to manipulate Google’s algorithms and that could lead to your website’s penalization in the future. Differentiating between good and bad links is an art, but also a necessary skill for many websites, and this is the official first step of this guide.
4 Preparing the Playing Field
Before you actually start preparing the file for the disavow (which is considered a last resort measure) you can manually try contacting the domain owner. Sending an email is easy, and it can save you a lot of trouble down the road. Finding their email is also easy:
● Site owner’s, or web administrator’s emails are usually at the bottom of every page;
● Try finding the Contact Us page;
● Try connecting with them on social networks (i.e. Facebook page);
● Use Whois.com, which will basically list all the info related to a particular domain (and the email used to register it);
An email should be a detailed description of your issue. Mention all the links you have pointing to your website, and where they can be found. Be specific, and it won’t hurt being polite. Ask for them to be removed, and wait for the reply.
Ideally, they will respond quickly and help you out. If you cannot contact them in any meaningful way, then you can continue with the disavowing process.
5 Finding All Inbound Links
Webmaster Tools is a great place to start. It is an official place to see everything that is happening on your website. When you open Search Console Search Traffic Links to Your Site you can see all the domains that are linking the most to your blog.
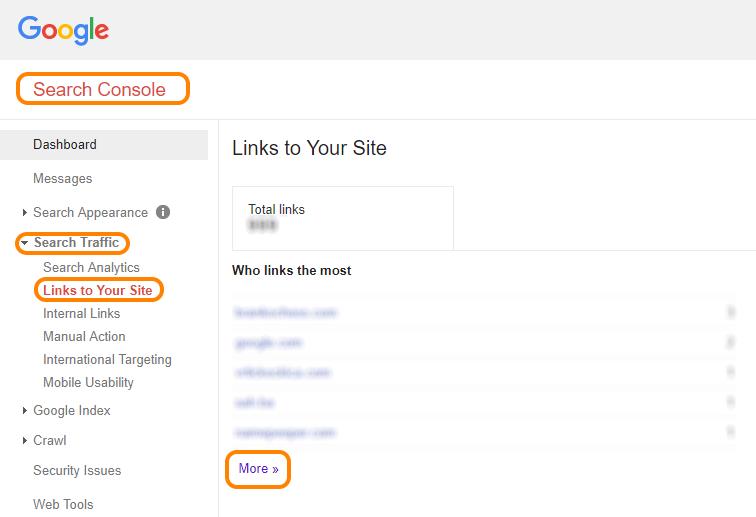
Another menu will appear once you click More.
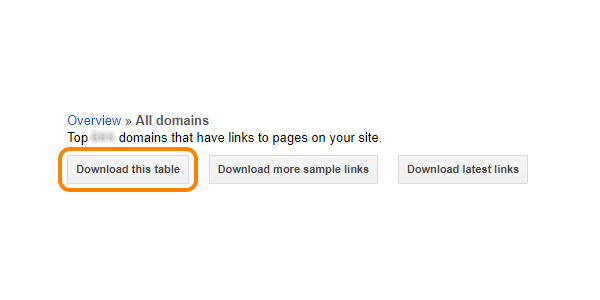
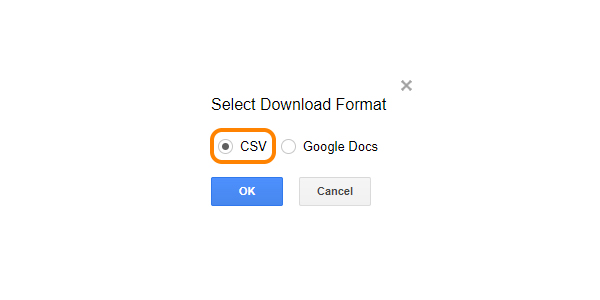
Here you will be able to download the file as CSV, which is the recommended format.
Once you do this, you will have the whole view of all domains that are currently linking to your website and how many links they actually have heading your way.
Remember, these are good and bad links, so don’t just go uploading this list to the disavow tool – you first need to sift through them.
6 Identifying Bad Links
For this part, it would be best to use some third party services that will analyze all the links you’ve extracted, and rate them according to specified criteria.
It is possible to do this manually, but if you have a lot of inbound links, it can take a lot of your time, which could be spent more productively.
We recommend SEMrush – it is an extremely popular tool used around the globe, and it almost needs no introduction.
3.1 Navigate to Landing Page
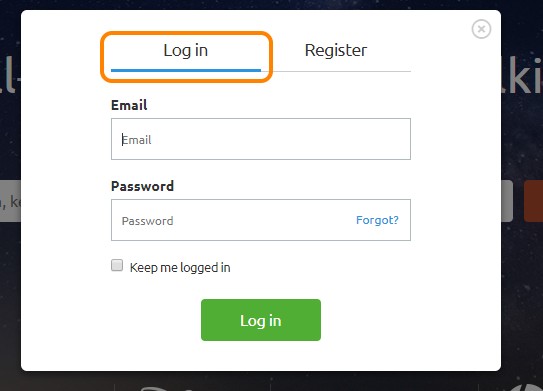
Navigate their landing page and click on Log In. If you already have an account, you can skip to step 3.7.

3.2 Provide Login
Provide login credentials (if you already have them, or click on the Forgot? button to reset them) or click on Register
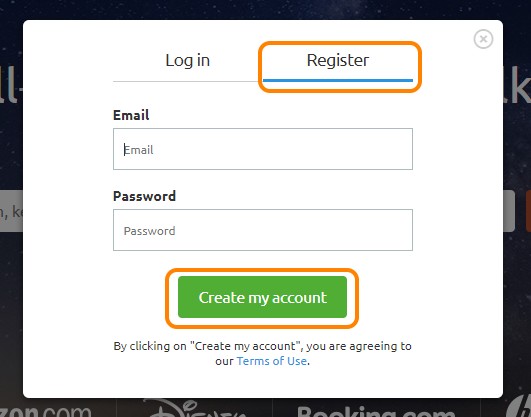
3.3 Register Account
In the Register panel, you need to insert your email and your desired password, and click on the Create my account button.
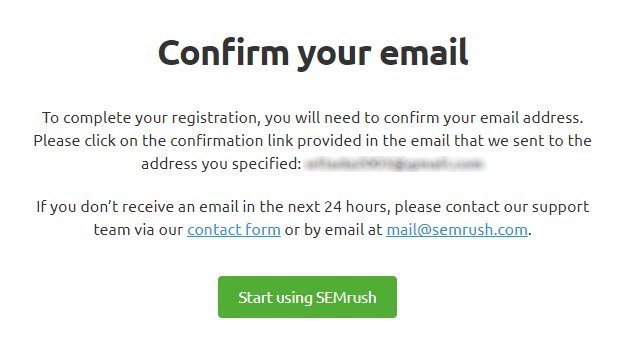
3.4 Confirm your Email
It will display a notification that you need to Confirm your email before you can proceed with your login. Make sure to check your Spam folder before waiting needlessly. SEMrush is a reputable source, so it will arrive in your main inbox almost instantly.
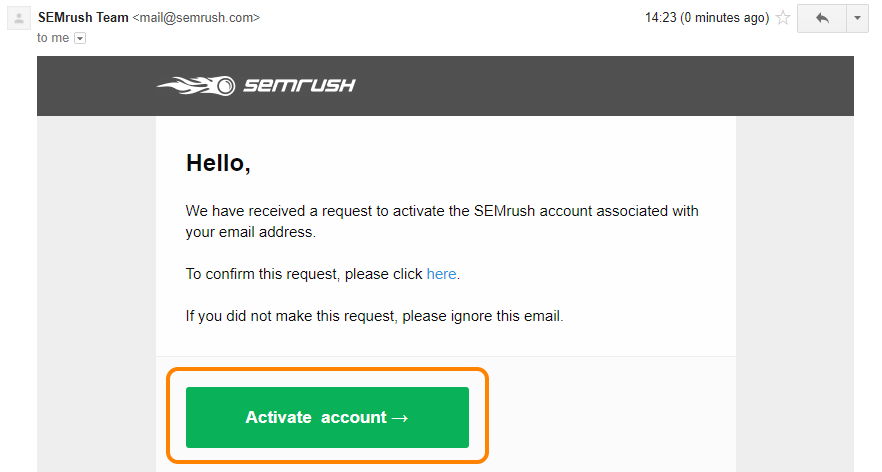
3.5 Activate Account
The email you’ve received is pretty straightforward, you just need to click on the Activate account button, and you will be taken to the next screen, and your email verified.
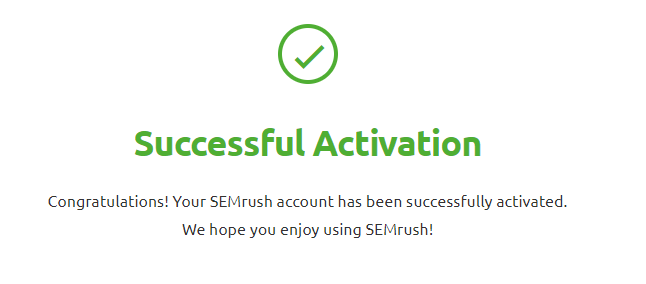
3.6 Activation Confirmation
A Successful Activation notification will let you know that you are now ready to go to the dashboard. The SEMrush landing page will redirect you to the dashboard automatically, so there is no need to look around.
3.7 Login to your Dashboard
Now Log In and be redirected to the dashboard.
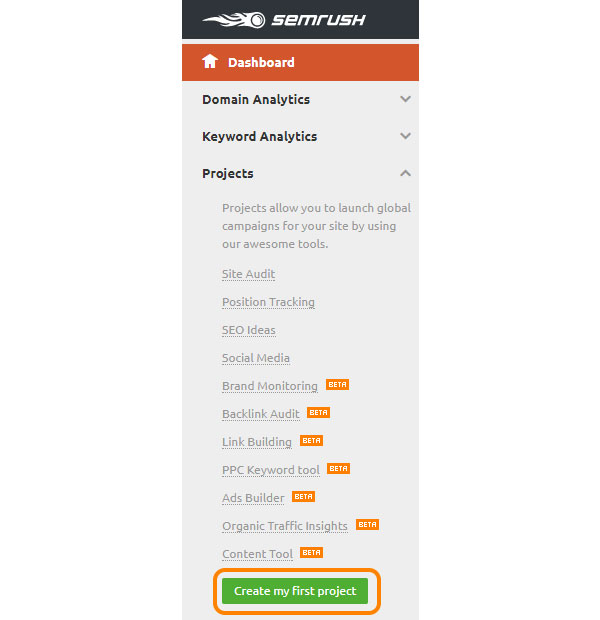
3.8 Select Projects Tab
Dashboard can seem a little confusing, especially for a novice user but everything is sorted neatly into categories. For now, we need the Projects tab, which is marked on our image of the dashboard.
3.9 Create First Project
Clicking on Projects will open a dropdown menu, with a lot of new options. For now, we only need Create my first project which is at the bottom of the menu, in a green button.
3.10 Save Project
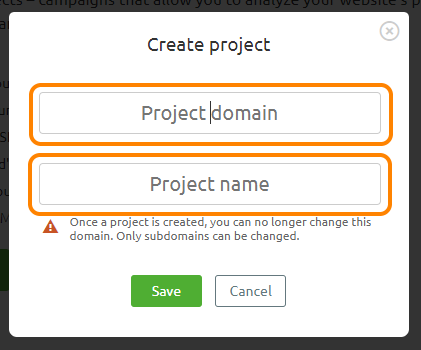
The Create project window will appear and will ask you for your domain name (paste the full URL), as well as for the project name. After that, click the Save button and you will be taken to the individual project dashboard.
3.11. There are a lot of tools on the project dashboard, most of which are not relevant for this guide. We are looking for the Backlink Audit section and the Set up button. This will allow us to conduct an in-depth analysis of all the links that lead to your website. Click on the Set up button.

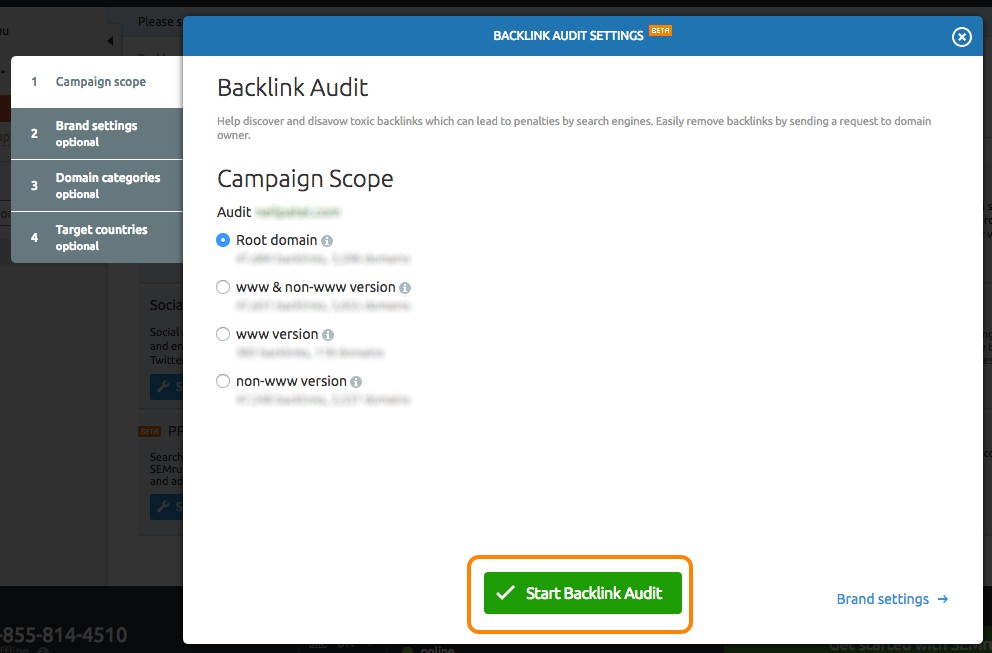
3.12. Once the new window opens, the URL will be automatically selected based on our previous inputs. It will give us a few options in order to select what we want analyze. By default, the root domain will be selected – which is exactly what we need. After that, click the Start Backlink Audit.
3.13. All you now have to do is – wait. This can take up to a few minutes. Only extremely large websites will need to wait longer than that.

3.14. In the Audit tab, you should have a detailed list of all links where you can automatically isolate low-quality, spammy links.
3.15. You can start the disavow process right there, by selecting all the desired domains and clicking on the Disavow tab, which will automatically generate the file you need to upload in Google’s Disavow Tool for perfect results.
NOTE: Even though SEMrush has an impeccable reputation, it is advised to manually check all toxic links coming your way. Just to be sure. It would be bad for your website to inadvertently block a good domain from reaching you. There are a few good common sense rules here:
3.15.1. If the website where the link is coming from is not in your niche, you are free to disavow it.
3.15.2. Shady domains such as .xyz or .click are usually spam.
3.15.3. Some country-based domains do not have a good reputation, but make sure to think about your target audience
3.15.4. Links from blog comments
3.15.5. Anything irrelevant, especially if the anchor text does not suit what it is trying to link
3.16. Now you are ready to click on the Disavow tab and create a file that can be used (in our case the .txt file)
7 The Disavowing
This is actually the easiest part (despite having the biggest consequences if done improperly) – so try and be careful. The reason behind this precaution is that the results from the disavow procedure can be expected quite quickly but, if you try to remove a domain from the disavow list, you could end up waiting a long time, or at least until an algorithm catches your changes.
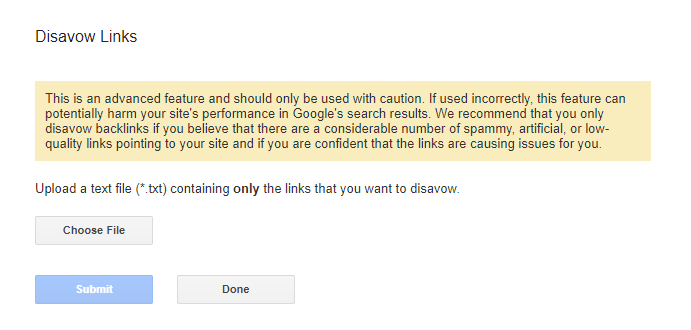
4.1. Go back to the Disavow Tool and click through the first two warnings. Make sure you know what you are clicking.
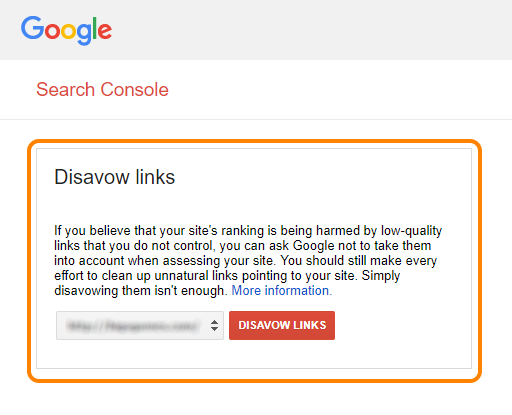
4.2. Another window will open, where you will be asked to upload the .txt that you’ve prepared. Now is the perfect time to double-check.
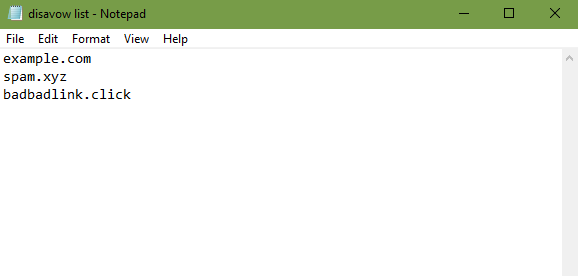
4.2.1. The .txt file should have a single domain per line.
4.2.2. There should be no http or https prefix.
4.2.3. There should be no www prefix either.
4.2.4. Make sure there are no duplicate domains.
4.2.5. A correct entry looks like this.
4.2.6. This is a completely machine-operated process. There are no humans involved.
4.2.7. Save the .txt file.
4.3. Most of the warnings are becoming repetitive at this point, so you can finally click Submit when you are ready.
4.4. If the system catches any errors, they will be displayed here (and information on how to fix them). When you try to upload a new file, remember that this will totally remove the old one, meaning that any new .txt files should have all the old rules, plus the new ones.
4.5. And that’s it! You should wait a few days before the changes are applied, and you should see a drop in spammy links (which can lead to an overall increase in your search engine rankings).
8 Final Words
While all of this might seem like a long and intimidating process – it actually isn’t.
Truth be told, it is a serious action and should be done with care, but only a few steps of this guide are really hard. Most of the job can be done quite easily.
Disavowing links correctly can help with your rankings and that can mean a new beginning if you’ve had troubles with toxic, spammy links, and detecting this problem is the first step towards a solution.
After this, you can dedicate all your efforts and your time to smart SEO optimization, by carefully selecting a good theme for your website, as well as the right plugins that can help you with your optimization efforts.
Use Google Webmaster Tools frequently and you will notice if there are any red flags that you should worry about, but for now, let the disavow do your job, and adjust some of the settings if necessary. Good luck!