The Importance Of A Fast Performing Website
A fast performing website is important for your business. A slow website is the easiest way to lose a customer.
Not only will your visitors abandon your website if it takes too long to load, but you will also lose search engine rankings. That means you will get fewer visitors and even those visitors will not stick around.
This infographic by Convert.com combines data from 12 different case studies showing the impact of reducing load times on conversions and other business metrics.
If you run paid campaigns and your website is slow, you will leave a lot of money on the table, if you make any at all.
Google explicitly mentions that page speed and website speed affect Ad Rank, which is Google’s Ad ranking score.
If your website is slow, your ad will become less competitive. On top of that, many users who click your ads will also leave your website, costing you money.
Optimizing your website for better performance should be the first thing you do once you start attracting visitors.
In this detailed post, we would tell you how you can improve the load time of your WordPress website so that you can not only improve your conversion rates but also prevent high bounce rates.
Here are some of the sections that we would be covering in detail:
Table Of Contents
- 1. Understanding Caching and Web Performance
- 2. Caching And It’s Effects On Web Optimization
- 3. Optimal Caching Plugin – W3 Total Cache
- 4. Installing the W3 Total Cache Plugin
- 5. Configuring W3 Total Cache
- 6. General Settings in W3 Total Cache
- 7. Page Cache
- 8. Minify
- 9. Database Cache
- 10. Object Cache
- 11. Browser Cache
- 12. User Agent Groups
- 13. Referrer Groups
- 14. CDN
- 15. Fragment Caching
- 16. Extensions
- 17. Setting Up CloudFlare
- 18. Testing the Results of W3 Total Cache
- 19. Download A Copy Of These Settings
- 20. Final Result
- 21. Conclusion
1 Understanding Caching and Web Performance
A lot happens behind the scenes when you open a website. First, the website name is translated into an IP address. A session is then opened with the server at the IP address.
The server at the other end receives the request and proceeds to execute code and fetch information from a database. All this information is then combined and shown on your screen.
We explained the working of a website for a reason. To perform any optimization, one has to understand the components that make the operation happen.
Optimizing the components individually and together is what makes performance optimization possible.
The goal of web performance is to reduce the load on the server while maintaining or enhancing user experience.
In our example, we shared many components that make up a web experience. Here are some of the important components.
- The browser on which the website is displayed
- The web server which serves the web-page
- The application which interacts with the web server
- The database server which retrieves the information from the database
- The actual database where the information is stored
- Other assets that are loaded with the web-page (images, JS, CSS, etc.)
To optimize your WordPress website for the best performance, all of these components have to be optimized.
2 Caching And It’s Effects On Web Optimization
One of the easiest ways to improve performance and decrease load times is caching.
To understand caching, you have to go back to the example we gave about website loading. A lot of information on a website is fetched from different places (Application server, database, disk).
This includes PHP, HTML, CSS, JS, results from the database queries, and images. Every time a user visits a page, all this information has to be fetched.
Since posts don’t change often, it doesn’t make sense to load all this information from the source every time a user visits a web page. That would cause too much strain on the server.
What if you could fetch all this information beforehand and make a copy? You can then just present the copy of the page to your visitor, thereby eliminating the need to engage the server.
That, in essence, is the concept of caching.
3 Optimal Caching Plugin – W3 Total Cache
WordPress has a lot of caching plugins available. We recommend using the W3 Total Cache plugin because it gives you granular control over the settings. Optimizing those settings gives you more room to improve performance.
The downside is that it’s difficult to make it work if you don’t know what you are doing.
That is the problem we are solving today. We will discuss the optimal settings for W3 Total Cache in this post. We will also discuss what each of the settings accomplishes and whether or not you should enable it.
4 Installing the W3 Total Cache Plugin
Before using the W3 Total Cache plugin, you have to install it.
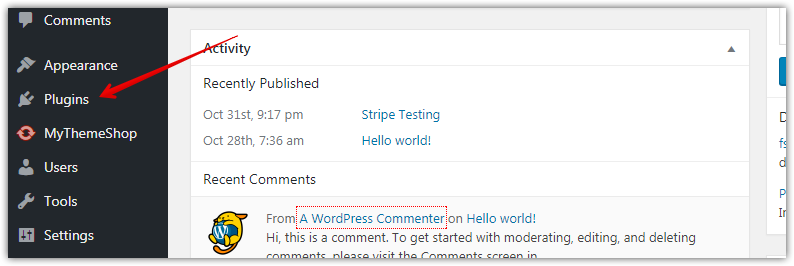
Installing the plugin is easy. Inside your WordPress admin, navigate to the plugins section.
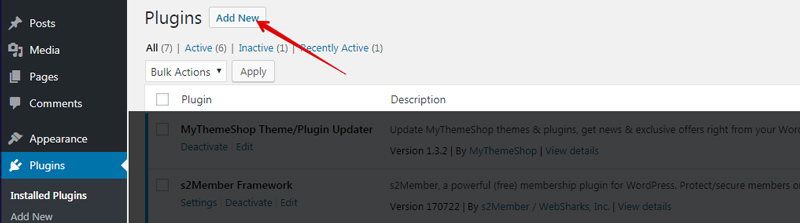
Once the plugins page opens, click the “Add New” button that appears on the top.
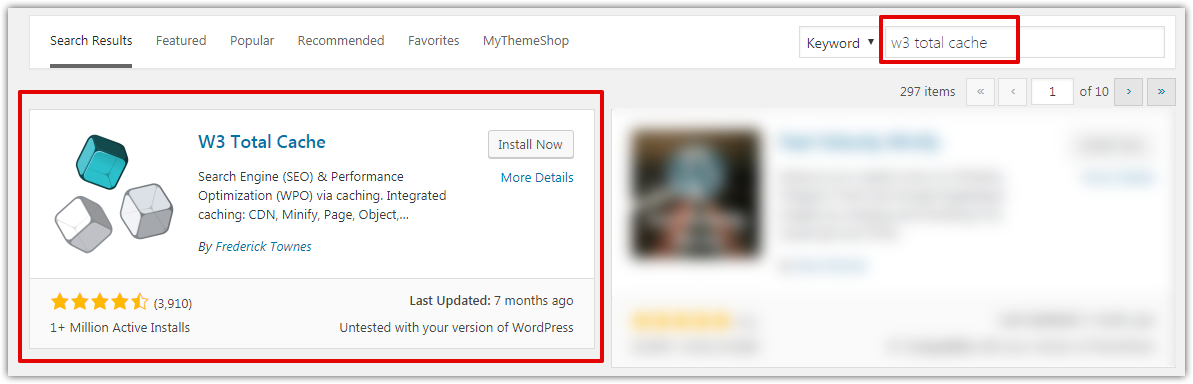
On the next screen, use the search bar to search for the W3 Total Cache plugin. WordPress will search for relevant plugins as soon as you start typing. After the search is complete, you should see the W3 Total Cache Plugin as the first result.
Click “Install Now” to start the plugin installation.
The plugin will start installing, and you will see the rotating icon on the button while the plugin installs. It usually takes just a few seconds to install, after which you should see the activate button.
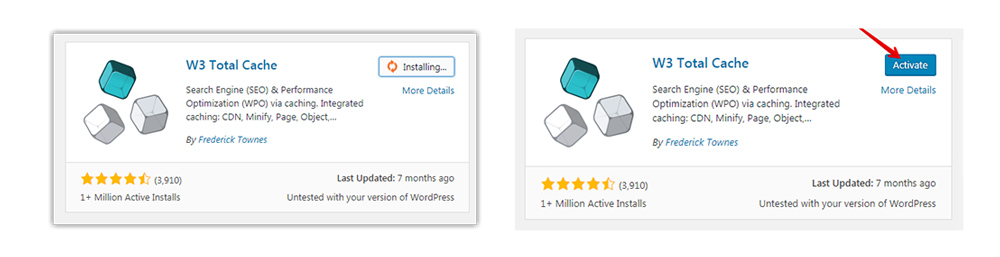
Click the “Activate” button to enable the W3 Total Cache plugin. You will be redirected to the plugins page where you should see the following message.

If you see the above message, then you successfully installed the W3 Total Cache plugin. Now, let us see how to configure the plugin.
5 Configuring W3 Total Cache
Once you download and install W3 Total Cache, you will see a section added to your WordPress admin window called “Performance.” Clicking the performance tab will open the W3 Total Cache dashboard and reveal the following settings.

6 General Settings in W3 Total Cache
The general section holds the most important settings for all the sections in one place. We will share the settings for the sections individually.
6.1 General Section

Use the checkbox to toggle all caching on or off at once. This setting is rarely used so, leave it unchecked.
The preview mode is helpful if you are trying out new settings and worried about breaking your site.
If you enable preview mode, you can test any of the settings to see how it affects your website. Turning preview mode off will revert the settings to the previous settings.
6.2 Page Cache

Page cache is the caching of individual pages on your site. The settings should be as follows.
- Page Cache : Enable
- Page Cache : Disk Enhanced. If you are on a VPS or use multiple servers, you can use other options as well. If unsure, select Disk Enhanced.
6.3 Minify
Minification is the process of combining and compressing CSS and JS files. A single large file has a smaller load on a server compared to several small files.
2 Things To Keep In Mind With Minify
-
If you use CloudFlare, then the minification will be taken care of in CloudFlare itself. Keep minify off in W3 Total Cache in that case.
-
If you don’t use CloudFlare, then enable Minify in W3 Total Cache at default settings first. Minify is one of the most common reasons why websites break. It is recommended that you turn on preview mode and then test minification. The most common sign of minify problems would be broken layout on your website or Javascript not working as intended.

6.4 Opcode Cache

Opcode cache is used to cache PHP. Parts of WordPress are written in PHP which is regularly executed. Opcode cache can cache these code blocks for a performance boost.
Opcode cache is only available with the pro version of W3 Total Cache. If you have the pro version, then enable both the settings and test performance.
6.5 Database Cache

Database cache caches the results of common database queries to enhance performance.
The recommended settings are:
- Database Cache : Enabled
- Database Cache Method : Disk
If you use a CDN like MaxCDN, KeyCDN, CloudFront, etc., then you should disable the database cache.
6.6 Object Cache

Object Cache caches the results of complex database queries to reduce server load. For example, a simple search on your website performs a full search on your WordPress database. A query like that can be cached for faster results.
Object cache can also slow down websites in some cases. We recommend that you test Object cache first with your website.
6.7 Browser Cache

Browser cache enables caching of your website’s assets in the visitor’s browser.
Recommended Settings
- Browser Cache: Enable
6.8 CDN

CDN (Content Delivery Network) are services that host static assets (images and other files) on multiple servers around the world. The visitor is then served by the CDN thereby reducing the load on your server.
The response time for the requests is also reduced since the server closest to the visitor is used to serve the request.
Recommended Settings
- CDN : Enabled if you are using a CDN
- CDN Type : Select the service that you plan to use
6.9 Reverse Proxy
If a large number of visitors visit your site at the same time, your server can get stuck between fetching data and checking new requests.
A reverse proxy helps in this situation. A reverse proxy is an additional server between your visitor and your actual server. When a request is made, the proxy server receives the request instead of your server.
The proxy server can then access the cache and serve the visitor. This leaves your actual server free to perform other tasks.

Using a reverse proxy server like Varnish is recommended, but its implementation is not for beginners. We would not recommend you setup Varnish without an experienced person helping you.
6.10 Monitoring

W3 Total Cache integrates with New Relic, a performance monitoring service. You can create a free account and get notified if your application or server performance drops.
6.11 Fragment Cache

Today’s websites have many different sections or fragments. A fragment may be a social element (FaceBook Like Box), an e-commerce element (shopping cart or wishlist), or other elements that are personalized to each user.
This presents some challenges as dynamic and personalized elements can’t (or shouldn’t) be cached since the data will be different for each user.
Fragment caching can bridge the gap between no caching and a full page cache. The full support for fragment cache is available only with the pro version of W3 Total Cache. You can enable it if you are using the pro version.
6.12 Licensing

If you use the pro version of W3 Total Cache, your license key goes here.
6.13 Miscellaneous
See the image for our recommended settings.

6.14 Debug

If you are running into issues with one of the caches, enable the respective setting. W3 Total Cache will post logs in the HTML source code which you can use to debug the issue.
Since this will give away a lot of information about your website, turning on this option is not recommended on a live website. Turning one or more options will also slow down your website.
6.15 Import/Export Settings

You can use this section to make a backup of your settings or import new settings for W3 Total Cache. We will also share our sample settings which you can use at the end of the post.
We have covered all the sections of the General section. Now let us move to the detailed sections.
7 Page Cache
As we briefed earlier, Page Cache is the caching of individual pages. Every WordPress page has a header, body, footer, sidebar, and more elements that make up the page.
Due to some limitations, not everything on a page can be cached. The detailed options in page caching will help you configure the page cache in W3 Total Cache in an optimal way.
7.1 General Section
Use the settings in the image.

7.2 Aliases

Not useful for most sites. Keep it disabled (default).
7.3 Cache Preload

When you enable cache for the first time, technically, a cache exists for your site, but it’s empty. This type of cache is also called cold cache.
Cold cache is troublesome for you and your visitors. If a large number of visitors come to the site at this time, the load on your server will rise significantly as it will try to serve users and refresh the cache at the same time.
Cache preload helps with this by automatically building the cache whether a user is visiting a specific section or not. A cache like that is called warm cache. In simple words, cache preload replaces your cold cache with the warm cache.
7.4 Purge Policy
Purging is a term used for discarding. A cache is only good if it has the same information as your actual database. Otherwise, it’s cold cache.
There are several instances where you would want to purge your cache. When you create or edit posts, you would want your visitors to see an updated page, not an old cached one.
This section helps you define which cache gets purged on post creation, post edit, and comments on posts. We recommend the following settings.

7.5 Advanced
Advanced settings provide granular control over your caching. Setting these up can give your website additional performance benefits. But this reward isn’t without a risk.
Just like you can tweak your car engine to give you better performance, you can also wreck it if you don’t know what you are doing. Treat these advanced settings the same way. Our recommended settings are in the image below.

8 Minify
As we mentioned above, if you use a CDN like CloudFlare, then the minification will be handled by CloudFlare.
The developer of W3 Total Cache recommends that you leave minify settings at default values. There is a reason for this recommendation.
Minify can easily wreck your site. There is also no general advice on what settings you can enable as it depends on many variables specific to your website.
A working set of settings might work, but a single change in theme or even installing a plugin might break it. Unless you have a professional helping you with this, we recommend leaving these settings at their default values.
If you use CloudFlare, you should turn off minification in the general tab. You can then leave these settings at their default values.
The recommended settings per section are below.
8.1 General

8.2 HTML and XML

8.3 JS (Javascript)

8.4 CSS

8.5 Advanced

9 Database Cache
Refer to the individual sections for their recommended settings.
9.1 General

9.2 Advanced

10 Object Cache
Object Cache deals with the caching of database queries. WordPress has built-in Object Cache support, but it discards the object cache on every page load. That defeats the purpose of caching to a large extent.
With the Object Cache support in W3 Total Cache, you can harness the full power the Object Cache. However, due to technical reasons, some websites can experience the opposite effect when Object Cache is enabled. We recommend that you test your website with Object Cache thoroughly before enabling it permanently.
10.1 Advanced
Again, the default settings are recommended by the plugin developer.

The global group settings in object cache are used for a multisite network. The motive behind it is to use the same cache and use it for other sites in the network. The non-persistent groups add as an exception to the global group.
11 Browser Cache
Just to refresh your memory, browser cache is caching of objects in your visitor’s browser. See the images in the sections below for our recommended settings.
11.1 General

Enable the first six options in the general tab. All these settings define how long the files will remain cached in the visitor’s browser.
11.2 CSS and JS
See the image for our recommended settings.

11.3 HTML and XML
See the image for our recommended settings.

11.4 Media and Other Files
See the image for our recommended settings.

12 User Agent Groups
A user agent is a software that is acting on behalf of a user. From a server’s perspective, the real person accessing the website does not exist.
The server only understands the browser that is sending the request. The server responds to those requests and does not know about the real user.
In this case, the browser is the user agent.
The user agent section in W3 Total Cache helps you create groups of specific user agents and personalize their experience.
For example, you may redirect users who are browsing your website on a Kindle to a specific theme that is optimized for Kindle viewing.
Since this section is not relevant to caching, we won’t discuss it in detail.
13 Referrer Groups
Similar to the user agent groups above, the referrer groups section lets you group and personalize the experience for certain users.
In this case, you can group users based on the referring website that they come from. A referrer may be a search engine, a social network or another website altogether.
Since referral group is also not related to caching, we won’t discuss this further.
14 CDN
The CDN settings will be set only if you use an external CDN to host your files. If you are not, leave the settings on default.
If you do use a CDN, these should be your settings.
14.1 General
In the general section, all the settings should be enabled.

14.2 Configuration
Since configuration will depend on the CDN that you choose, we won’t be able to discuss this further here. You can always contact the CDN customer support, and they will help you set it up.
By default, the settings would look like this.

14.3 Advanced
The default settings are ideal for the advanced CDN settings.

15 Fragment Caching
As mentioned earlier, the pro version of W3 Total Cache can unlock the full power of fragment caching.
Implementing fragment caching is not for beginners. Only use fragment caching if the performance boost is worth a lot in your business.
We recommend that you hire experienced personnel to setup fragment caching for you. This article will serve as a starting guide.
16 Extensions
Just as WordPress is extendible with the addition of extensions or plugins, W3 Total Cache is also extendible by using extensions.
We will share what each extension is used for in brief.

- AMP Extension : Enable if you use AMP on your website
- CloudFlare : Enable if you use CloudFlare. You can configure CloudFlare in detail after activating the plugin
- Google Feedburner : You can leave this extension deactivated
- Fragment Cache : Enable if you use the fragment cache module
- Genesis Framework by StudioPress : Only available if you use the Genesis Framework
- New Relic : Enable if you use the New Relic Service
- Swarmify : Enable if you use the Swarmify SmartVideo solution
- Yoast SEO : Enable if you use the Yoast SEO plugin for WordPress
- WPML : Enable if you use the WPML plugin on your website
17 Setting Up CloudFlare
Since CloudFlare is a popular free CDN provider, we think it’s useful to mention how to setup CloudFlare within W3 Total Cache.
First, activate the CloudFlare plugin and click the settings link to be taken to settings.

Authorize your account with your registered email address and API key. After the authorization, the rest of the settings become available.
Let’s see the different sections and their settings.
17.1 General

The default settings should work well for you here.
17.2 Caching
You should set the cache level to aggressive and leave the rest of the settings at their default values.

17.3 Content Processing
Enable all available settings except Rocket Loader.
Rocket Loader can give you additional performance benefits with the risk of breaking Javascript on your site. We recommend you test it before deciding to use it.
Please note that we are referencing the free version of CloudFlare. Some of the settings can only be changed or enabled in the enterprise plan.

17.4 Image Processing
Enable all the available options.

17.5 Protection
Keep the settings as in the image below. The security level will depend on your website status.

18 Testing the Results of W3 Total Cache
If you followed our instructions, you should have the best configuration for W3 Total Cache installed for your WordPress blog.
But, you might experience a decrease in performance, especially if you have a site with a lot of content.
You might think that is unexpected, but it’s not.
If you remember, we mentioned the concept of cold cache and warm cache earlier. When you setup W3 Total Cache for the first time, your cache is cold cache.
As visitors access your site and as W3 Total Cache also works in the background (Cache priming), your cold cache is replaced with a warm cache. Until the time this is completed, you might experience slower load times.
19 Download A Copy Of These Settings
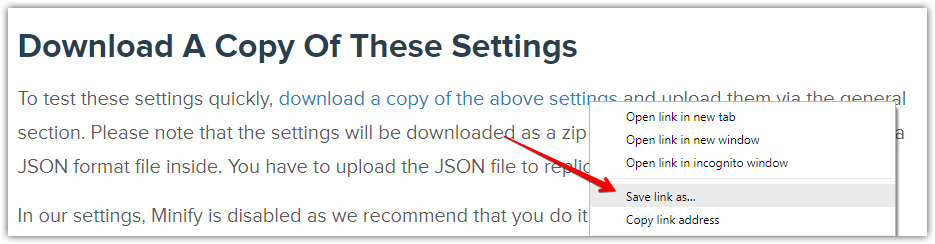
To test these settings quickly, download a copy of the above settings and upload them via the general section. Please note that the settings will be downloaded as a zip file. Unzip the file and you will find a JSON format file inside. You have to upload the JSON file to replicate these settings.
Here are the detailed steps in case you are interested.
Right-click the link from above and click “Save Link As.”
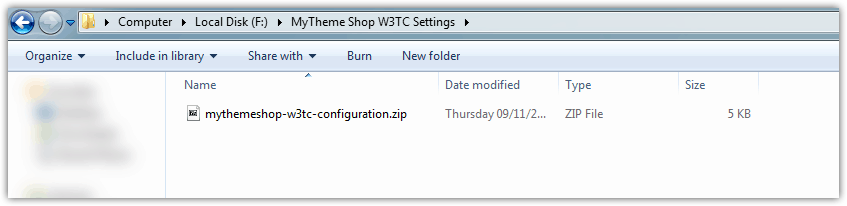
Save the zip file in a separate folder on your computer.
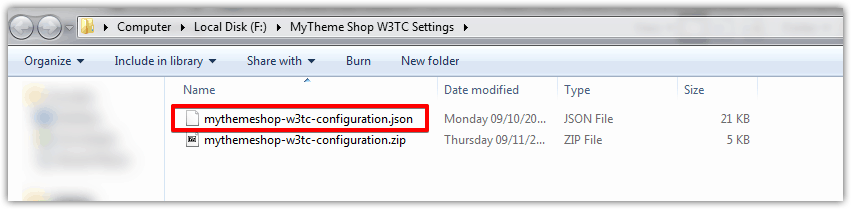
Extract the contents of the zip file in the same folder using a utility of your choice. A free utility for Windows is 7-Zip and for Mac is iZip.
Upon extraction, a JSON format file will be created in the same folder.
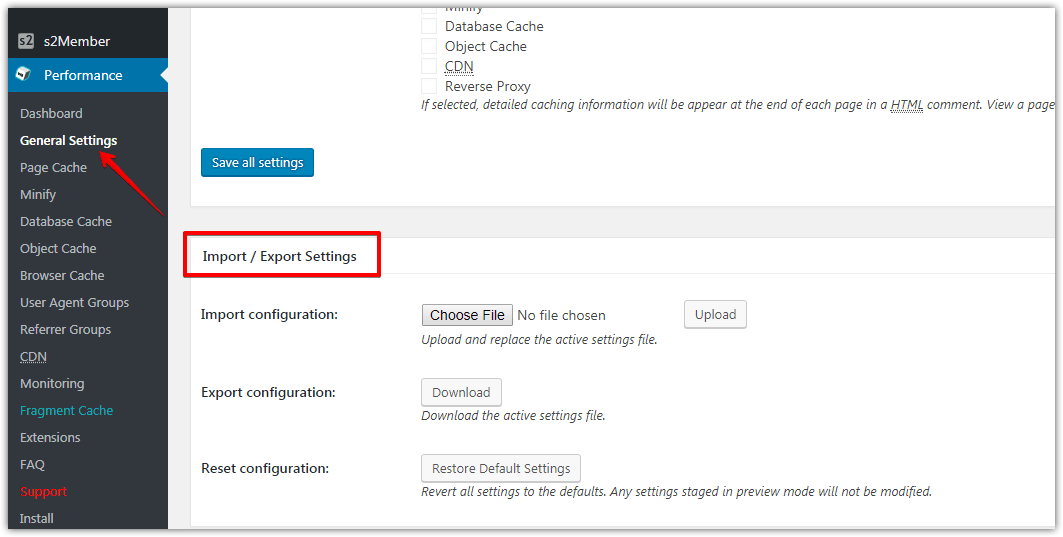
Head to the admin section of your website. In the Performance Tab, go to General Settings. Scroll to the bottom to find the Import/Export Settings section.
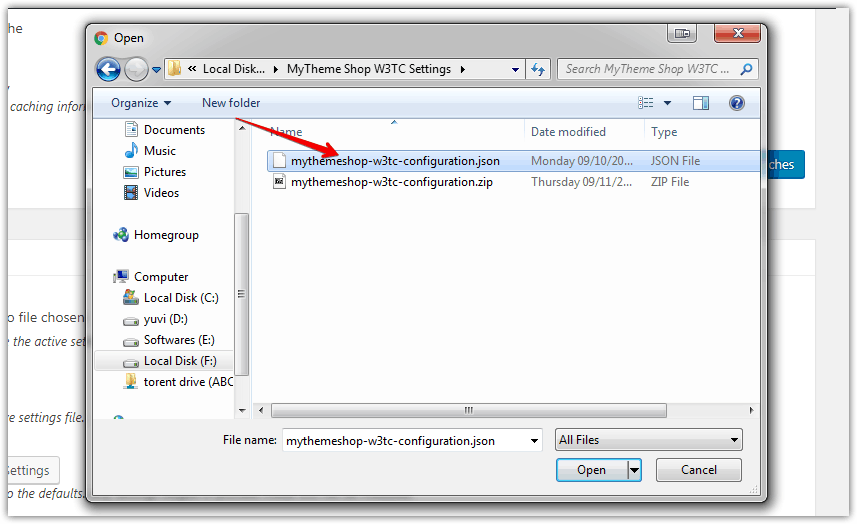
Press the choose file button, navigate to the JSON file on your computer and click open.
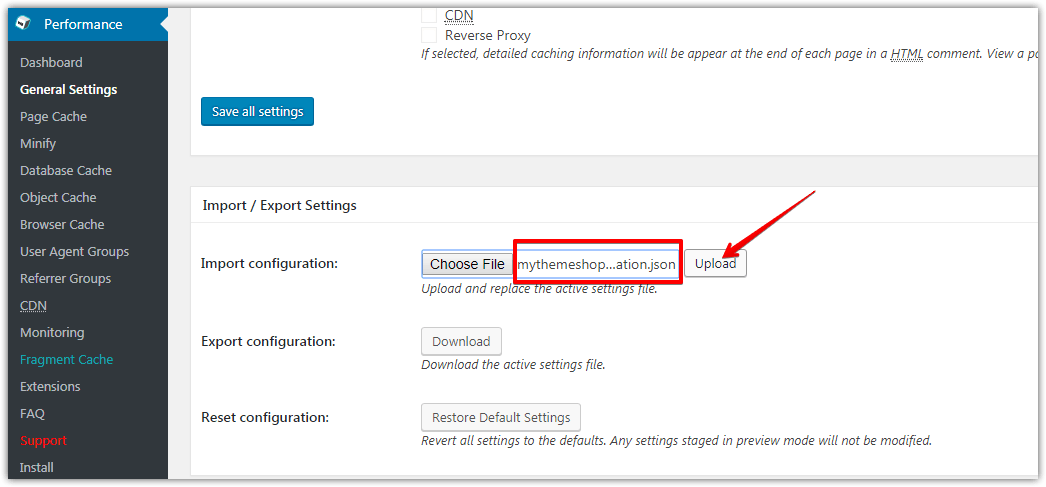
The filename will be displayed in the Choose File section indicating that the file was selected. Press the upload button to upload the file.
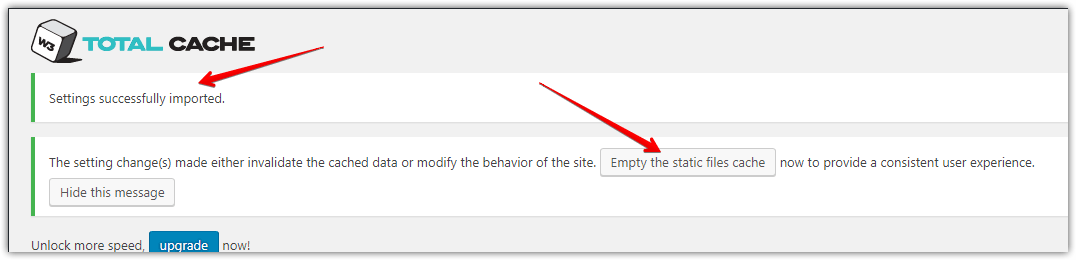
The file will start uploading, and the page will refresh when it’s done. Look for the successful import notification to confirm. Also, press the “Empty the static files cache” to empty the current cache and rebuild it with the new settings.
Note that in our settings, Minify is disabled as we recommend that you do it via CloudFlare for better performance. You will also have to enter your sitemap link in the cache priming section as it depends on your website.
Please go through the settings once to make sure that all website specific information is filled in by you.
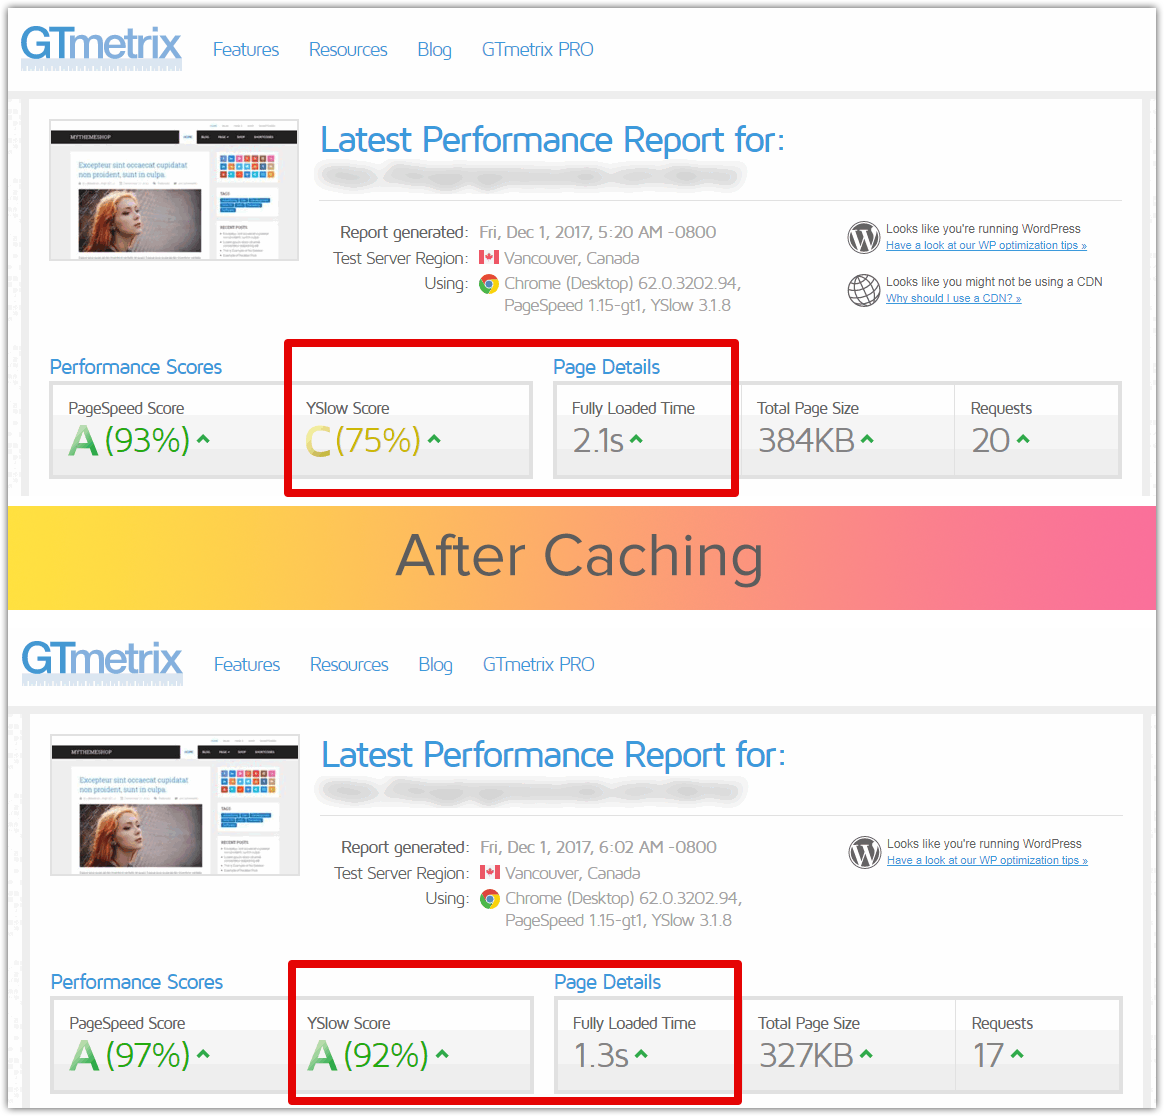
20 Final Result
Time for the final results. If you follow the above instructions well, you can expect to get similar results like the below:
21 Conclusion
Caching is the first step to increase your server performance. It doesn’t require you to invest in additional resources, and its performance gains are immense.
W3 Total Cache plugin for WordPress makes it easy to set up a caching system for your blog.
Due to the complexity of web technologies, it’s hard to give general advice that works for everyone. We have done our best to configure W3 Total Cache in a way that would work best for most people.
If you experience any troubles with your website with these settings, let us know in the comments below, and we will help you out in any way we can.