WordPress is the most preferred Content Management System for developing stunningly secure websites. There is a reason why nearly 70% of the world’s best websites are being developed on WordPress.
Talking about security, the platform provides methods to segregate the users by defining a fixed set of rules for their profiles.
This helps and restricts the users to a limited set of standards which have been specified to them. This is the primary reason why most of the content-based websites are made on WordPress.
In this post, we would be learning in-depth about different types of user roles in WordPress. We would also learn how to modify and change the roles so as to provide the users with the aptest set of roles on your WordPress blog.
This would enable them to work with ease, be it an administrator, author, contributor, developer, or any other user who is working on the website.
WordPress as a CMS comes power packed with a role management system that enables us to define what tasks a particular user can or cannot perform on your website.
Being aware of these roles are necessary for you to manage your website accessibility with more ease.
In this post, we will learn about different WordPress user roles and how you can manage them like a pro.
Let’s learn more about what set of permissions are allowed in each set of roles.
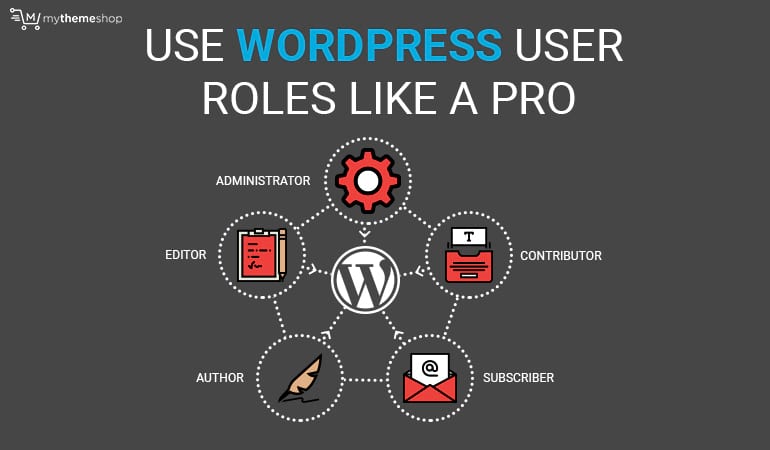
1 Different Types of WordPress User Roles:
You might be aware of some permissions defined for each role. It is crucial for you to know how to change these permissions and set a role to a particular user.
You won’t feel the need for this if you are solely working on your website but, these tips would surely be useful when your website is growing with more visitors, more content, and more features.
Let’s learn about each role now:
1.1 Subscriber
A subscriber is just like a regular user of the website. If you provide a subscriber role to your user, they can login to your WordPress website, update their profiles and change their passwords.
They cannot write posts, view comments, modify the WordPress theme or anything else inside your WordPress admin area.
This type of role suits when you want your users to login to your website to view posts or leave a comment. Being a subscriber, they may also enroll for Email subscriptions like newsletters and promotions if you provide one on your website.
1.2 Contributor
Contributors are the users who prominently aim for getting recognition by contributing their work on your website. A contributor can add a new post, edit their post but they cannot publish any post, not even their personal ones.
Apart from that, they have no access to the admin functionalities like altering the website design, uploading the plugins or creating new categories.
Contributors can, however, choose from the existing categories and add the relevant tags to their posts. They can also view all the comments, even which are in moderation but, they cannot alter, approve or delete them.
They are even restricted to upload any external files on the website, not even the images for their posts.
1.3 Author
As the name states, users who have been assigned the role of an author can write, edit, and publish their posts. They have full freedom to upload media files to use within their posts.
Coming to the things which are restricted for a user assigned an author role, they cannot create any new categories. They can only choose an existing category and create new tags for their posts.
They can view all the comments including the ones which are awaiting moderation from the admin but, they cannot alter, moderate, approve or delete any comments.
The author does not have the freedom to change the theme, plugin and other settings of the website.
The biggest disadvantage or fear of assigning an author role is, even after publishing the posts, they can delete any of their posts.
While it is not a major issue for many but, it can create a problem in some instances. Like, an author can delete the posts after publishing them, even if they are paid for this task or, may delete their posts after resigning from your company. The consequences of such situations cannot be imagined and can be dangerous for your website.
Thus, it is always better to keep a WordPress backup for your website.
In this post, we would also see how to resolve this issue by restricting an author from deleting a post.
1.4 Editor
As the name suggests, an editor sits at the top position of handling the content of your website.
Thus, a user with an editor role can do anything with the content of your website. They have access to add, edit, publish and delete any posts on your WordPress website.
This includes all the posts, even the ones written by others (Author, Contributor, Admin). An editor can view all the comments and also moderate, alter, and delete them as well.
Having access to all the content aspects of the website, the editor cannot change the site’s settings, remove or change plugins or add any new users.
1.5 Administrator
An administrator role is the most dominant role and is mainly reserved for the site owners only.
As an administrator, the user can add, edit and delete any post on the website. This includes posts by editors, authors, and contributors as well.
A user with an administrator (abbreviated as admin) role can change the structure of the website including its theme, plugins, and other user settings.
An administrator is the only user which can create new users and modify and delete any existing ones including other administrators also.
An administrator’s role provides the user with a full hold over the website and thus regarded as the most powerful role of a WordPress website.
The biggest concern while assigning the admin role is when you are working in a multi-partner WordPress website. In such a case, you should always have the proper legal documents to prevent any future dispute.
So that was a brief understanding about different types of WordPress user roles. Let’s dig deep and see how to assign these roles from the WordPress Dashboard.
2 Assigning WordPress User Roles
Follow the below steps to create a new user for your WordPress Website and assign a particular role to them.
2.1 Step 1: Add a New User
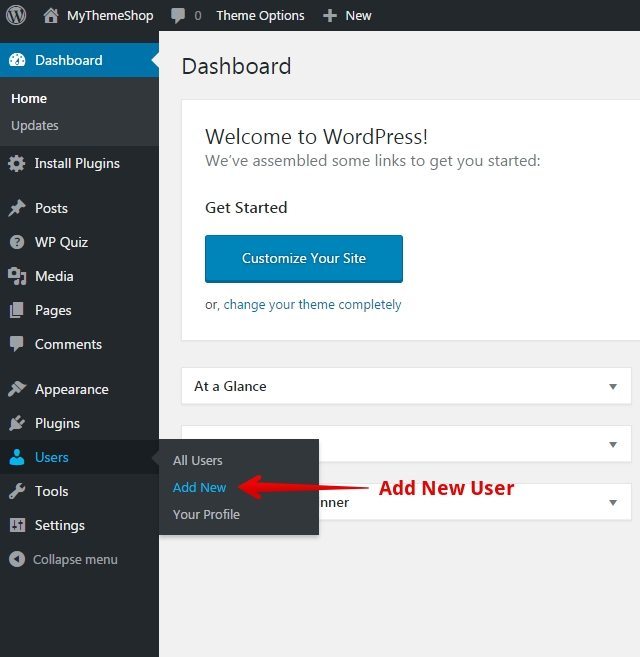
Login to your WordPress Dashboard, hover to Users and click on “Add New” to create a new user for your website.
2.2 Step 2: Fill User Details
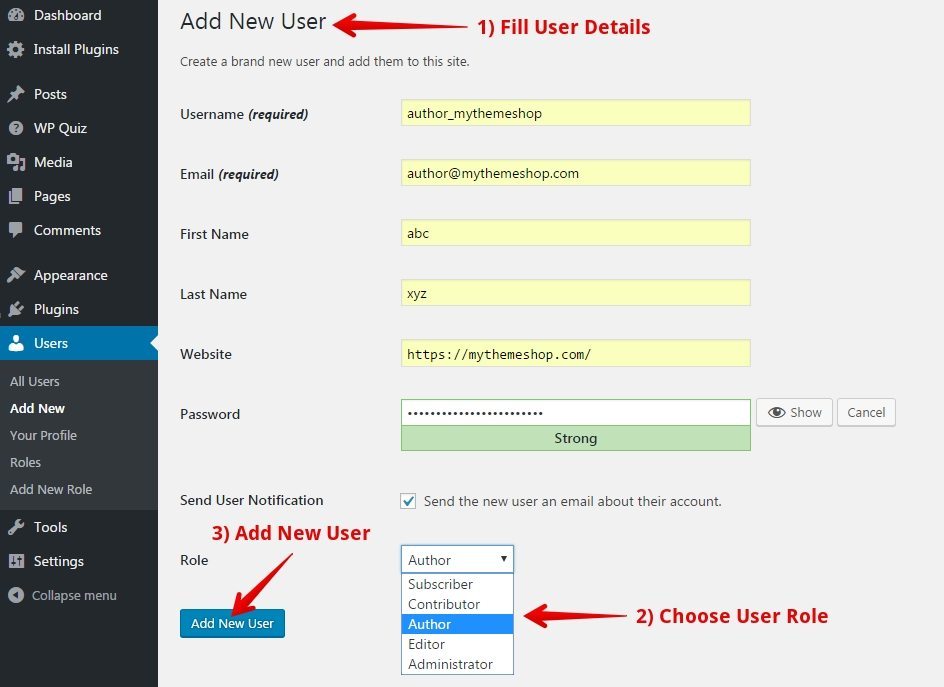
- You need to fill in the necessary details for a new user.
- Here, you have to assign a specific role for your new user. Be careful while assigning the role. In the above reference image, we are assigning a role of an “Author.”
- Click on “Add New User” to create the user.
2.3 Step 3: Login using the Credentials
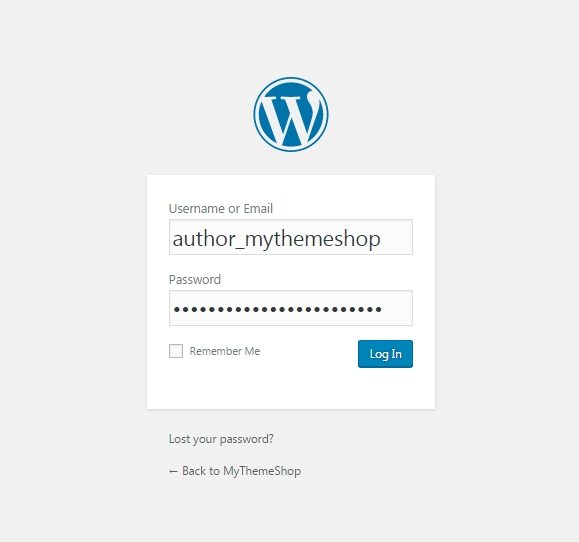
Congratulations! You have successfully created a new user. Just to be sure, you can login using the above credentials and check whether you have performed the steps right. If the Login is successful, you can then pass on the necessary credentials to the specific user.
No, we are not done yet. As you may have noticed by now that WordPress provides a fixed set of rules that are assigned to each user.
What if you want to provide the file uploading rights to the contributor or, you want the editor to install a new plugin or, you want to prevent the author from deleting their posts.
It’s time to become a pro and learn how to modify the WordPress user roles according to our convenience. Let’s see how to do that.
3 Use User Roles Like a Pro with Members Plugin
Members is a free WordPress Plugin which gives you full control on the users by extending the default user functionalities.
Using Members you can modify existing roles and create new roles with custom functions for your users. This gives you total control over your users by giving them the access to only those parts of the website which are necessary for them.
Let us see in brief how to use the Members Plugin.
3.1 Step 1: Add New Plugin
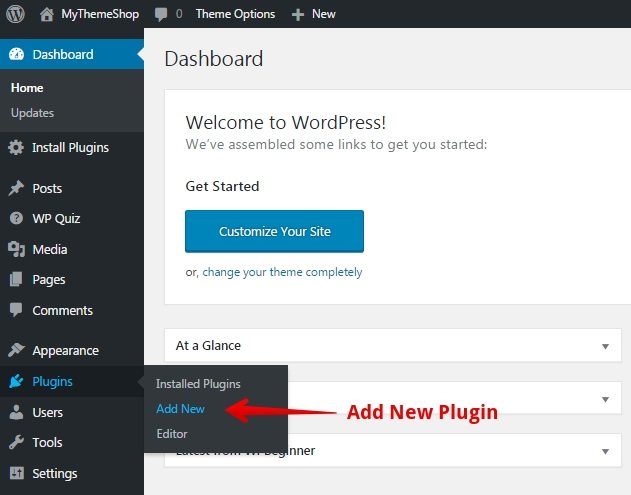
In your WordPress Dashboard, hover to Plugins and click on “Add New” to add a new Plugin.
3.2 Step 2: Install and Activate Members Plugin
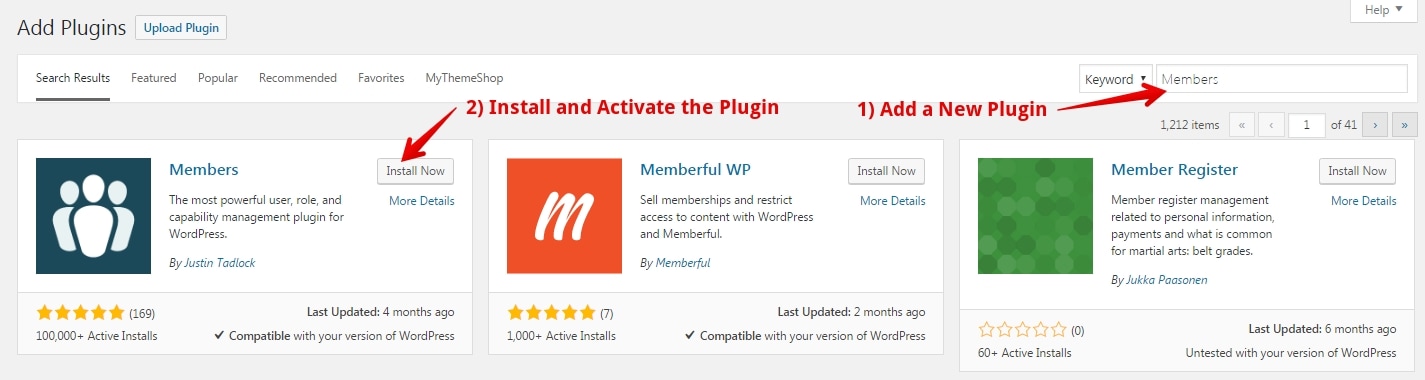
- In the search box, search for “Members.”
- Install and activate the plugin by Justin Tadlock.
3.3 Step 3: View Existing Roles
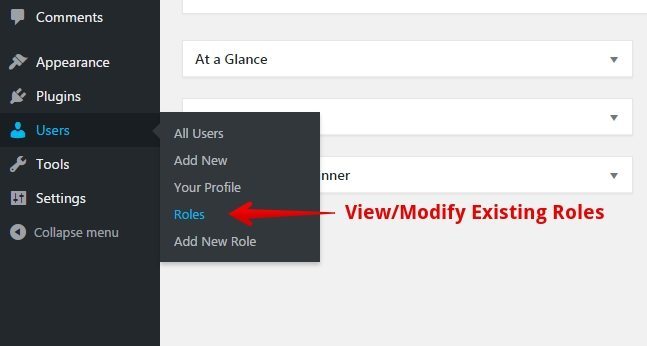
After successfully activating the Members plugin, hover to Users in your WordPress Dashboard. You will now find two new options i.e. “Roles” and “Add New Role” added. These options are being provided by the Members Plugin. Click on “Roles” to view the current existing user roles on your website.
3.4 Step 4: View Access Rights
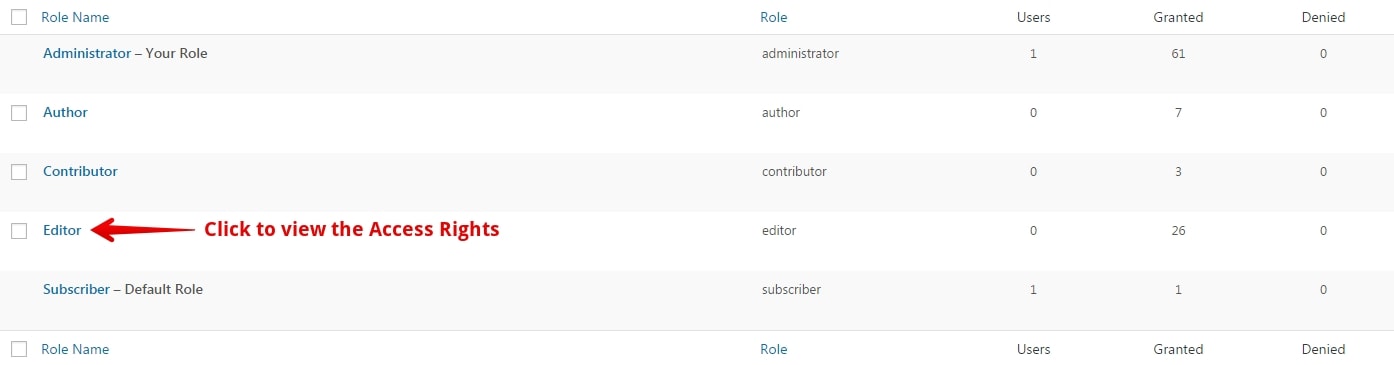
After clicking on Roles, you will be taken to a similar screen as above. Here you can view all the current user roles of your website.
To modify any role, click on the particular role to view all its access rights. Access rights are nothing but the access to functions allowed for a specific user. In the above example, we are viewing the access rights for the editor.
3.5 Step 5: Modifying Roles
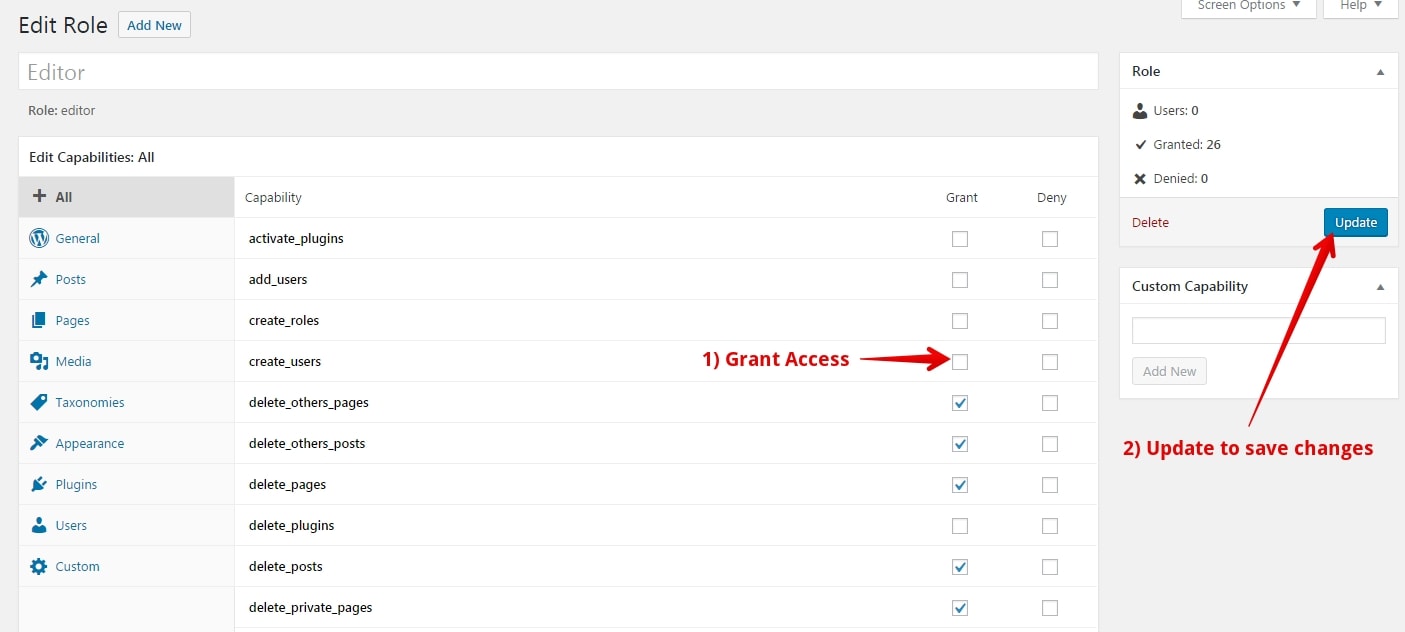
- Here you can see all the rights that have been granted for a specific role. You can also grant or deny any additional or existing rights and modify any existing role. In the above example, if we grant the access by ticking the checkbox of create_users function, the editor would be able to create new users for your website. Although, in the default WordPress settings, this functionality was only accessible to the administrator.
- Click on “Update” to reflect changes.
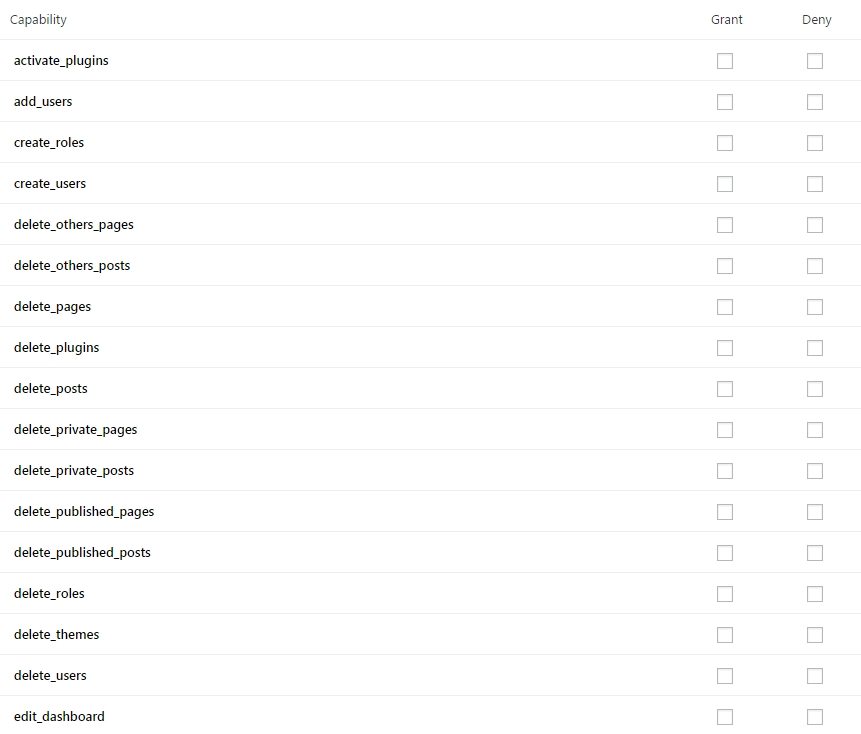
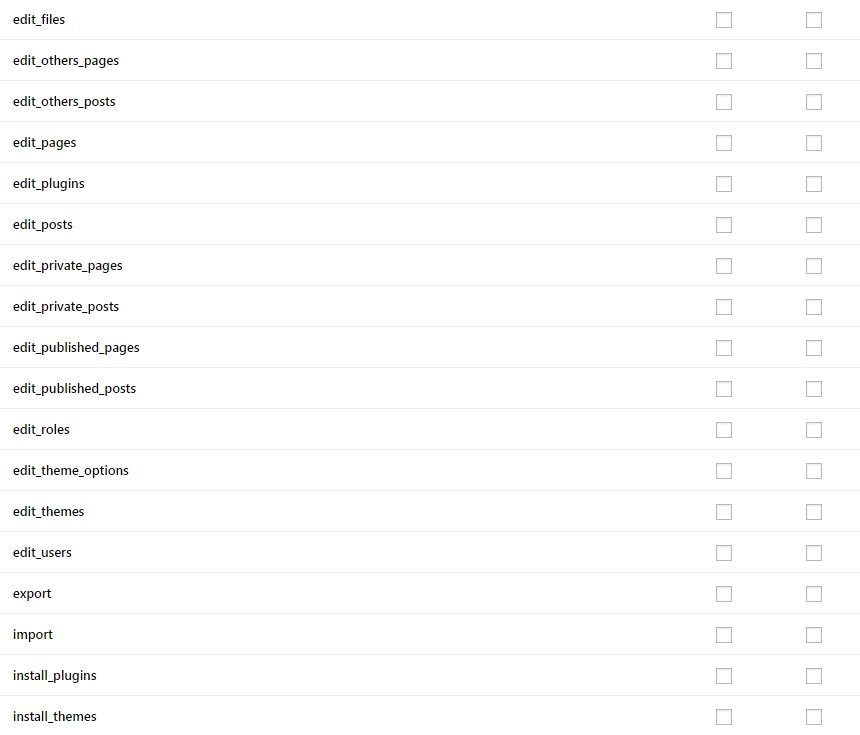
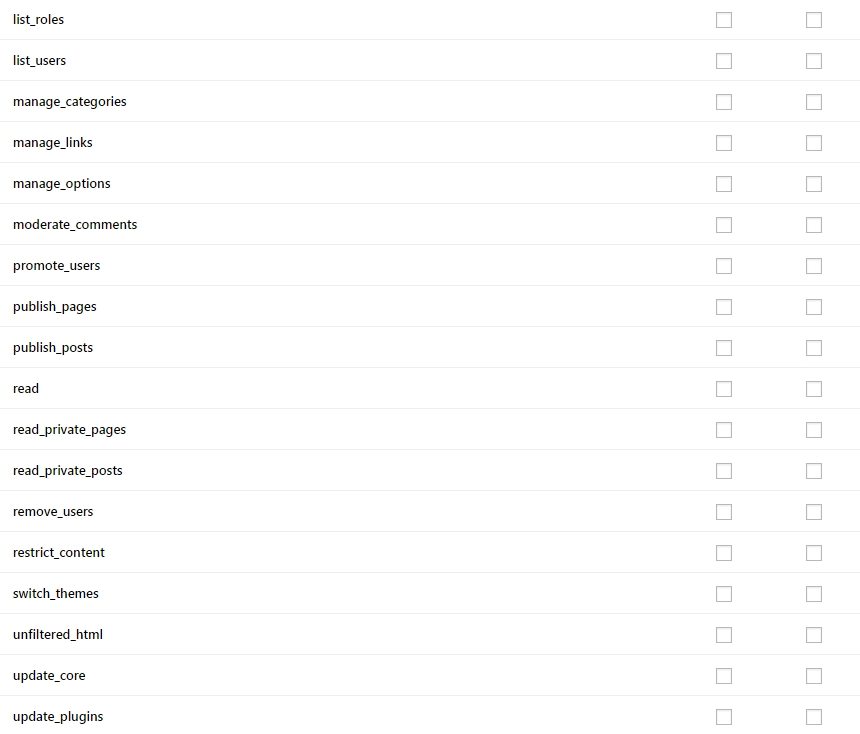
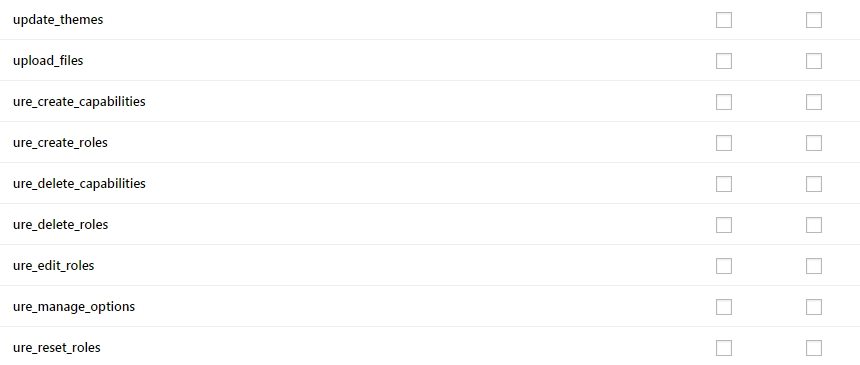
Here is the list of all the capabilities that you can specify for any user role on your WordPress website using the Members plugin.
3.6 Step 6: Create New Roles
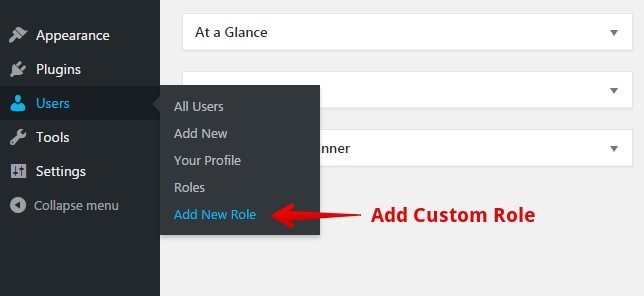
Using the Members Plugin, you can also create custom roles for your website. To do this, hover to Users in your WordPress Dashboard, click on “Add New Role” to create a custom role. You will be directed to the below screen.
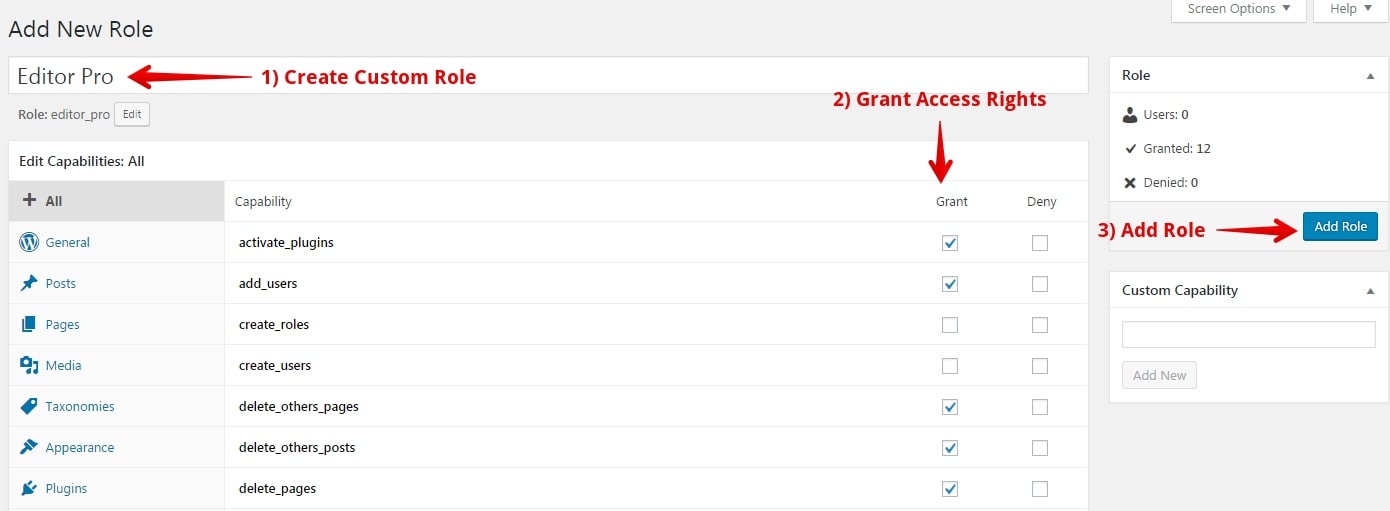
- For creating a role, give a proper name to your new role. In the above example, we have given the name “Editor Pro” to provide extended functionalities to the top and experienced editors of our website.
- Tick the checkboxes for the capabilities you want to grant to your new user role.
- Click on “Add Role” to save the new user role. You can later select this role while creating or modifying a user for your WordPress website.
So now that you have learned how to use the user roles like a pro, it would be a good decision to start implementing the above steps. The Members plugin surely comes handy when your website is on the verge of growing, and you would need more people to handle it.
The free Members plugin will surely help you to have a sound sleep without worrying about you website being mishandled or misused by any of your users.
You can also watch this exclusive tutorial by MyThemeShop to understand more about User Management for your WordPress website.
We hope this post would have helped you to have a strong grip over your WordPress website. At MyThemeShop, we firmly believe that you handle your website like a pro.
Do share your views about this post in the comments section below.