YouTube is truly an awesome platform for content creators, streamers, and marketers. It comes bundled with a lot of features where you can moderate the visibility of your videos and restrict it to a specific audience if you like.
In this post, we would be explaining to you how you can make your YouTube videos public, private, or unlisted. If you want to utilize one of these features or control the visibility of your videos, this article will help you a lot.
First of all, we need to know the difference between public, private, and an unlisted video on YouTube.
1 Public vs Private vs Unlisted YouTube Videos
Public:
It is the default YouTube setting where your videos are available for everyone. Anybody can see your videos. Also, your videos will also come under the YouTube search results.
This option is highly useful for all the content creators who are looking to reach a mass audience on YouTube.
Private:
As the name suggests, a Private video can only be viewed by an audience whom you invite to view the video.
This limits your YouTube video to come up in the search results. Also, it won’t be visible on your YouTube channel.
Last but not least, you can only invite 50 usernames to view your private YouTube video. Also, these people need to have an account on YouTube otherwise, they won’t be able to view your video.
This feature is highly useful when you only want a small invite-only audience to view the video. For eg: you want to take an opinion on a video. You can share it with a limited audience size who can see your video, and you can know their opinion before making it public for a wider audience.
Another example for the same – if you are a YouTuber and you want to hide your old YouTube videos that do not have any relevance in the current circumstances, making your video as Private is a really good option.
Unlisted:
An unlisted YouTube video would be visible to only those people who have the URL of your video. They can watch the video irrespective of whether they have an account on YouTube or not.
Unlisted YouTube videos won’t come up on the search results or on your channel.
It is a really good option for steamers to use this feature. They can share the link to a limited audience and stream their content. Also, this option is good when you aren’t sharing any confidential information in the video.
2 How to make a video Public, Private or Unlisted?
We will try to explain this by showing you a detailed tutorial for the same. Changing the privacy settings of your YouTube videos is a simple process. Follow the listed steps below.
Step 1: Log in to your YouTube account.
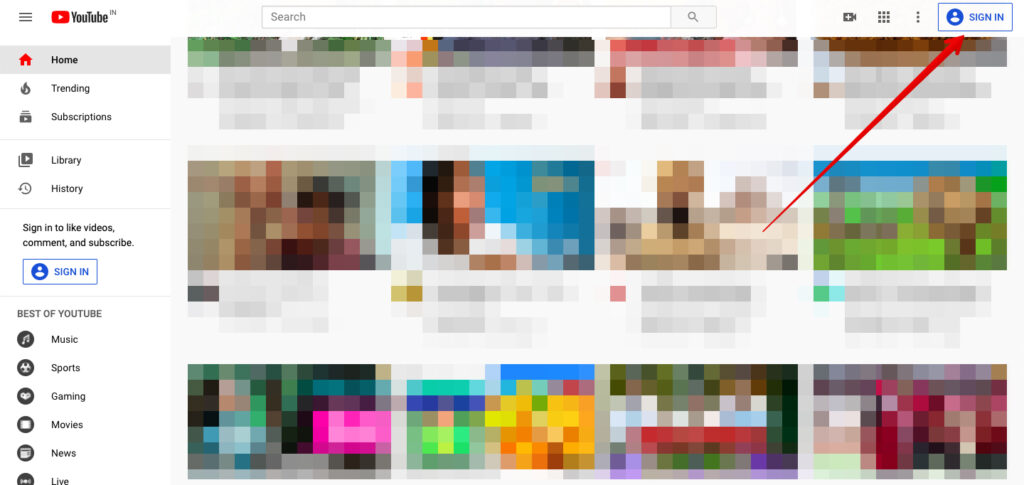
Step 2: Hover to your channel icon, click on it and go to the “YouTube Studio”.
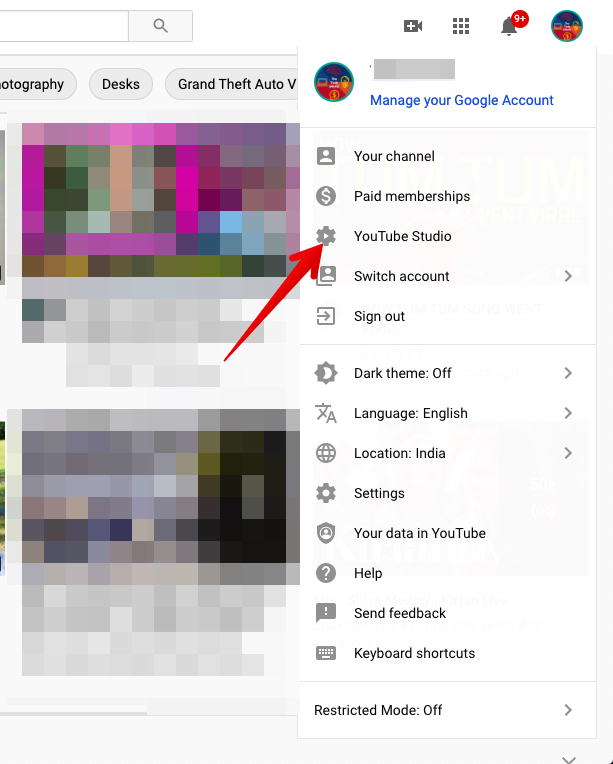
Step 3: Once there, go to your videos. This will take you to a section which would showcase all your uploaded videos

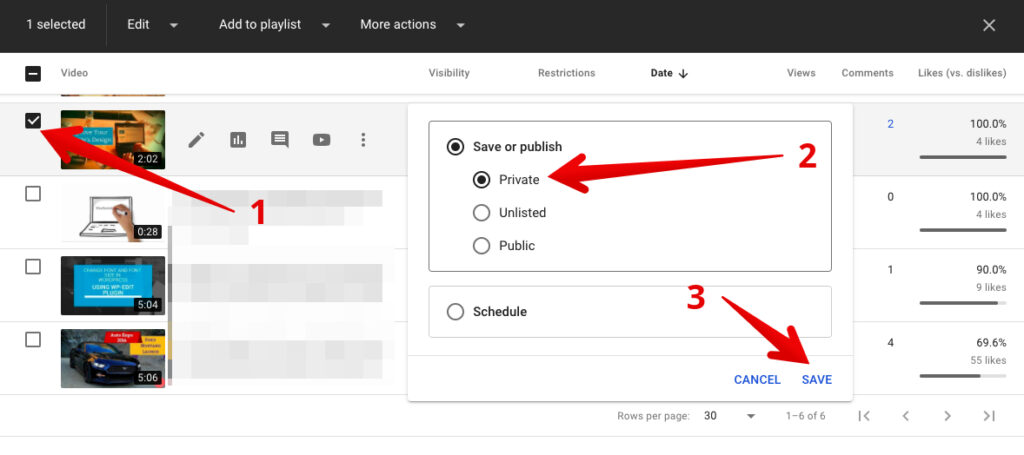
Step 4: Now, in order to change the privacy settings, click on the current visibility, you will get an option to modify the visibility of your selected video. Select from Public, Private or Unlisted and hit “Save”. For the Public and Unlisted video, you can directly share their link. Further, we will tell you how to share a private video.
Step 5: For sharing a private video, click on the “Details” icon in front of your video. This will take you to the specific video details.

Step 6: In the top right corner, click on the “Options” icon and click “Share Privately”.

This will take you to a dedicated block where you can enter all the email ids to which you want to share the respective video that you have made “Private”. Once done, you can notify the respective people. They will get the link of your video on their respective emails.

3 Private vs. Unlisted Video – Which Option Should You Use?
Advantage of Making a Video as “Private”
If you have personal or somewhat confidential videos – for eg, an important company project, the YouTube Private features would be ideal for you.
Some of its advantages are:
- Share videos with the people you love: If your family stays far, you can easily share private videos documenting personal life with them.
- Create a Personal Repository: You can create a personal repository of important private videos that belong to you and nobody else.
- Saving space: You can use the Private video functionality to save a ton of your videos. Moreover, this would save you a ton of money as compared to going for a paid cloud platform like Dropbox.
- Access Videos on the go: Using this functionality, you can also access all your private videos on the go whenever you need them.
Advantage of Making a Video as “Unlisted”
The actual battle is between private vs unlisted videos. If you want to share a video with a large group (more than 50 people) and do not want that to come up in the search results or be visible on your channel, making the video “Unlisted” will be your best bet.
Let’s look into some of its advantages:
- Good for Companies: The option gives you a functionality to view as well as share videos with your staff members and employees.
- Sharing portfolios: You can use the unlisted videos to share your portfolio with prospect leads and clients.
- Recommended for feedbacks: Unlisted videos give you a functionality to do beta testing or taking suggestions from a limited number of people so that you can improvise the video and later make them public for a wider audience.
- A great option for YouTube Creators: As a creator, you can clear your old junk or irrelevant videos from your channel by making them Unlisted. This would prevent your audience from viewing them through search results or your channel.
4 Final Thought
The main confusion for most of the people lies in choosing between private vs unlisted YouTube videos. One can use these features for multiple instances.
It is important to use the above features sensibly. You would not want to lose on an opportunity of gaining more views and subscribers on your channel.
Which feature did you find the best and why? Do share your thoughts in the comments section below.
