Have you ever wondered how you would embed Google forms in WordPress?
Did you know that Google offers an embed functionality with its forms which you can use to embed them on any external website, including WordPress sites?
In this post, we will share how you can use Google forms with your WordPress blog and why they might be more beneficial than using a WordPress plugin.
1 Google Forms v/s Form Plugins
WordPress has many features and plugins available to create forms. A few of the popular ones are Ninja Forms, Contact Form 7 and more. With so many good options, why would you even choose Google Forms in the first place?
The answer is simple. You can use Google forms in multiple places. You can share them on your Facebook wall, send a direct link via a messaging app or even use them on multiple websites.
If you did this with other form plugins, then you would have to find different solutions that work for each channel you share your form.
That means a different solution for your WordPress site, another solution for Facebook, another solution for instant messenger and so forth. Even after using different solutions, you would have had to combine all the responses manually.
Using Google Forms eliminates that. All the collected responses are stored in a single place. The responses are also populated instantaneously. This means you can make decisions quickly based on the information you receive.
You can also use hidden fields (a Google Form feature) to sort the responses from different channels.
This way you can measure the responses from each of your channels. You can also use other Google Form features like sharing responses with multiple people or collaborating with them directly.
Advanced users can record the responses to a Google Sheet directly and use the Google Sheets API to manipulate the data as desired.
2 How to Embed a Google Form in WordPress?
To embed a Google Form in WordPress, you have to create one first.
Head over to the Google Forms website and select a blank slate or template to create one.

Make sure to add a form name, title, and description. A name and appropriate title help the end users understand what the form is about.
Next, you have to choose which fields you want to include. You can choose different types of validations to make sure the end users enter the exact information you need.
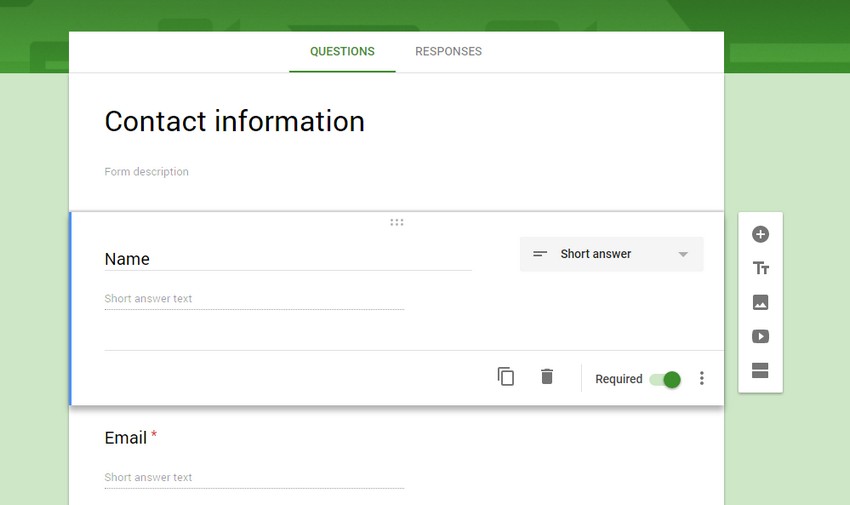
You can customize the form with custom backgrounds, images and videos as well. Once you are satisfied with the form, click the send button to finalize the form.
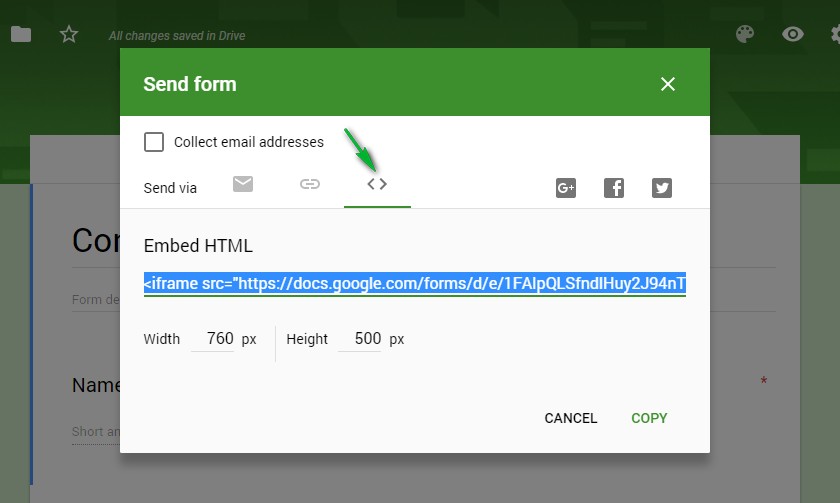
You will have three options to send the form to others. You can use email, share the direct link, or use the embed code. We will select the embed code.
Once you click the embed form option, you will see the embed code with some customization options. Enter the desired values in the fields, and hit copy.
Now head over to your WordPress admin area. Create a new page/post or edit the one where you would like to embed the Google Form.
If you chose a new page or post, then all you have to do is use the text area in the editor and paste the embed code that we copied.
A new dedicated page/post will be created on your WordPress website where the embedded Google Form will be displayed.
If you chose to edit an existing page or post, then edit the post, navigate to the text area and carefully scroll to the section where you would like to embed the respective Google Form.
The position where you paste the respective code is the position where you will see the Google Form.
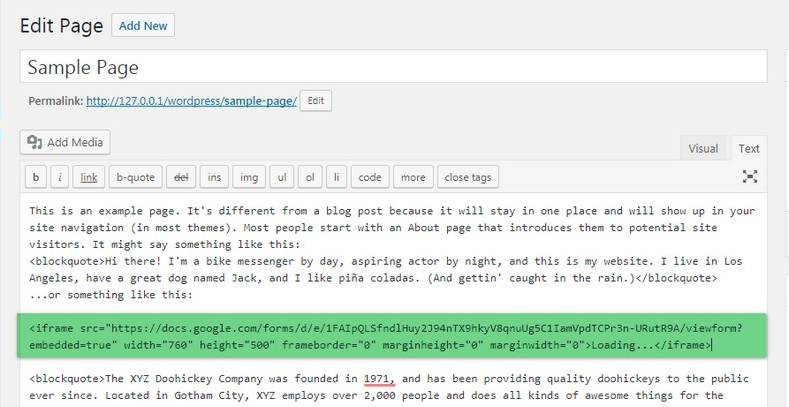
To confirm that you have placed the embedded Google form in the correct position, you can choose the preview option inside your post.
Clicking the preview button will open a preview page with the form embedded. If you are happy with the way the form looks, then go back inside the WordPress admin and hit save.
If you are not happy with the way the embedded Google Form looks, you can either change the position where the form is placed or customize the Google Form from the Google Form interface.
After you have made the changes you desire, copy the embed code again and paste it carefully at the desired position inside the post. Then preview and save.
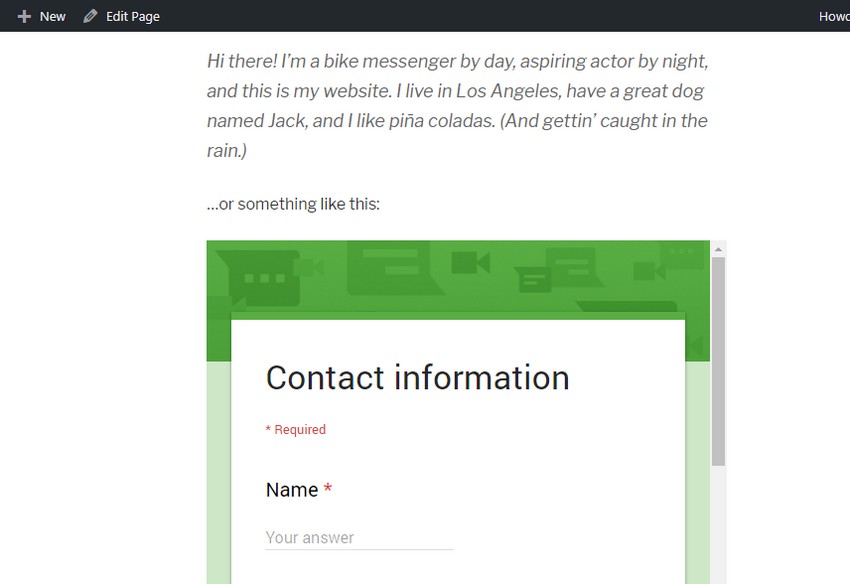
This is how an embedded Google Form will look on your WordPress page.
3 Embedding Google Form Inside WordPress Using a Free Plugin
If you are not comfortable with code whatsoever, you can also use a dedicated plugin to embed your Google Form.
The plugin is appropriately titled Google Form. Here is how you use it.
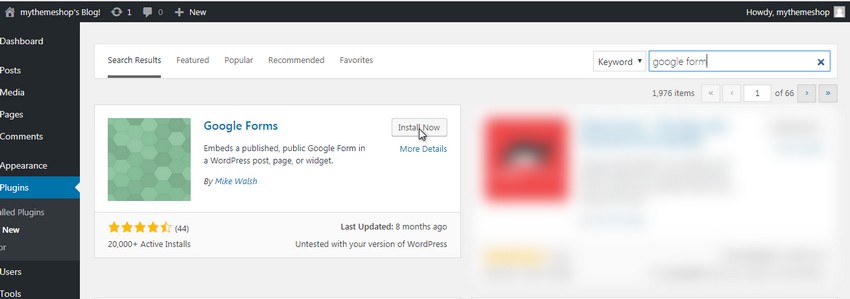
Log into to your WordPress admin panel and install the plugin.
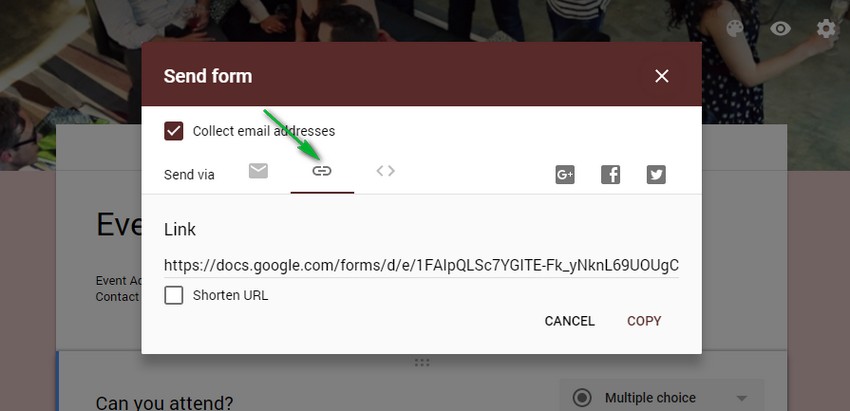
Go to your Google Form and copy the form URL.
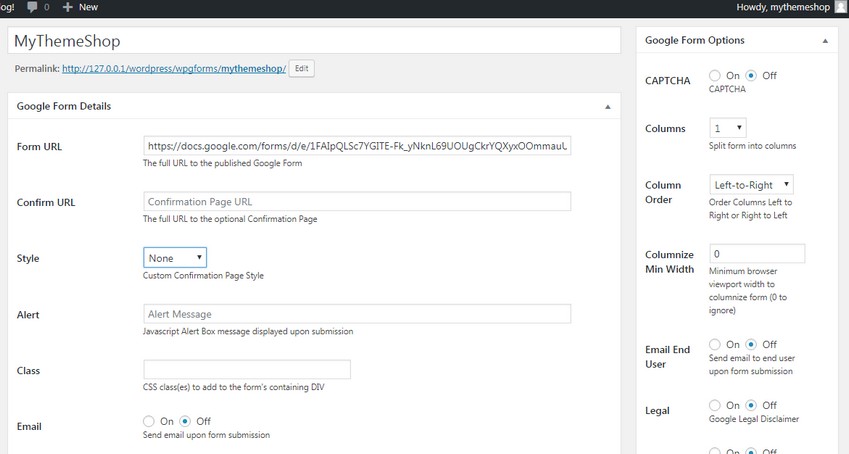
In the plugin settings, go to Add new Google form.

In the following screen, paste the form URL that you copied in the previous step. After configuring the other settings hit publish. Your form is now published.
To see the form in action, you have to include it in a post or page.
Go back to the plugin and head to the Google forms section. You will see the form name and the corresponding shortcode for the form.

Copy the shortcode and insert it into an existing or new post. Remember, shortcodes should be entered in the visual editor, not the text editor.
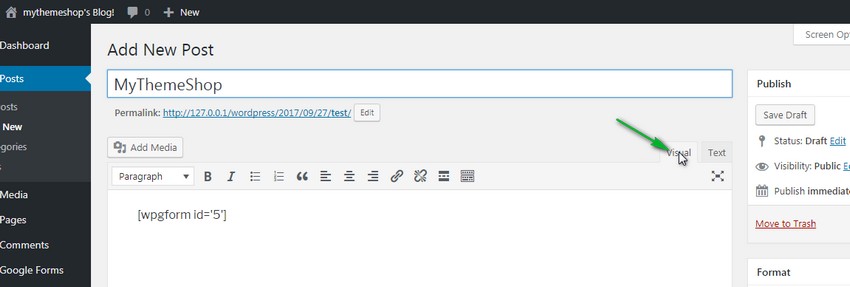
Hit publish, and your Google From should be embedded in your post.
Things to remember when using this plugin:
Although this plugin makes it easy to embed a Google Form, it currently works with public Google Forms only. Only use this plugin if you are ok with everyone viewing your Google Form.
This plugin also gives you a lot of advanced options which you can use to create your Google Form in a particular way. For example, when someone submits a form, you can have them sent to the WordPress page instead of the default Google Form page.
The most important thing to remember while using this plugin is, it is not an official plugin made by Google.
It is created by a 3rd party and updated by them. Google often changes its products much more frequently, and it might break your forms if that happens. If you plan to use this plugin, make sure to have a backup plan just in case.
Conclusion
Google Forms are great for making surveys and quizzes. By using Google Forms instead of traditional WordPress Plugins, you can save yourself a lot of manual work.
Also, you don’t have to research a different way to embed a form in different customer channels.
Google Form unifies your customer responses allowing you to make data-backed decisions on the fly, which is extremely useful. The best part, using Google Forms is free.
We hope that you now understand how to embed Google Forms inside your blog. If you have any questions, feel free to ask us in the comments section below.

