Whenever we get anxious about jumping into a new project, it’s very easy to forget to cover the basics. For web developers, this can be very costly, especially if you are looking to develop an application in PHP.
Fortunately, it’s possible to set up a virtual development environment where you can start coding in PHP as well as test the different features and functionalities of your website before taking it live.
WAMP is one popular choice for developers who use Windows operating systems. While there are other choices, such as XAMPP, this article will cover the exact steps of installing WAMP server.
Now let’s dive into the details.
What is a WAMP Server?
WAMP stands for Windows (operating system), Apache (webserver), MySQL (database), and PHP (coding language). WAMP can be compared to two other close variants, namely:
- LAMP (Linux, Apache, MySQL, and PHP) for Linux Systems and,
- MAMP (Mac, Apache, MySQL, and PHP) for Mac OS operating systems
WAMP, therefore, is a localhost server for Windows Operating Systems that lets you manage, create, test, and develop websites without having to use a remote web server.
What do we mean here?
Let’s take WordPress as an example. If you want to build a website on the WordPress platform, for example, you can use the WAMP server to create a local environment that allows you to work offline.
Here you can experiment with code, plugins, design, as well as test the different features of your website before taking it live.
It’s important to note that Apache, PHP, and MySQL are all open-source software. This means that you can install and configure each service individually.
However, this process is not easy, even for skilled developers. Luckily, a WAMP server automates the configuration process giving you a local working environment in a matter of minutes.
With that in mind, now let’s look at how to install a WAMP server.
Step 1: Installing and Setting Up WAMP Server on Windows Computer
The first step is to download the latest version of the installer file for the WAMP server on to your Windows PC.
To do this:
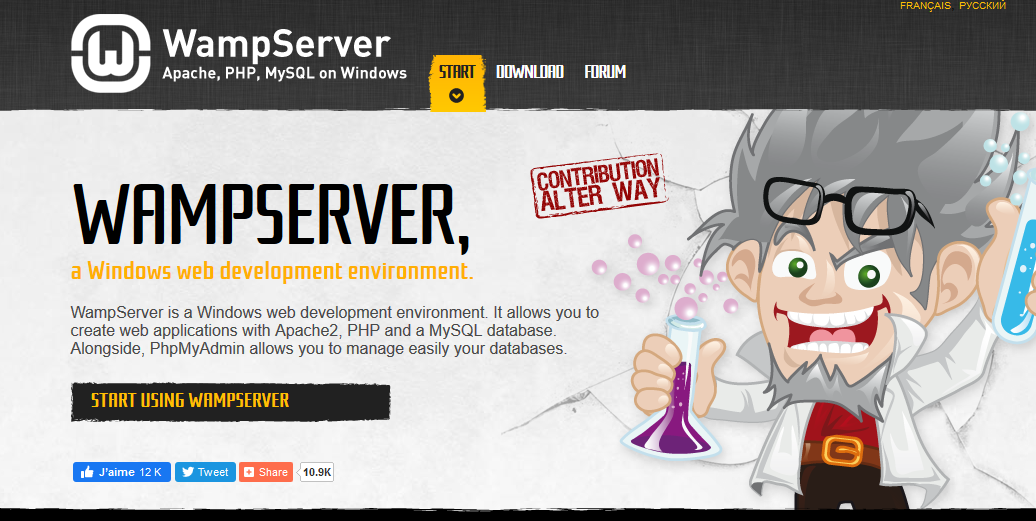
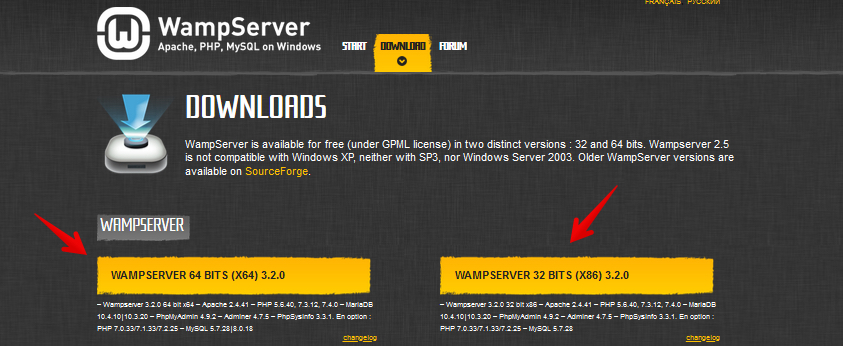
- Visit the WAMPserver website.
- On the web page, you’ll see the “START USING WAMPSERVER” button. Click on it.
- The button will automatically take you to the “DOWNLOADS” section where you’ll be greeted by two versions of the WAMP server namely, WAMP SERVER 64 BITS (X64) and WAMPSERVER 32 BITS (X86).
- Choose the installer file that matches your Windows operating system. If you are not sure whether you are using a 62-bit system or a 32-bit system, just go to This PC >> Open Control Panel >> System. Alternatively, you can just right-click on This PC (My Computer) >> Properties.

Once the download process is complete, follow the following simple steps:
- Go to the Downloads folder and locate the WAMP server installer file.
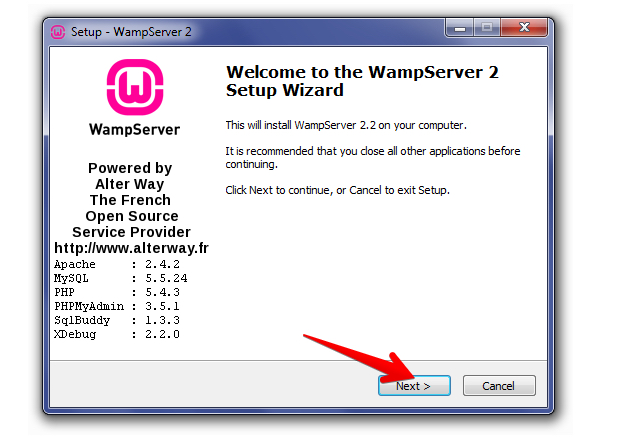
- Double-click the WAMP server installer file. A security window will pop up, asking you whether you are sure of whether you want to run the file.
- Click “Run” to initiate the installation process.
- A WAMP Server wizard screen will pop up. Select “Next” to continue with the installation process.
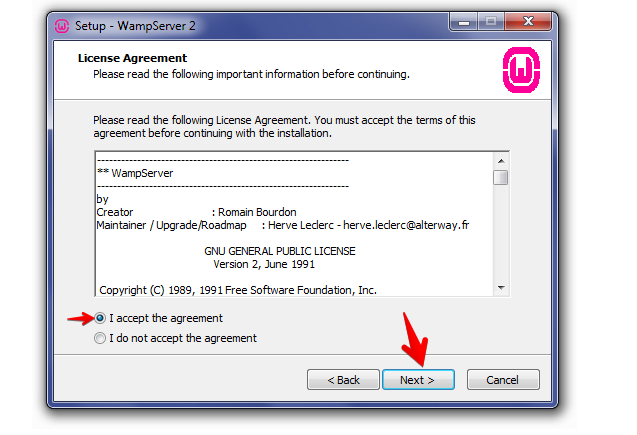
- On the next screen, you’ll see a License Agreement. Read through it and then check “I accept the agreement” at the bottom of the screen”. Now click “Next.”
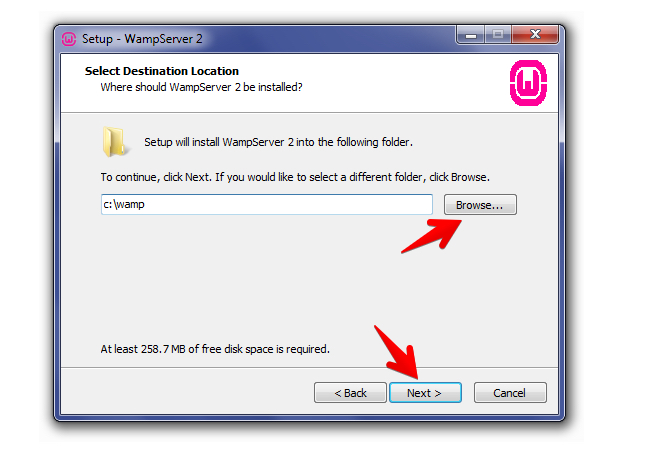
- On the next screen, you’ll be presented with a Select Destination Location screen. Choose a folder where you would like to install the WAMP server. In most cases, it’s just good to leave it as it is. Now click “Next” to continue.
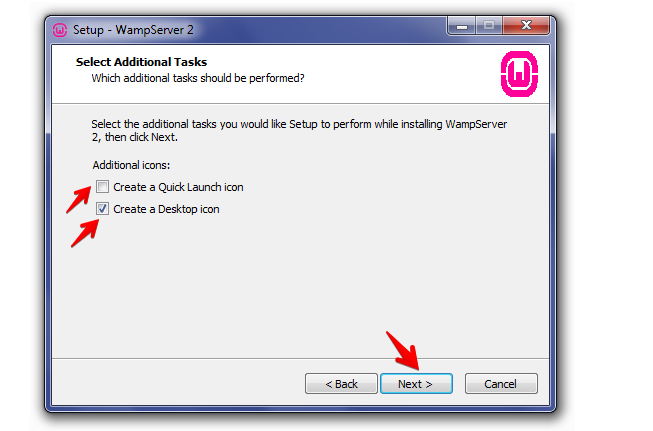
- A “Select Additional Tasks” screen will follow. Here you can choose to have a desktop icon created, or a quick launch icon added. Make your selection and click on “Next.”
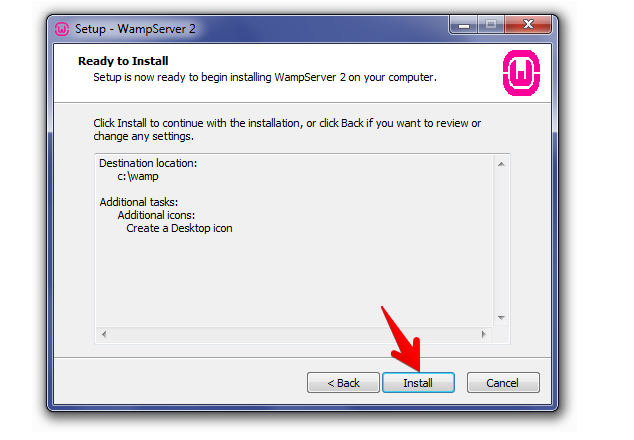
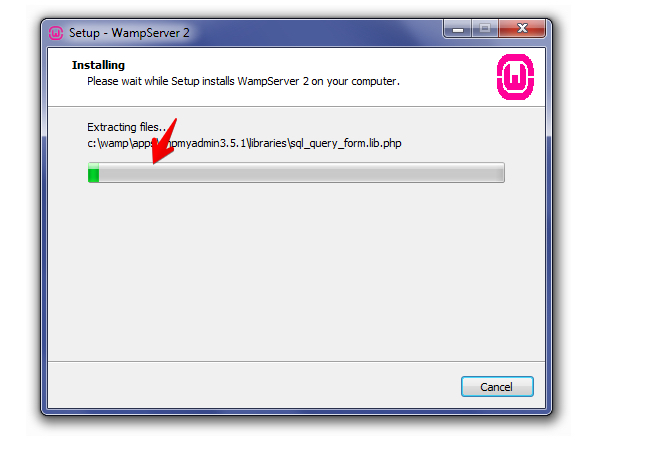
- At this juncture, the setup process is just a click away. If you are sure you do not need to make any changes in your previous selections, click “Install” and the extraction process will start automatically.
- Once the extraction process is complete, you’ll be required to choose your default browser. In most cases, the default file browser will be Internet Explorer, but you can change it to Safari, Opera, Mozilla, or Chrome.
- Your default browser should have a corresponding .exe file. For example, safari.exe, opera.exe, firefox.exe, or chome.exe. Select Open to continue.
- You’ll see a Windows security alert indication that firewall has blocked some of the program’s features. Check to allow Apache HTTP to communicate on a public or private network.
- Choose to Allow Access.
- A setup screen with a green bar will appear to show the status of your installation. Once the bar is fully green, another screen will appear, asking you for PHP mail parameters. Leave the SMTP server as “localhost” and enter your preferred email address. Click on Next.
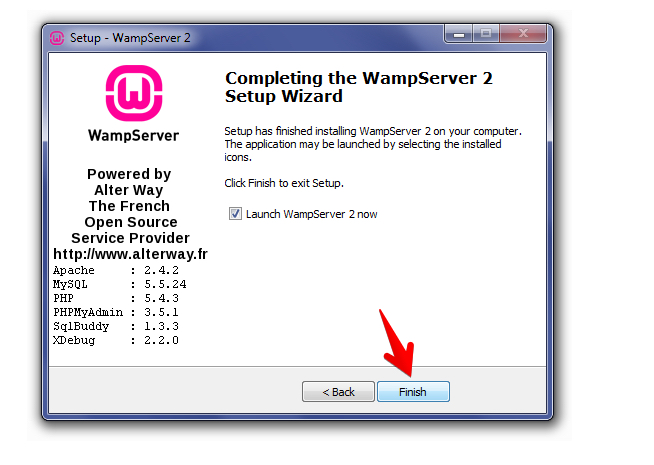
- A completing installation set up wizard screen will appear. Check on the box adjacent to “Launch Wamp Server” now and click Finish.
- At this stage, you should be able to see a WAMP server icon at the system tray of your Windows PC taskbar. You should know that the WAMP server is working correctly if the icon is green. A red icon indicates an issue with Apache and MySQL and an orange icon is an indication of a problem with one of the services.
Step 2: Setting Up a Database for WordPress
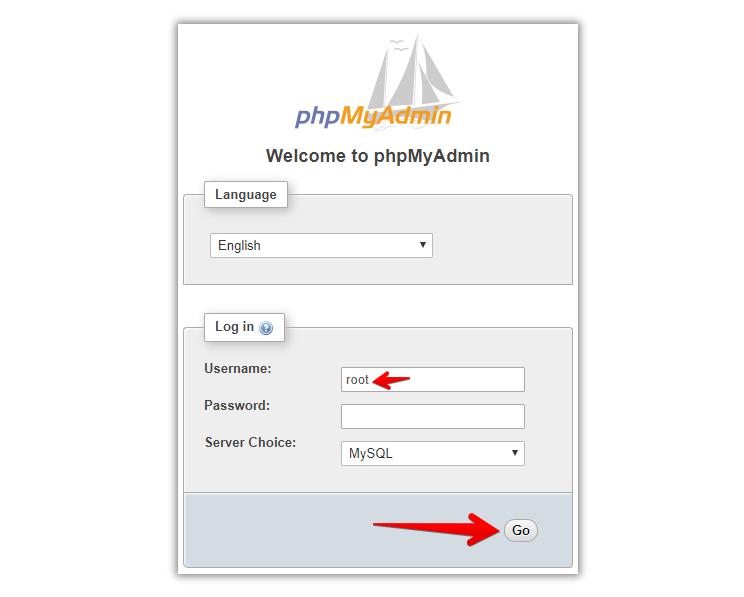
Now that you’ve finished installing WAMP, the next step is to create a MySQL database. Now launch WAMP and you’ll see a green icon at the systray. Click on phpMyAdmin. Your default web browser will show displaying the phpMyAdmin login screen.
You’ll be required to enter your username and password. Enter the following details:
- Username: root
Leave the password area field blank and click on the “Go” button. This will automatically log you in.
Now click on Databases in phpMyAdmin to create your database name for WordPress such as WP_Project. Click on “Create” and your database will be ready. You can now install WordPress.
Step 3: Install WordPress on WAMP Server
There are two versions of WordPress. One is Hosted WordPress from Wordpress.com and the other is self-hosted WordPress from wordpress.org.
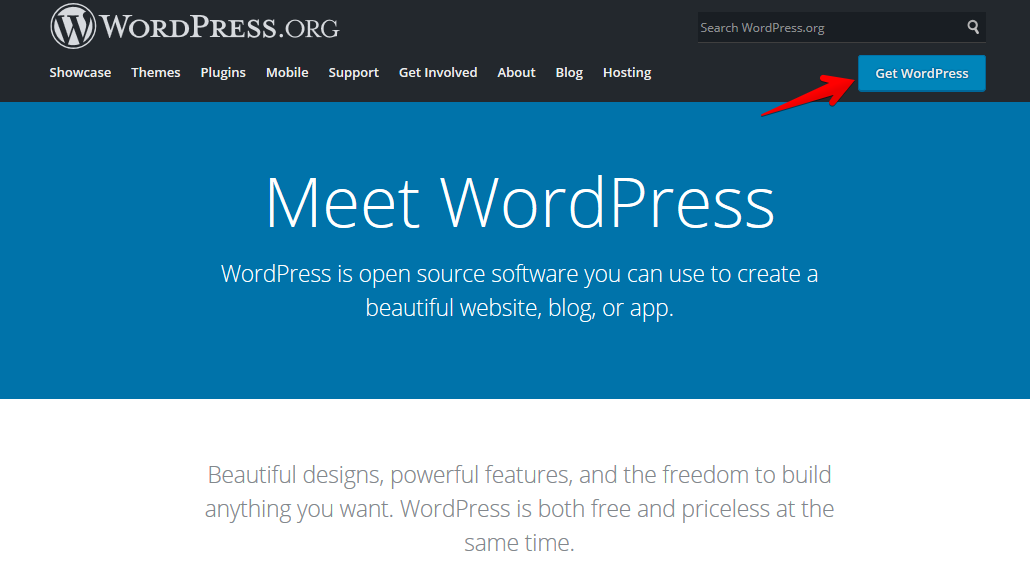
In this case, we will be talking about the self-hosted WordPress, which is a free, open-source CMS for website building and maintenance. Now, to download WordPress, visit www.wordpress.org.
Click on “Get WordPress.” The file will download as a zip archive.
Extract the contents of the file and copy or move the WordPress folder. In our case, our WAMP server file was installed in C:\wamp64, so we pasted our WordPress folder in C:\wamp64\www folder.
To avoid confusion in the later stages of your project, you can choose to give the WordPress folder a name that you will remember such as mywpproject, testwp, etc. Keep in mind that this will be your local WordPress site URL.
For example, your URL will appear something like http://localhost/folder-name. For the sake of this tutorial, we used the default WordPress folder whose URL is http://localhost/wordpress.
Now follow the following steps:
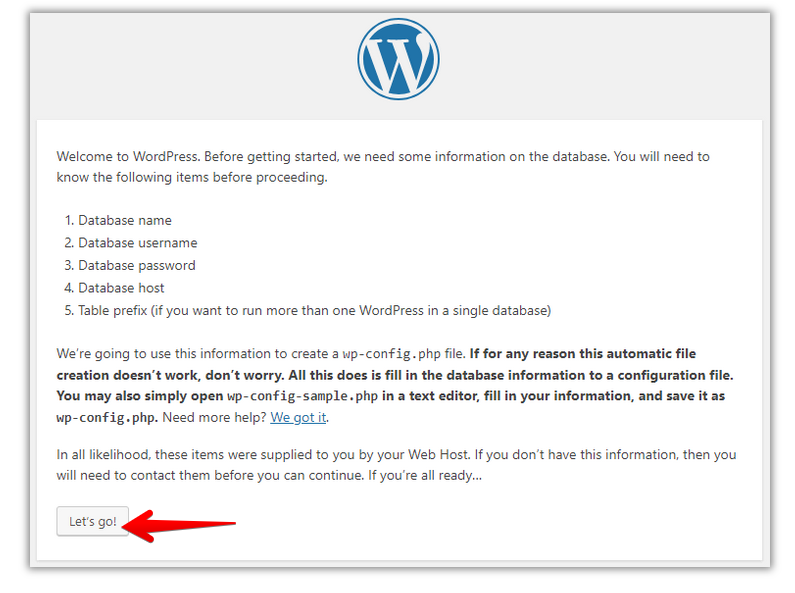
- Enter the following address into your default web browser: http://localhost/wordpress.
- Choose a language and create a configuration file.
- Click on “Let’s go!”
- You’ll be required to enter your database name, username, password, host, and table prefix. In our case, we entered the following credentials.
| Database Name: WP_Project (Our preferred database name) |
| Username: root (default MySQL password) |
| Password: (leave this field blank) |
| Host: localhost |
| Table prefix: wp_ |
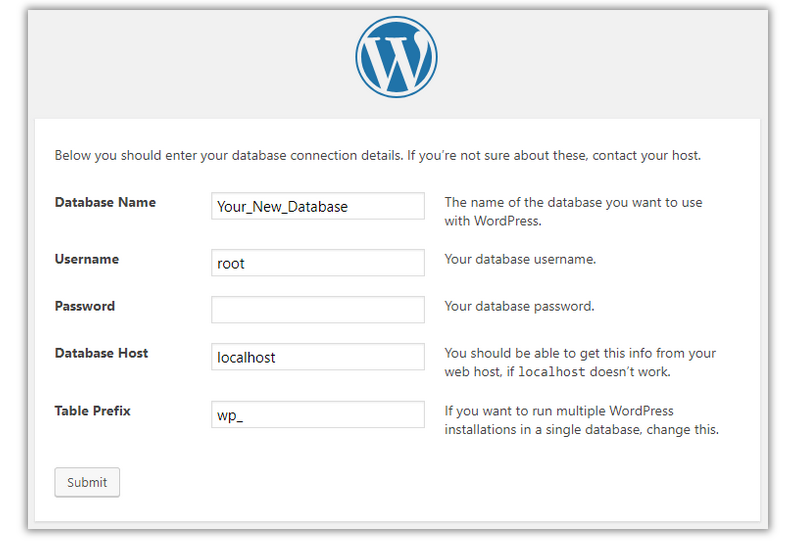
- After you’ve entered the above credentials, click Submit. A configuration file will be created in the backend. You’ll then be met by another screen indicating that WordPress has successfully been connected to your database.
- Now click on “Run the installation.”
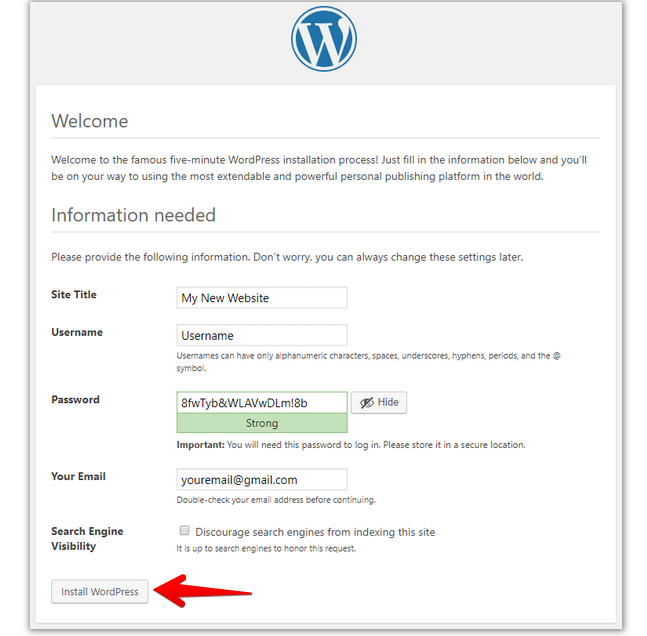
The next screen will ask for your information regarding your new WordPress website. These include the site title, username, password, and email address.
Enter the credentials and hit “Install WordPress.”
Once the installation is complete, you’ll be greeted by a success message. You can now move forward and log into your WordPress dashboard.
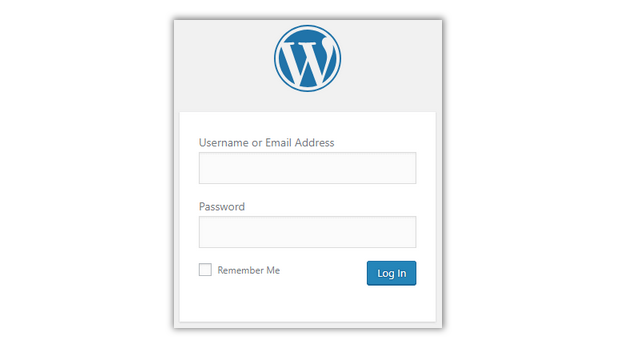
If you’ve already done that, Congratulations! Because you just installed WordPress using WAMP.
Wrapping Up
Having a local server such as WAMP helps create a near-live environment where you can test, design, and experiment on different features such as plugins and get a gist of how your site will look like.
You can also experiment on different website building platforms such as WordPress, Drupal, etc., and get to learn how the two platforms compare.
We hope that this article was helpful. Please feel free to share your views in the comments section below.